Despite being called dragons, the Thunder Dragon series actually carries powerful Thunder- type monsters. Used to make waves on the Meta line but was completely nerfed after many rounds of list bans. However, that still does not reduce Thunder Dragon 's power at this Duel Links . This will be a guide for you to understand more about Thunder Dragon , as well as create your own Thunder Dragon deck that reflects your own playing style.
Instructions for playing Thunder Dragon
Sections covered in this guide:
overview
Thunder Dragons is a card line based on the original Thunder Dragon , a fairly old card line on the TCG/OCG and in Duel Links. Most Thunder Dragons monsters have self-discard effects, as well as effects when they are banished, and since they both have LIGHT and DARK attributes, they are also suitable as a Chaos -themed deck .
The play style is a control oriented deck with different field layouts and ways to trigger search effects that maintain your card advantage, while also having ways to rotate the field layout and apply Island your opponent. While the deck doesn't require your Normal Summon (other than maybe your starting play), it can use Tuners to access Synchro cards or use more expansion cards to Make better use of the Xyz card format, which can help you deal with difficult situations, annoying monsters, and to clear your opponent's field.
Latest news
Pendulums is out! And we won't care about them haha. Their mechanics simply don't suit Thunder Dragons (as you need a fair amount of scale to keep them from bricking their hands too much) but there are some pretty good Pendulum monsters and you can see them in some sets Article by Thunder Dragons.
Although Xyz 's mechanic no longer activates Thunder Dragons, it still allows you to move them from the field to the Graveyard, allowing you to summon Chaos monsters, allowing you to activate Thunder Dragons to make up for the penalty of Xyz summon or to gain advantage.
Steps to approaching a Thunder Dragon deck from scratch
With the gray wolf Lupine being limited, it is very difficult, frankly, there are too many options to build a reasonable Thunder Dragon deck. Therefore, with this guide, we will not start by introducing the Cores as usual, but below, I will give step-by-step instructions so that newbies can easily access the Thunder Dragon deck from scratch. 0. Then we will introduce other items later.
This deck does not require stable backrow cards but it does require a stable set of Synchros / XYZs.
Here's what you need to start building a TD deck from scratch:
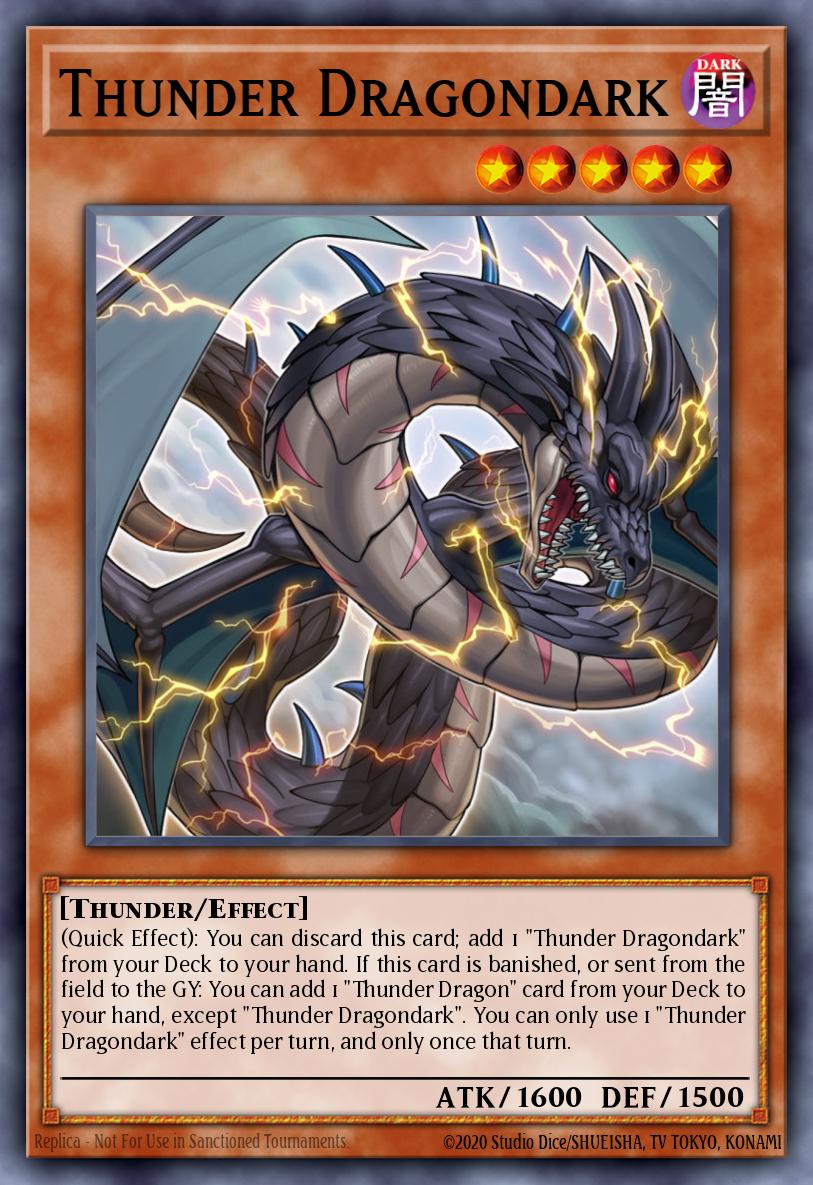
Thunder Dragondark, Thunder Dragon Discharge and Thunder Dragonroar (Step 1)

 DARK
DARK 5
5Thunder Dragondark
ATK:
1600
DEF:
1500
(Quick Effect): You can discard this card; add 1 "Thunder Dragondark" from your Deck to your hand. If this card is banished, or sent from the field to the GY: You can add 1 "Thunder Dragon" card from your Deck to your hand, except "Thunder Dragondark". You can only use 1 "Thunder Dragondark" effect per turn, and only once that turn.

 Trap
Trap Continuous
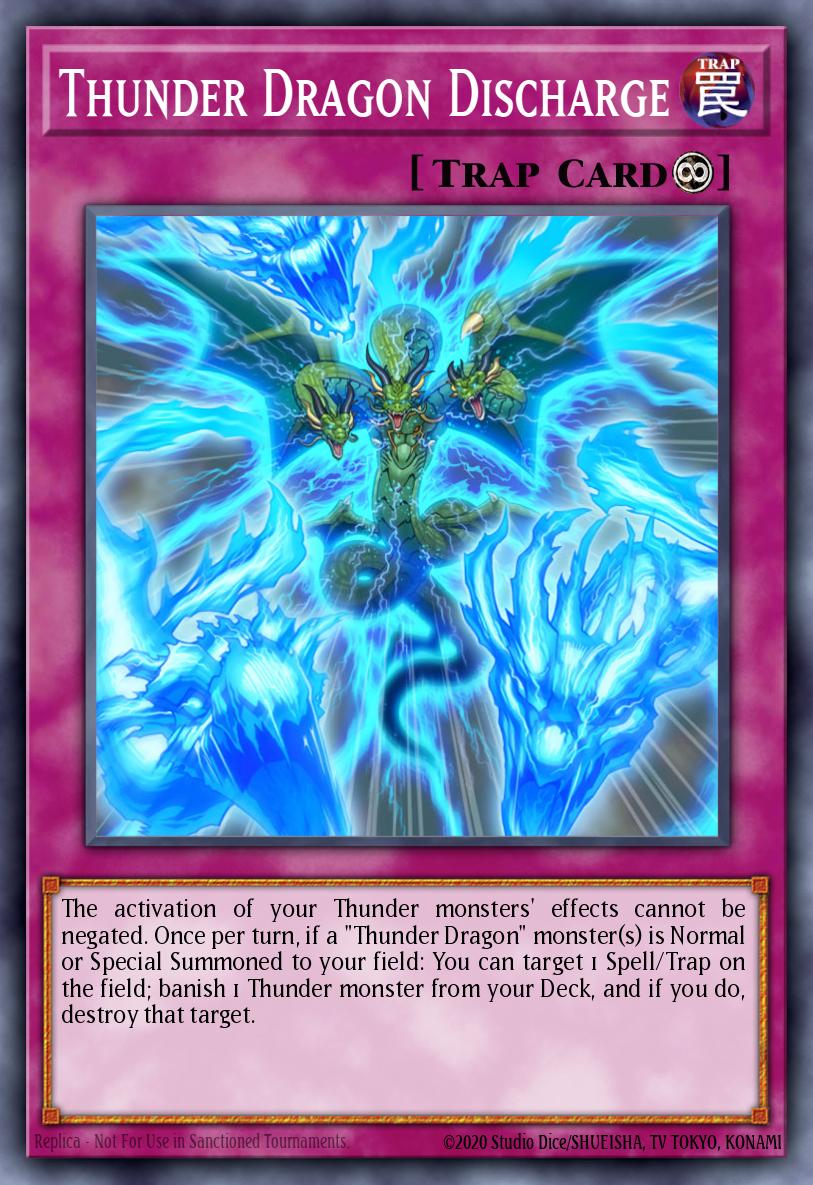
Thunder Dragon Discharge
The activation of your Thunder monsters' effects cannot be negated. Once per turn, if a "Thunder Dragon" monster(s) is Normal or Special Summoned to your field: You can target 1 Spell/Trap on the field; banish 1 Thunder monster from your Deck, and if you do, destroy that target.
 DARK
6
DARK
6Thunder Dragonroar
ATK:
2400
DEF:
0
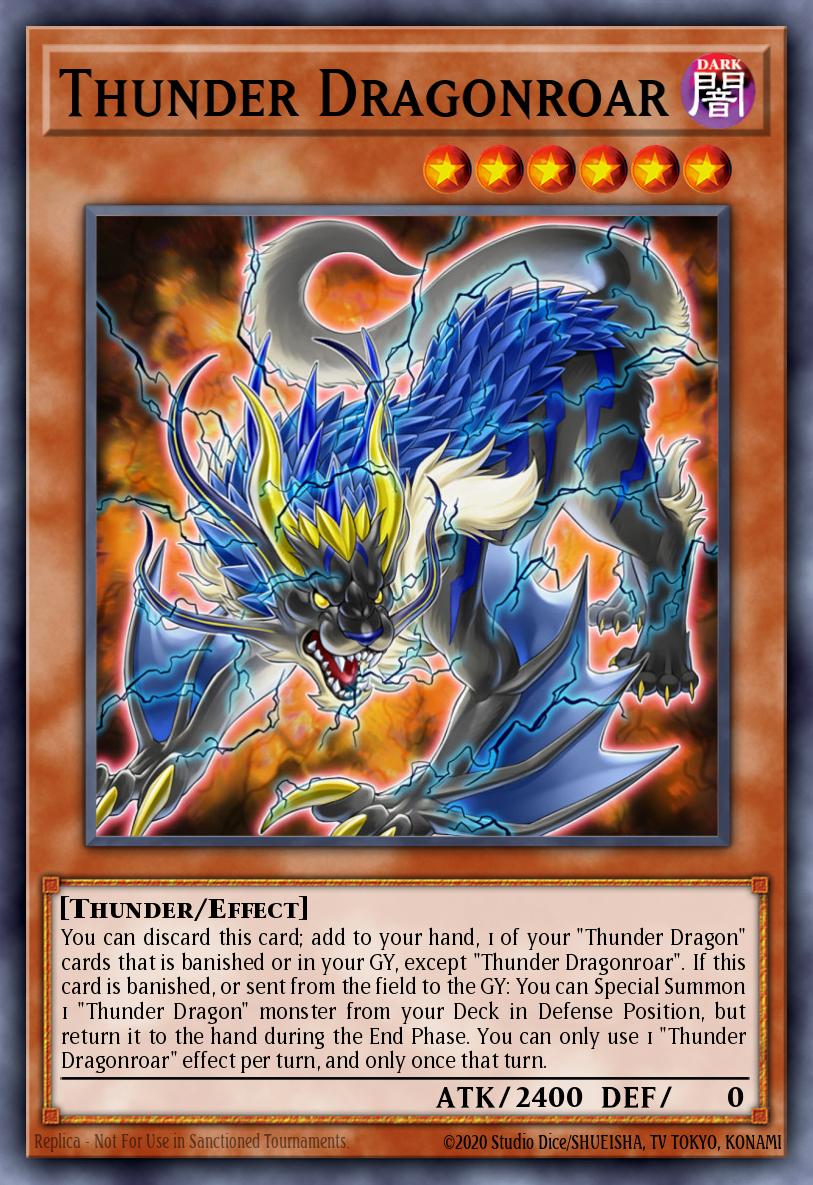
You can discard this card; add to your hand, 1 of your "Thunder Dragon" cards that is banished or in your GY, except "Thunder Dragonroar". If this card is banished, or sent from the field to the GY: You can Special Summon 1 "Thunder Dragon" monster from your Deck in Defense Position, but return it to the hand during the End Phase. You can only use 1 "Thunder Dragonroar" effect per turn, and only once that turn.
You need to Unlock Mokuba DSOD , as you will need some of his lv-up rewards as well as his drop rewards (for those drops you can use regular UR/SR tickets) .
Here are some cards you can get by leveling up, drop rewards, Card Trade or Tickets:
- Odd-Eyes Advance Dragon
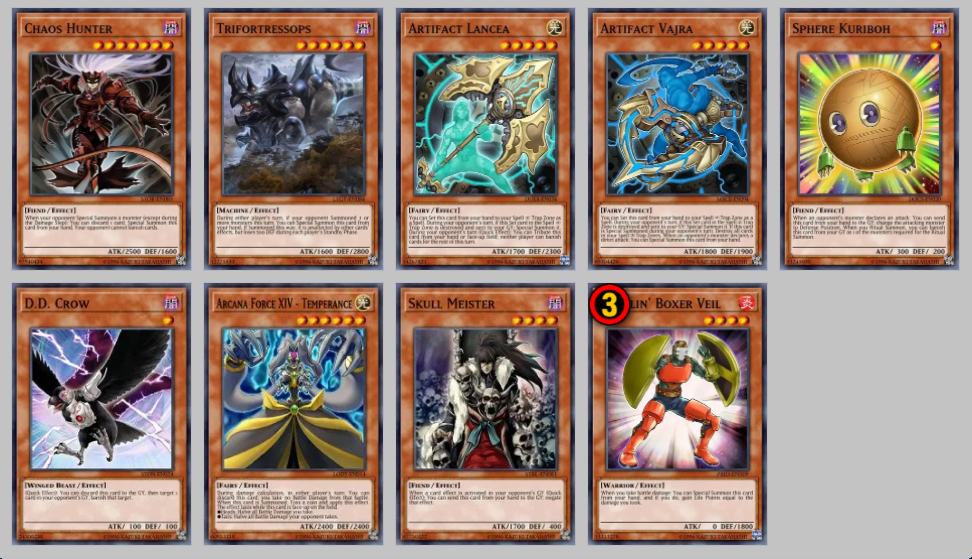
- Artifact Vajra
- Thunder Dragondark
- Gaia the Fierce Knight Origin
- Luna the Dark Spirit
- Chaos Betrayer
- Arcana Force XIV - Temperance
- Thunder Dragonroar
- Thunder Dragon
- Thunder Dragonmatrix
- The Melody of Awakening Dragon
- Thunder Dragons' Hundred Thunders
- Thunder Dragon Discharge
- Giganticcastle
- Archfiend's Ascent
I do not recommend using Dream Tickets unless the card is to complete your deck list or if the Ticket expires
If you choose to do so, look for cards from boxes that you won't open or if the value of that box is really bad (For example the box is old or if most of the cards from that box have been reprinted).
Thunder Dragonhawk and Thunder Dragonduo (Step 2)
 LIGHT
6
LIGHT
6Thunder Dragonhawk
ATK:
1800
DEF:
2200
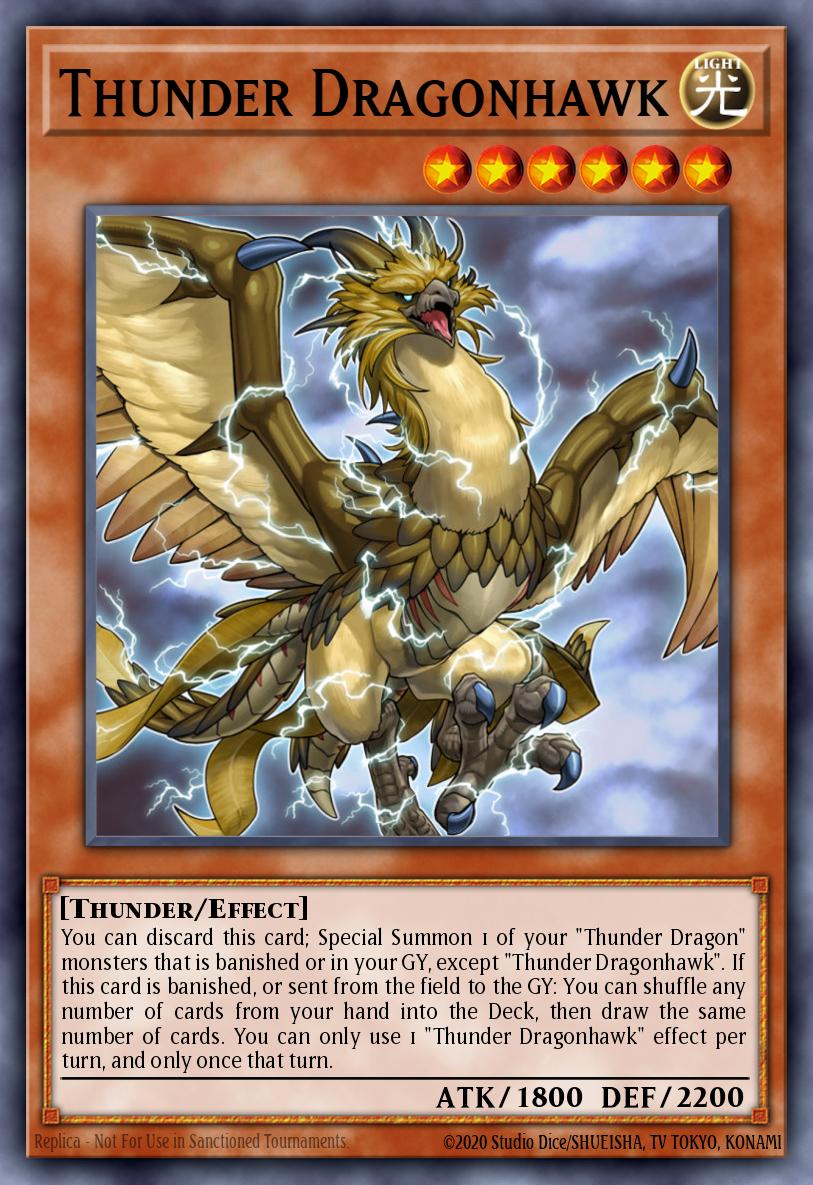
You can discard this card; Special Summon 1 of your "Thunder Dragon" monsters that is banished or in your GY, except "Thunder Dragonhawk". If this card is banished, or sent from the field to the GY: You can shuffle any number of cards from your hand into the Deck, then draw the same number of cards. You can only use 1 "Thunder Dragonhawk" effect per turn, and only once that turn.
 DARK
8
DARK
8Thunder Dragonduo
ATK:
2800
DEF:
0
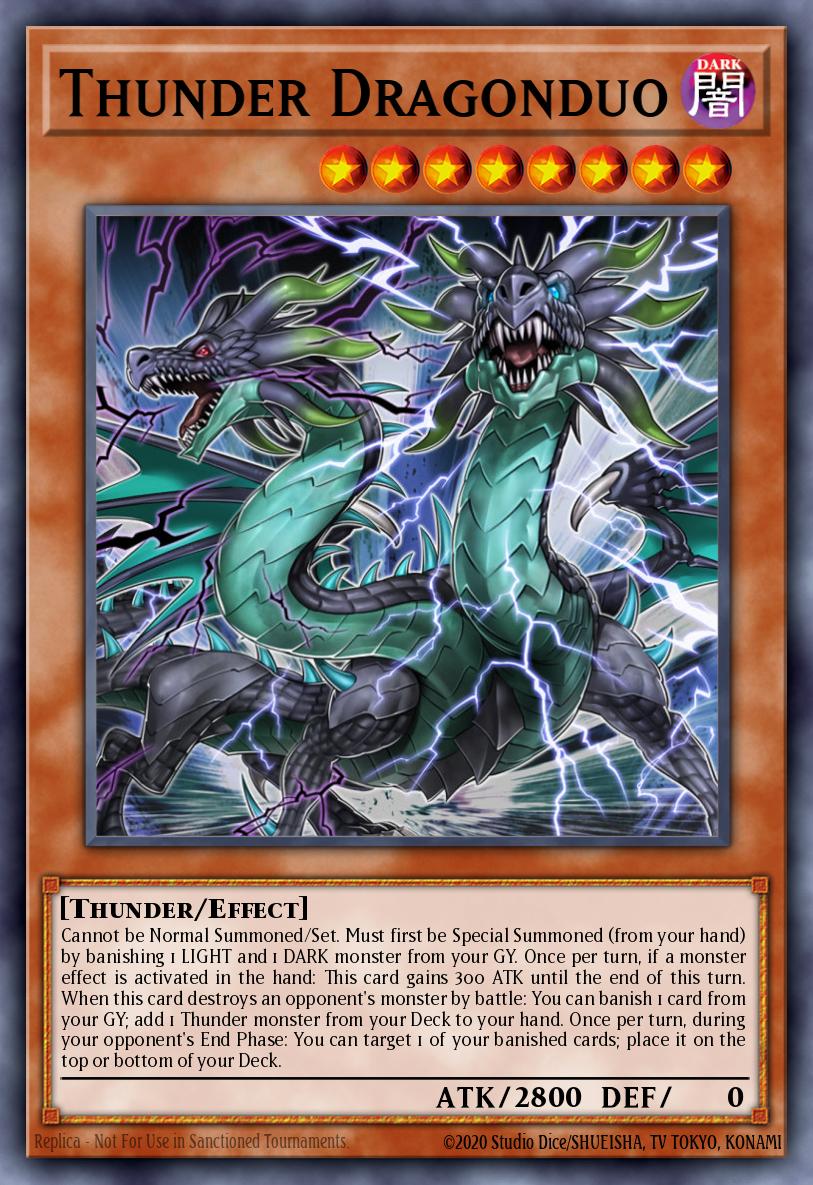
Cannot be Normal Summoned/Set. Must first be Special Summoned (from your hand) by banishing 1 LIGHT and 1 DARK monster from your GY. Once per turn, if a monster effect is activated in the hand: This card gains 300 ATK until the end of this turn. When this card destroys an opponent's monster by battle: You can banish 1 card from your GY; add 1 Thunder monster from your Deck to your hand. Once per turn, during your opponent's End Phase: You can target 1 of your banished cards; place it on the top or bottom of your Deck.
You will need at least 2 Hawks, and you will find this card in the Dark Dimension box, in addition, in the box there are some cards you will want to add to your deck such as:
- Chaos Sorcerer
- Samurai Destroyer
Additionally, you need to find at least one Duo in the Future Horizon box. Some other useful leaves in the box include:
- PSY-Framelord Zeta
- Artifact Lancea
- Junk Archer
Charge of the Light Brigade, Gold Sarcophagus and Aloof Lupine (Step 3)
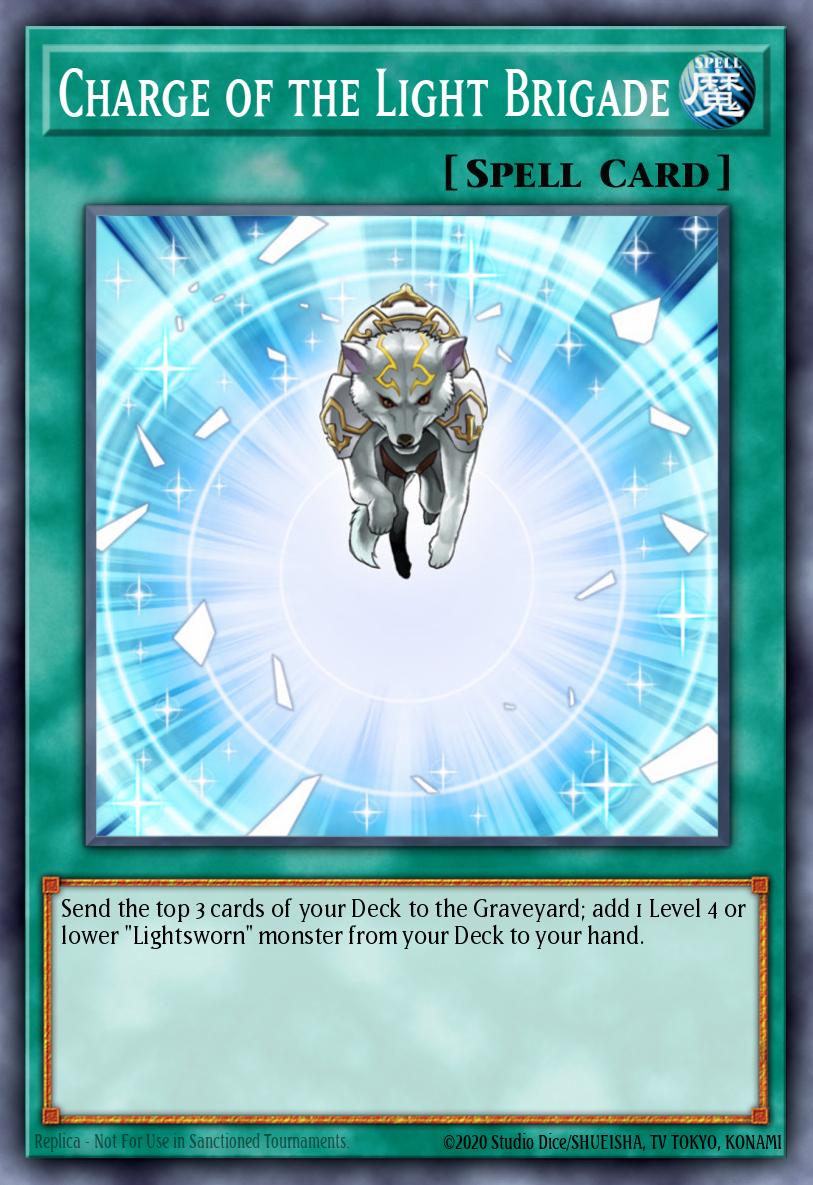
 Spell
Spell Normal
Charge of the Light Brigade
Send the top 3 cards of your Deck to the Graveyard; add 1 Level 4 or lower "Lightsworn" monster from your Deck to your hand.

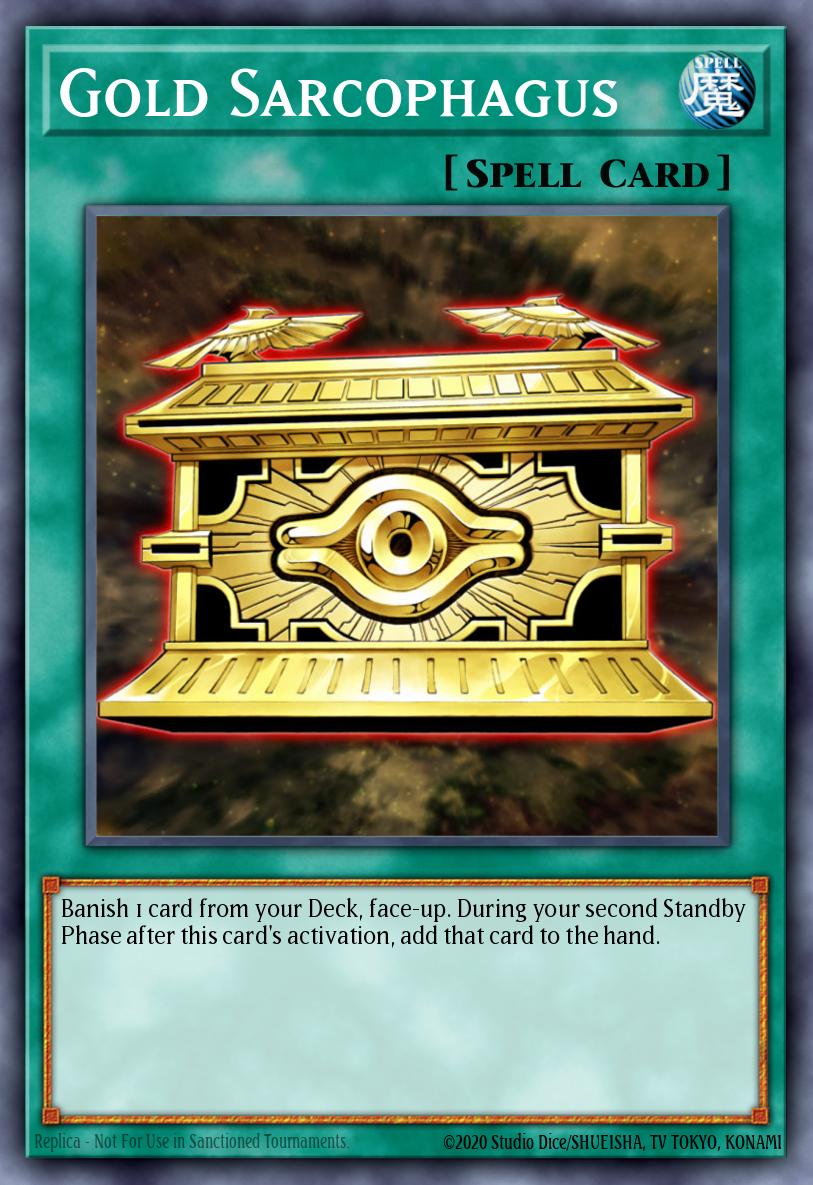 Spell
Normal
Spell
NormalGold Sarcophagus
Banish 1 card from your Deck, face-up. During your second Standby Phase after this card's activation, add that card to the hand.


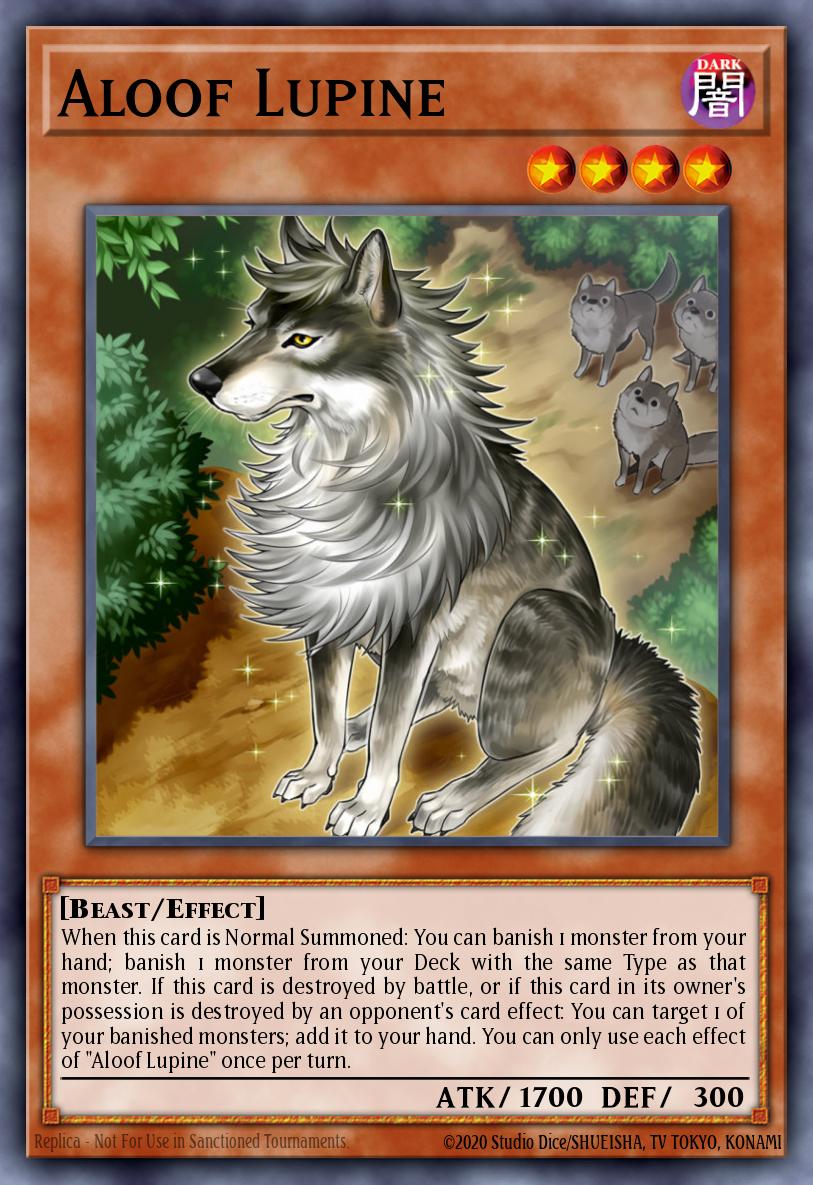 DARK
4
DARK
4Aloof Lupine
ATK:
1700
DEF:
300
When this card is Normal Summoned: You can banish 1 monster from your hand; banish 1 monster from your Deck with the same Type as that monster. If this card is destroyed by battle, or if this card in its owner's possession is destroyed by an opponent's card effect: You can target 1 of your banished monsters; add it to your hand. You can only use each effect of "Aloof Lupine" once per turn.
You now have 3 options for your Limited cards down to 2:
- Aloof Lupine
- Charge of the Light Brigade
- Gold Sarcophagus
You can receive these cards in 2 ways:
A - Box or Structure Deck (more budget friendly/f2p)
B - Selection Box (better way to spend money for newer accounts)
For choice A , I suggest you open the Judgment Force and Blazing Rose boxes to get the following cards:
- Charge of the Light Brigade
- Raiden, Hand of the Lightsworn
- Aloof Lupine
- Black Rose Dragon
- Vermillion Dragon Mech
- World Legacy Clash
With choice B , you won't be able to use your Gems much because most of these cards will have to use your money and a little luck. You will find the following cards through Selection Box vol.03 and vol.04 , SD Spellbound Silence or Dream Tickets because this is a situation where you need to use them:
- Gold Sarcophagus
- Raiden, Hand of the Lightsworn
- Aloof Lupine
Chaos Dragon Levianeer, Hieratic Sun Dragon Overlord of Heliopolis and Constellar Ptolemy M7 (Step 4)

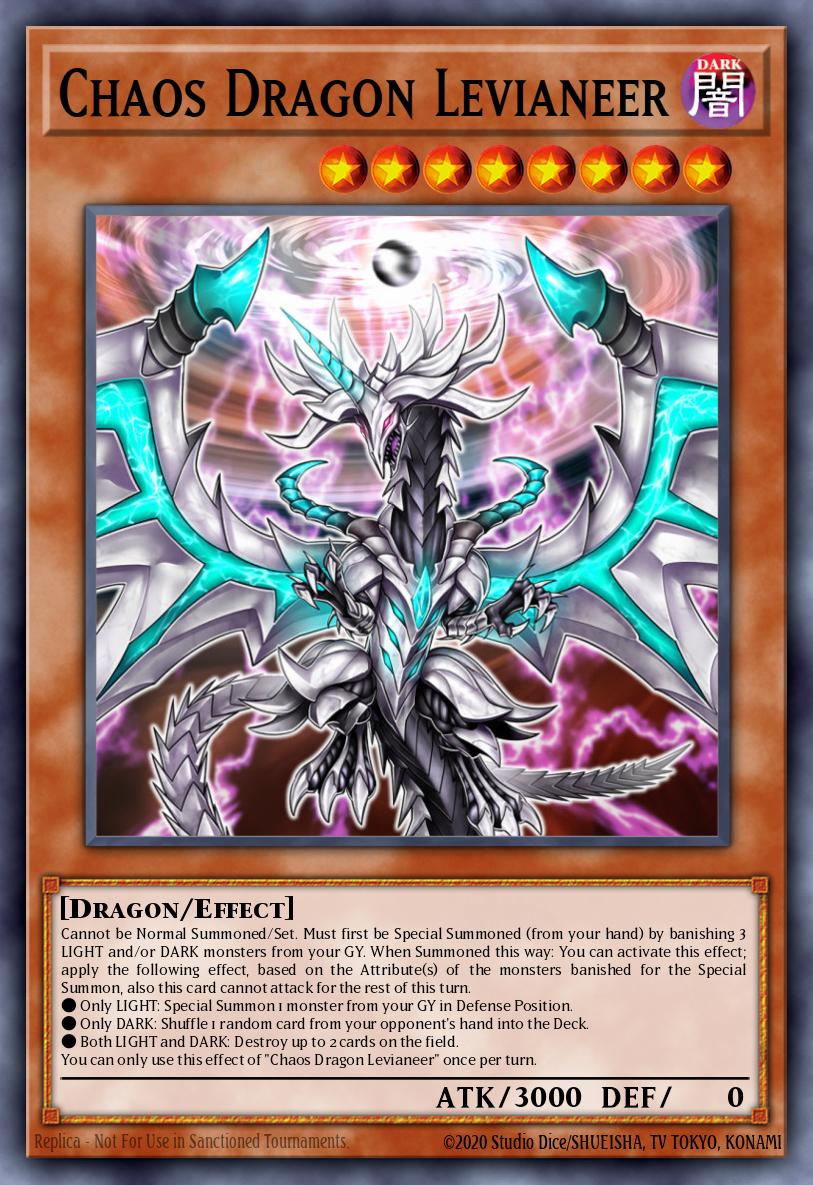 DARK
8
DARK
8Chaos Dragon Levianeer
ATK:
3000
DEF:
0
Cannot be Normal Summoned/Set. Must first be Special Summoned (from your hand) by banishing 3 LIGHT and/or DARK monsters from your GY. When Summoned this way: You can activate this effect; apply the following effect, based on the Attribute(s) of the monsters banished for the Special Summon, also this card cannot attack for the rest of this turn. ● Only LIGHT: Special Summon 1 monster from your GY in Defense Position. ● Only DARK: Shuffle 1 random card from your opponent's hand into the Deck. ● Both LIGHT and DARK: Destroy up to 2 cards on the field. You can only use this effect of "Chaos Dragon Levianeer" once per turn.
 LIGHT
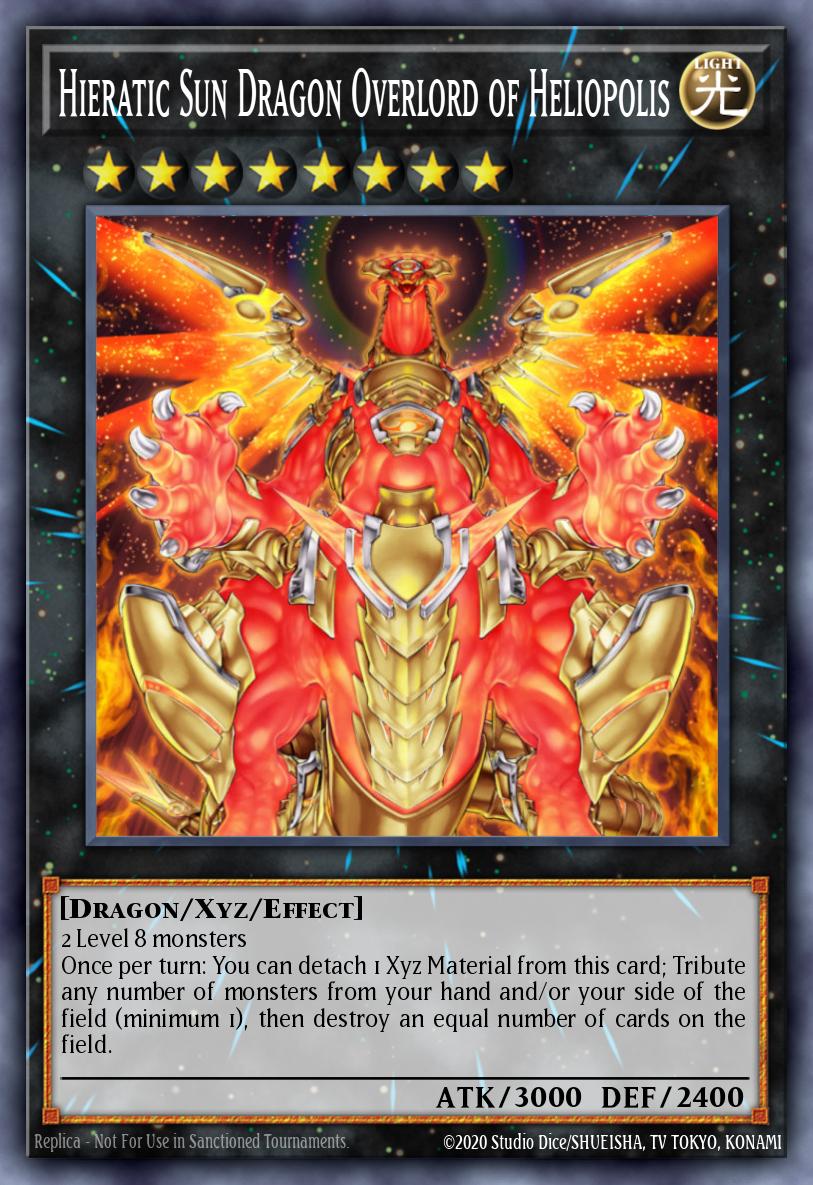
LIGHTHieratic Sun Dragon Overlord of Heliopolis
ATK:
3000
DEF:
2400
2 Level 8 monsters Once per turn: You can detach 1 Xyz Material from this card; Tribute any number of monsters from your hand and/or your side of the field (minimum 1), then destroy an equal number of cards on the field.
 LIGHT
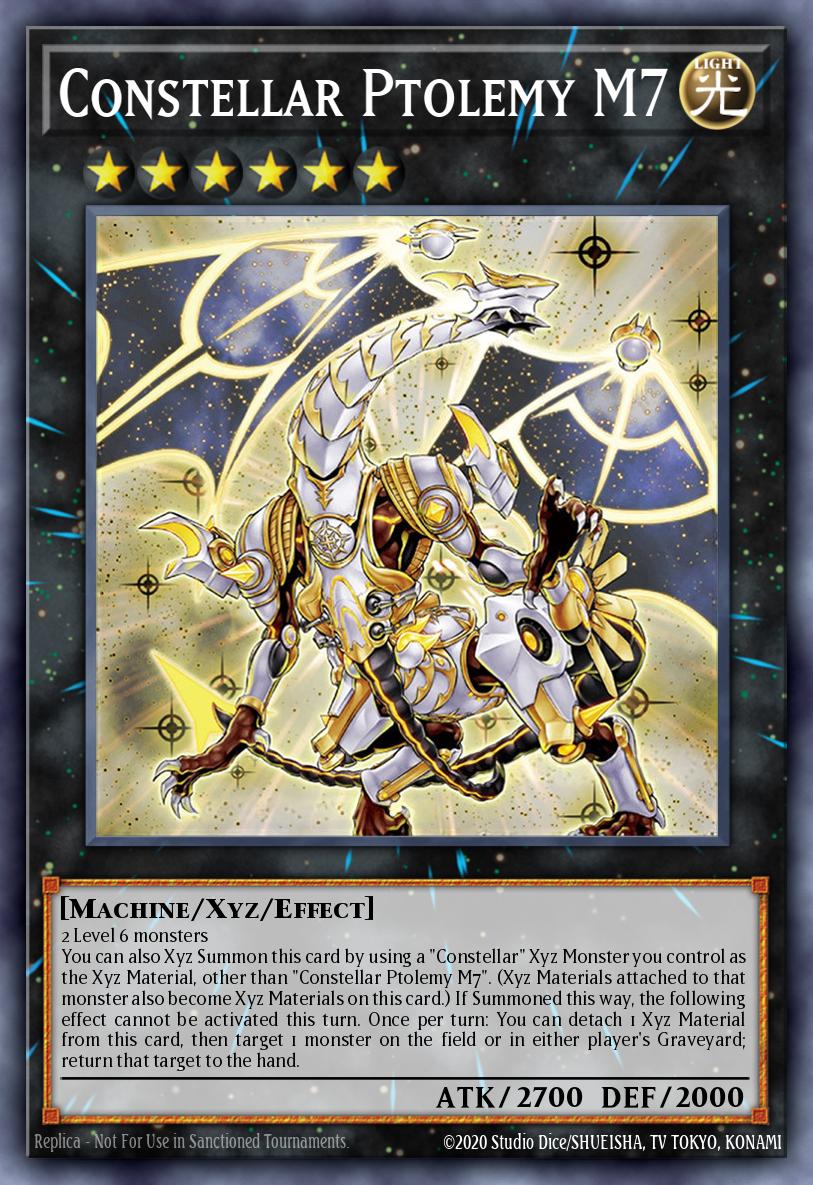
LIGHTConstellar Ptolemy M7
ATK:
2700
DEF:
2000
2 Level 6 monsters You can also Xyz Summon this card by using a "Constellar" Xyz Monster you control as the Xyz Material, other than "Constellar Ptolemy M7". (Xyz Materials attached to that monster also become Xyz Materials on this card.) If Summoned this way, the following effect cannot be activated this turn. Once per turn: You can detach 1 Xyz Material from this card, then target 1 monster on the field or in either player's Graveyard; return that target to the hand.
It's time for you to expand your Extra Deck because Thunder Dragon will rely heavily on the monsters in it. Some of the following options can be found in the boxes Infinite Ray , Photon of Galaxy , Shark Fang , Voltage of Meta l, Curse of Dread , Arena of Sanctuary :
- Chaos Dragon Levianeer
- Constellar Ptolemy M7
- Hieratic Sun Dragon Overlord of Heliopolis
- Photon Strike Bounzer
- Number 70: Malevolent Sin
- Abyss Dweller
- Adreus, Keeper of Armageddon
- Diamond Dire Wolf
- Plaguespreader Zombie
- Trishula, the Dragon of Icy Imprisonment
Batteryman Solar and Sphere Kuriboh (Step 5 (Extra step, các newbie có thể cân nhắc đầu tư vào bước này hoặc không))

 LIGHT
4
LIGHT
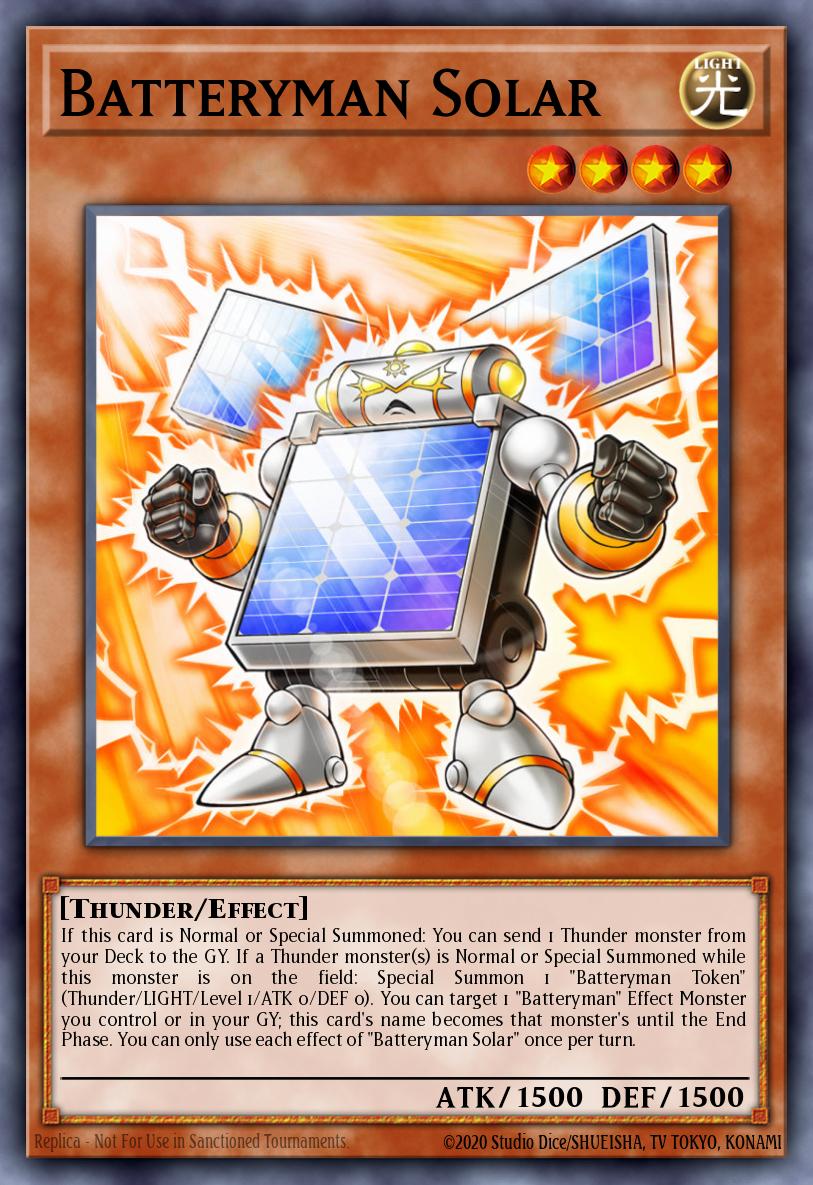
4Batteryman Solar
ATK:
1500
DEF:
1500
If this card is Normal or Special Summoned: You can send 1 Thunder monster from your Deck to the GY. If a Thunder monster(s) is Normal or Special Summoned while this monster is on the field: Special Summon 1 "Batteryman Token" (Thunder/LIGHT/Level 1/ATK 0/DEF 0). You can target 1 "Batteryman" Effect Monster you control or in your GY; this card's name becomes that monster's until the End Phase. You can only use each effect of "Batteryman Solar" once per turn.
 DARK
1
DARK
1Sphere Kuriboh
ATK:
300
DEF:
200
When an opponent's monster declares an attack: You can send this card from your hand to the GY; change the attacking monster to Defense Position. When you Ritual Summon, you can banish this card from your GY as 1 of the monsters required for the Ritual Summon.
In this section, you should think about using simple small Tech cards to power up your Thunder Dragon deck when going from zero. However, whether it is or not doesn't matter because according to the cards above I have guided you, you already have a deck of Thunder Dragon cards with 90% power to swing wildly on the Rank stage.
- As for Sphere Kuriboh . The Ultimate Rising is the first box, whose power is affected to a point where it's not worth opening right away with the amount of Gems you have. Sphere Kuriboh is universal for all decks and it is a great card in Duel Links . You should use Dream Tickets that are about to expire for it.
- As for Batteryman Solar , you can get it for free at Burning Nova during 50% Gem sales for boxes, or open Selection Box Vol.02 to receive it.
Skills
Of course, after creating a Thunder Dragons deck from scratch, you need to learn its small details to understand their gameplay and annoying fighting style. First of all, Skills, the first part of every guide I write
Skill is an extremely important part of this deck. Especially the Skills that allow you to draw cards to get the card you want or simply the Skills that decide your match.
Destiny Draw (Skill Card) (97% được dùng)
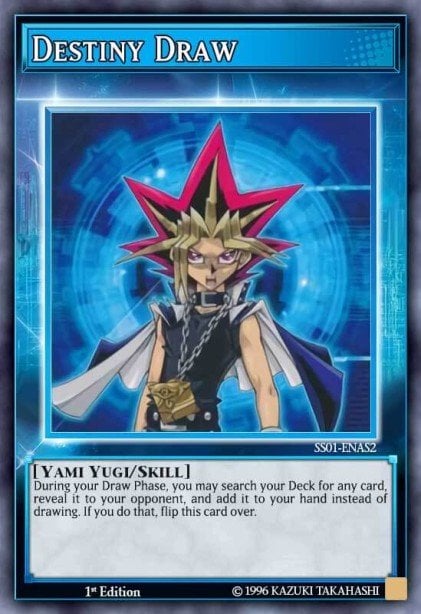
Destiny Draw (Skill Card)
ATK:
0
DEF:
0
[If you lose 2000 or more LP, you can activate this Skill during your next Draw Phase.] During your Draw Phase, you may search your Deck for any card, reveal it to your opponent, and add it to your hand instead of drawing. If you do that, flip this card over.
With the help of hand traps to control the amount of damage you take, you can control what your next draw is, which can be the deciding card of victory in many situations. It allows you to escape some turns and access your Side Deck cards more easily. The downside is that your opponent plays around it and puts you at a lower LP without activating the skill, which will make it easy for them to win the next turn. So building your deck too much around it may not be ideal.
Allured by Darkness (Skill Card) (90% được dùng )

Allured by Darkness (Skill Card)
ATK:
0
DEF:
0
Can be used each time your Life Points decrease by 1800. Instead of doing a normal draw, "Allure of Darkness" is added to your hand from outside of your Deck.
Allure of Darkness is a great card for this deck, drawing 2 cards rather than banishing Roar or Dark will give you a significant advantage while also providing card draw power. 1800 damage is a pretty tough requirement to activate this skill, so you'll need hand traps to help control your LP.
Draw Sense: Spell/Trap (50% được dùng)
Draw Sense: Spell/Trap
ATK:
0
DEF:
0
Can be used each time your Life Points decrease by 1000. In the Draw Phase, instead of confucting your normal draw, draw a random Spell/Trap Card. This Skill will only activate if you begin the Duel with a Deck that has 3 or more Spell/Trap Cards with different names.
Similar to Desnity Draw but with a slight LP cost to activate that can provide access to your starting cards or powerful spells. While you can also play this skill with Yami Yugi or Yubel to replace Destiny Draw or Allured by Darkness .
Tuning (Skill Card) (40% được dùng)
Tuning (Skill Card)
ATK:
0
DEF:
0
Can be used when your Life Points decrease by 1000. Instead of conducting your normal draw, draw 1 'Synchron' Tuner Monster of your choice from your Deck. Then, send the top card of your Deck to the Graveyard. If you began the Duel with 3 or more 'Junk' Effect Monsters in your Deck, add 'Speed Warrior' from outside of your Deck to your Graveyard. This Skill can only be used once per Duel.
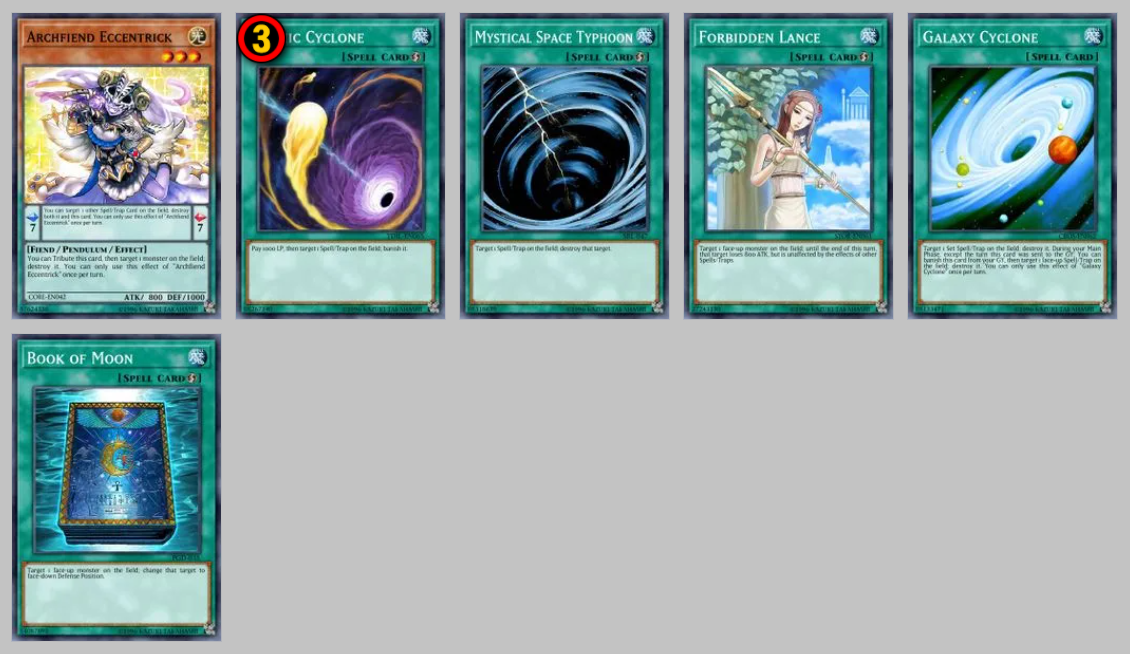
Tuning allows you to access Synchro turns by taking only 1000 LP, and Cosmic Cyclone can ensure that you activate the ability on the next turn. This allows you to play less Tuner because you can access it more easily. Jet Synchron is the best choice but there are other better options.
Zombie Draw (Skill Card) (40% được dùng)
Zombie Draw (Skill Card)
ATK:
0
DEF:
0
Can be used each time your Life Points decrease by 1000. During your Draw Phase, instead of doing a normal draw, randomly draw a Zombie-Type monster.
Similar to the Tuning skill, you can use this skill in case you don't play zombies other than Plaguespreader Zombie .
The Tie that Binds (50% được dùng)

The Tie that Binds
ATK:
0
DEF:
0
Until the end of your turn, the ATK of all face-up monsters on your field increases by the number of monsters on your field times 100. This Skill can only be used once per turn.
A Skill just to slightly increase ATK to be able to exceed the opponent's monster or cause the opponent a moderate amount of damage.
Level Duplication (Skill Card) (60% được dùng)
Level Duplication (Skill Card)
ATK:
0
DEF:
0
Can be used when your Life Points are 3000 or lower, by revealing 1 monster card in your hand and selecting 1 monster on your field. The selected monster's Level will become equal to the Level of the monster you revealed until the end of the turn. This Skill can only be used once per Duel.
Can be used to help summon rank4, rank6 or rank8 monsters. Also, you can surprise your opponent by summoning Black Rose Dragon , this is because when you have level 1 and level 5 on the field, they may not activate something to stop your Synchro , but if you turn lv5 into lv6, they won't have a way to respond to the skill and it might be too late (if they can't negate your BRD).
Light and Dark (75% được dùng)
Light and Dark
ATK:
0
DEF:
0
This Skill can be used when your Life Points decrease by 1000. Choose 1 of the following: ● Return 1 DARK monster from your hand to your Deck. Then, add from your Deck to your hand, 1 LIGHT monster with the same Level and Type as that monster from your Deck to your hand. ● Return 1 LIGHT monster from your hand to your Deck. Then, add 1 DARK monster with the same Level and Type as that monster from your Deck to your hand. This Skill can only be used once per turn, and twice per Duel.
This skill has great synergy with Cosmic Cyclone and instead of being activated during your Draw Phase , you can activate during your Main Phase . You can use it to swap between Thunder Dragonroar and Thunder Dragonhawk as well as Thunder Dragondark and Thunder Dragon . In addition to the cards you can swap between Sphere Kuriboh and Mirror Resonator , which can provide options between defensive and offensive play.
Fiend Farewell (Skill Card) (40% được dùng)
Fiend Farewell (Skill Card)
ATK:
0
DEF:
0
Can be used when one of your monsters is destroyed in battle. 1 random Fiend-Type monster from your Deck is sent to the Graveyard.
Can be used to send Chaos Betraye r from your deck to your GY if you don't have other Fiends and if you don't draw before activating the Skill. Having Betrayer on the field to banish cards from your opponent's grave is also a bonus for you, both locking their grave and giving you a very good Xyz or Synchro turn.
Core Cards
After the Skills, you need to learn about the Cores you need to have as well as the Cores that can add strength to TD.
First, I'll talk about how the cards work and explain the odds
The following monsters have 2 effects:
You can send monsters to the Graveyard to activate this effect
If the monster leaves the field or if it is banished (and yes, “if” not “when” neither of them can miss the effect activation time) And you can only use one of effects once per turn.
Note: "You can only use one of the effects once per turn" means that if they are negated, you CANNOT activate the same or a different effect during the turn.
Those monsters are:
- Thunder Dragondark
- Thunder Dragonmatrix
- Thunder Dragonroar
- Thunder Dragonhawk
Thunder Dragonroar (2-3x)
DARK
6Thunder Dragonroar
ATK:
2400
DEF:
0
You can discard this card; add to your hand, 1 of your "Thunder Dragon" cards that is banished or in your GY, except "Thunder Dragonroar". If this card is banished, or sent from the field to the GY: You can Special Summon 1 "Thunder Dragon" monster from your Deck in Defense Position, but return it to the hand during the End Phase. You can only use 1 "Thunder Dragonroar" effect per turn, and only once that turn.
- Discard card to the Graveyard effect (quick activation): add a Thunder Dragon card from the GY or banish to your hand
- If banished or sent off the field: special summon one " Thunder Dragon " from the deck to defend (the monster returns to your hand in End Phase)
Both effects are essential to the deck.
The discard effect can recycle all cards from the Thunder Dragon line, including Spells/Traps banished by Cosmic Cyclon e for example. While the 2nd effect can actually be used with Gold Sarcophagus or Aloof Lupine which can be banished from your deck. This effect can give you a free monster on the field to be used for Xyz, Synchro or Tribute Summon.
During your opponent's turn will give you an additional defensive monster in case they discard your Roar , it will float as another TD in your deck.
How much of these leaves should you use? It really depends on your deck construction here
Some factors you should consider:
- 3 copies
- In case there are only 2 Thunder Dragonhawks
- Better chances for you to get started:
- Good for Tribute/Set Summon
- Good together with Batteryman Solar
- Good along with Aloof Lupine
- Better chance to have in your deck (for use with Gold Sarcophagus )
- More recycling (Good for longer matches).
- 2 copies
- It is one of the more brick copies
- Recommended for smaller lists.
Thunder Dragondark (2-3x)
DARK
5Thunder Dragondark
ATK:
1600
DEF:
1500
(Quick Effect): You can discard this card; add 1 "Thunder Dragondark" from your Deck to your hand. If this card is banished, or sent from the field to the GY: You can add 1 "Thunder Dragon" card from your Deck to your hand, except "Thunder Dragondark". You can only use 1 "Thunder Dragondark" effect per turn, and only once that turn.
- GY discard effect (quick effect): adds another copy of itself from the deck.
- If banished or sent off the field: add one Thunder Dragon card from your deck to your hand.
Searcher of the deck. The good part is that you can use the same copy to search multiple times during a match (still once per turn) as long as you have access to it.
Ability to thin the deck.
About rate:
- 3 copies:
- Good in your starting hand without the starting combo and with Hawk
- Good in the lesson you start with Aloof Lupin
- It's okay to thin the deck during your opponent's turn if you go 2nd
- Good to have in your deck (so you can special summon with Roar's effect)
- A pretty good card in your starting hand along with T hunder Dragons' Hundred Thunders
- Helps summon Thunder Dragonduo and the monster "Chaos".
- 2 copies:
- Build a deck without Aloof Lupine , since you don't have a great reason to have it in your hand.
- Having the first effect thin the deck is not a great choice.
Thunder Dragonhawk (2-3x)
LIGHT
6Thunder Dragonhawk
ATK:
1800
DEF:
2200
You can discard this card; Special Summon 1 of your "Thunder Dragon" monsters that is banished or in your GY, except "Thunder Dragonhawk". If this card is banished, or sent from the field to the GY: You can shuffle any number of cards from your hand into the Deck, then draw the same number of cards. You can only use 1 "Thunder Dragonhawk" effect per turn, and only once that turn.
- Discard GY effect (auto-activate): you can special summon any banished Thunder Dragon or in your graveyard.
- If banished or sent off the field: you may shuffle any number of cards from your hand into the deck to draw the same number of cards.
The ability to special summon any Thunder Dragon banished or in your GY is really nice. It will give you different options for the effect you want to use during your turn (send from the field, banish from the GY or hand, or use the discard effect) and the monster you want to leave on the field during your opponent's turn. It is also possible to revive Thunder Dragonduo .
Magical Mallet effect can be a good choice to get your strong cards.
Well, since it is a UR of Main Box, you need at least 2. Here is the reason for the ratios:
- 3 copies:
- Better for consistency, as long as you can put TD into your GY, it won't be a brick
- It will reduce Roar 's task of recycling this leaf.
- 2 copies:
- Because you don't have the 3rd card (Try to plow the box)
- So as not to get it on your hands too many times
- Because you play other cards that have similar roles.
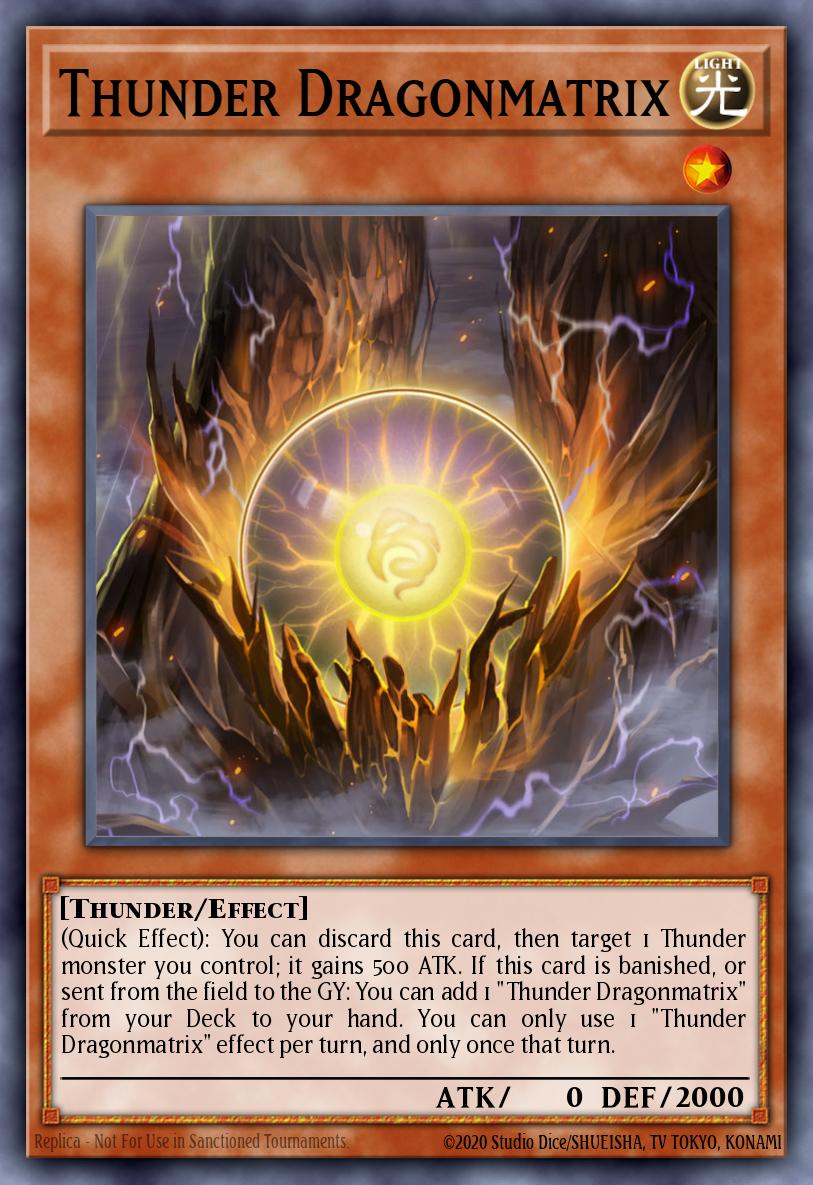
Thunder Dragonmatrix (0-1x)
 LIGHT
1
LIGHT
1Thunder Dragonmatrix
ATK:
0
DEF:
2000
(Quick Effect): You can discard this card, then target 1 Thunder monster you control; it gains 500 ATK. If this card is banished, or sent from the field to the GY: You can add 1 "Thunder Dragonmatrix" from your Deck to your hand. You can only use 1 "Thunder Dragonmatrix" effect per turn, and only once that turn.
- Discard card to GY effect (quick effect): increases the ATK of a Thunder monster you control by 500 (permanent, as long as that monster is face-up on the field)
- If banished or sent from the field -> add a copy of itself from the deck
With the addition of Thunder Dragonduo , this card becomes much more relevant, not least because it makes Duo a really big puncher at 3600, and the 500 boost is permanent as long as the monster is face-up on the field.
If you summon Duo during a turn where you do not activate Dark 's effect, banishing Dark to summon Duo allows you to add Matrix from your deck to your hand.
Ratio:
- 3 copies:
- Could be bricks
- Might be good as fuel for Thunder Dragon Discharge.
- 2 copies:
- Less chance of getting multiple copies
- There's hardly a need for much when it can be recycled with Roar and Duo's effects.
- 1 copy:
- Less chance of bricking
- Loses the effect when banished or sent from the field to the GY to add another copy of itself.
This card has a lot of potential in the future.
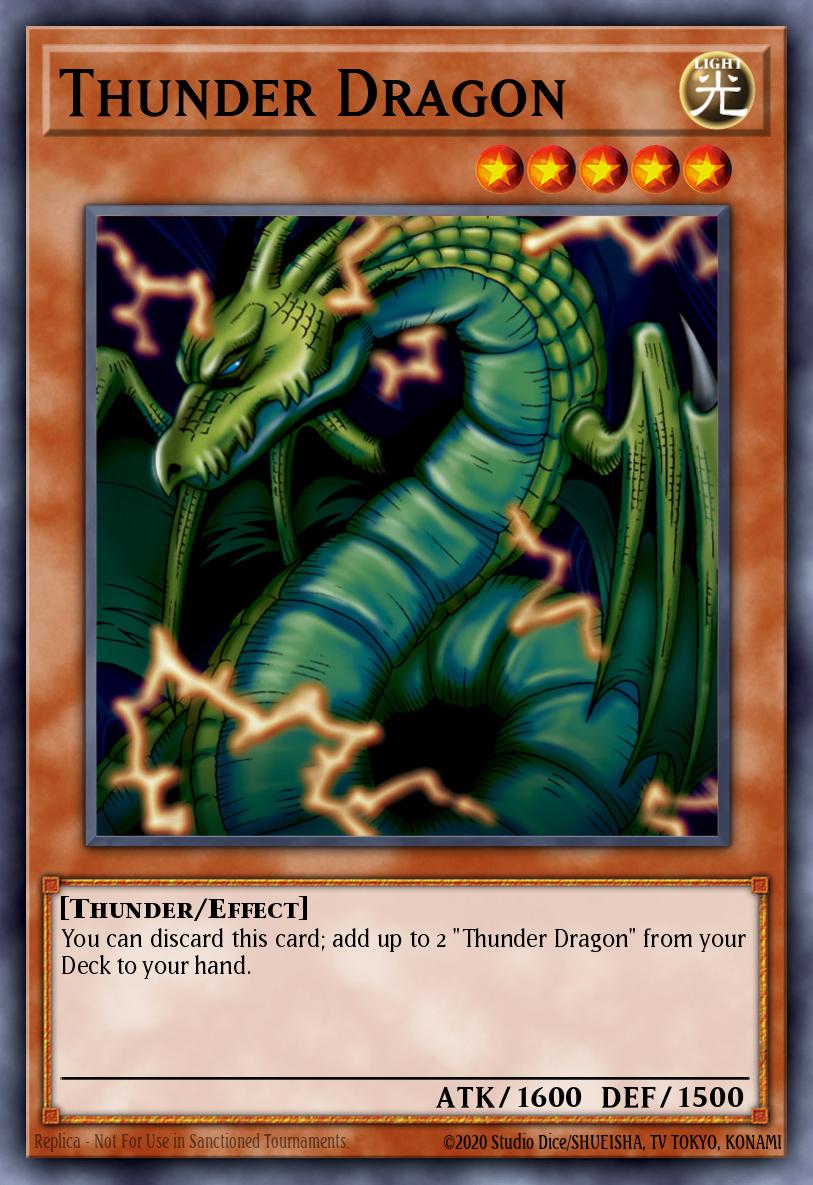
Thunder Dragon (0-3x)
 LIGHT
5
LIGHT
5Thunder Dragon
ATK:
1600
DEF:
1500
You can discard this card; add up to 2 "Thunder Dragon" from your Deck to your hand.
- You can discard it to add up to two copies of itself from your deck to your hand.
Odds: play 0 or 3. Reasons for playing/not playing:
- Great for filling the GY for Duo and other monsters that require banishing LIGHT and DARK monsters from the GY, as it can place 2 LIGHT monsters in the GY, by not adding additional copies, but instead activating activates the removal effect twice, which gives you a tough option to end the game quickly.
- It gives you +1 in your hand to use a Hawk effect to shuffle your hand into the deck or use as a card to the Graveyard, which is more of a "I guess I have this option" sense. is "I want this strategy in my deck"
- Not worth it if you don't play 2 or more monsters that use LIGHT and DARK in the GY
- Hard to fit into a smaller built deck
- Can be quite brick.
Thunder Dragonduo (1x)
DARK
8Thunder Dragonduo
ATK:
2800
DEF:
0
Cannot be Normal Summoned/Set. Must first be Special Summoned (from your hand) by banishing 1 LIGHT and 1 DARK monster from your GY. Once per turn, if a monster effect is activated in the hand: This card gains 300 ATK until the end of this turn. When this card destroys an opponent's monster by battle: You can banish 1 card from your GY; add 1 Thunder monster from your Deck to your hand. Once per turn, during your opponent's End Phase: You can target 1 of your banished cards; place it on the top or bottom of your Deck.
- You can Special Summon this card from your hand by banishing 1 LIGHT or DARK monster in your GY.
- If you use any of Thunder Dragon's discard effects; Gain 300 ATK until End Phase.
- If you destroy a monster in battle, banish any card in your GY to add a Thunder Dragon monster.
- During your turn your opponent may return any banish cards to the top or bottom of your deck.
Reasons to play and how much you should play:
- ATK is rich and can reach 3600 with Matrix , but even without it can easily reach 3300
- Can be searched or added from the banish pile or GY (Dark and Roar effect)
- Once properly summoned, can be summoned with the effect of Thunder Dragonhawk or Thunder Dragons' Hundred Thunders if anything happens to it (Destroyed or Banished)
- Can activate all Thunder Dragons effects, when summoned or if a monster is destroyed in battle (this can also activate other effects)
- Can search any Thunder Dragon or other Thunder monster for subsequent turns
- Any Tech can be recycled if banished while being able to be placed on top of your deck so you can immediately use your resources for other exciting plays.
- Bring 2 copies if you really want to use in the starting hand and to save Dark's effect for other cards and you're missing the Chaos component, but it's really not worth using with 2 cards .
Some note:
- Except for the "destroy monsters in battle" effect, all other effects are once per turn but are per copy, meaning multiple Duos will give you multiple recycles
- World Legacy Clash will return Duos in their final phase, which still allows you to use the recycle effect
- Controlling the opposing Thunder Dragonduo will allow you to deal with the banish pile's recycling effect instead of your opponent, which is often the case for decks playing Enemy Controller .
Thunder Dragon Discharge (0-1x)
Trap
ContinuousThunder Dragon Discharge
The activation of your Thunder monsters' effects cannot be negated. Once per turn, if a "Thunder Dragon" monster(s) is Normal or Special Summoned to your field: You can target 1 Spell/Trap on the field; banish 1 Thunder monster from your Deck, and if you do, destroy that target.
- Prevents the activation of your Thunder monster's effects from being negated.
- If Thunder Dragon monster(s) are Normal or Special Summoned to your field, target a spell/trap on the field; banish 1 Thunder monster from your deck and if you destroy that target (not once per turn, but once per copy).
It is a card in the Thunder Dragon line to deal with backrow.
- Strength:
- It is searchable from Thunder Dragondar k's effect and can be recycled with Thunder Dragonroar's effect. So 1 copy is enough.
- Time cannot be missed, meaning it will activate if a Thunder Dragon monster is special summoned during a chain.
- Can be used during your opponent's turn with the effect of Thunder Dragonroar, Thunder Dragrs' Hundred Thunders, Super Team Buddy Force Unite! or Oasis of Dragon Souls.
- Resolve effect allows you to activate Thunder Dragon's effects if you need them or just to thin out the deck by removing other cards like Batteryman Solar
- Defect:
- Preventing your opponent negates the activation of Thunder Dragon's effect, which is only good against Counter Trap decks or some other decks, but you need it to be face-up to be effective, because so it will only be good if you can search early. It depends a lot on the matchups.
- It's a persistent trap, so it activates quite slowly, and if it's removed from the field it doesn't trigger.
- It can be really expensive because you need to banish a Thunder Dragon in your deck, which will activate that monster's effect, if you haven't used its effect before.
- This card can help deal with problematic cards like Shadow-Imprisoning Mirror and Necrovalle y. But there are other options that don't require setup.
It is suitable for a slower list built around this card.
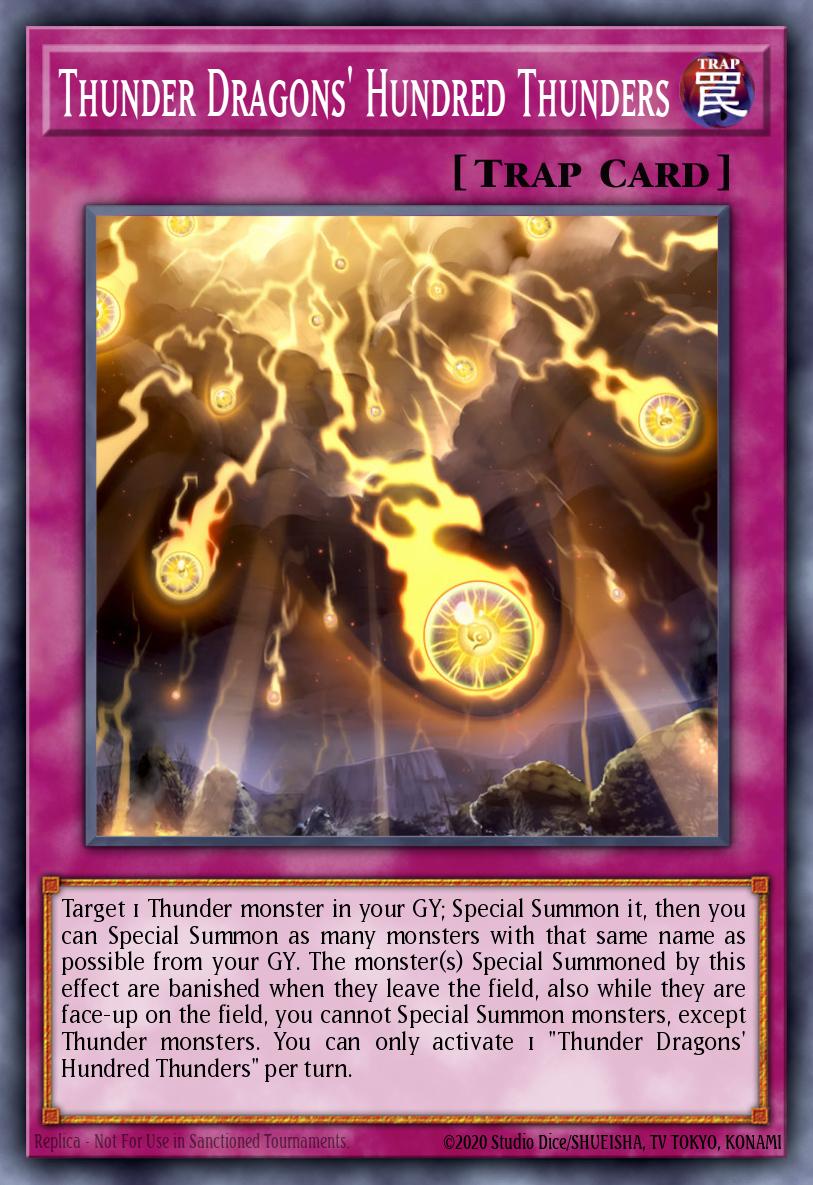
Thunder Dragons' Hundred Thunders (0-1x)
 Trap
Normal
Trap
NormalThunder Dragons' Hundred Thunders
Target 1 Thunder monster in your GY; Special Summon it, then you can Special Summon as many monsters with that same name as possible from your GY. The monster(s) Special Summoned by this effect are banished when they leave the field, also while they are face-up on the field, you cannot Special Summon monsters, except Thunder monsters. You can only activate 1 "Thunder Dragons' Hundred Thunders" per turn.
This card is a great defensive choice for the deck and a great tool in a long draw.
- It is searchable from the effect of Thunder Dragondark and can be recycled with the effect of Thunder Dragonroar , this is a really good card and it can be used for defense or attack by summoning Excess monsters on the field
- Even if it is searchable, you will often prioritize other cards over this one. So playing multiple copies will save you from having to search for it
- It can be a fake starter by removing Thunder Dragondark
- The limitation of not being able to special summon a non-Thunder-type monster will only prevent you from special summoning if that monster is still face-up on the field.
Some note:
- Monsters special summoned by this effect are banished if they leave the field (even if your opponent tries to return them to your hand), which activates their effect.
- There is an interaction with cards like World Legacy Clash for example that you should keep in mind. The monster(s) you specifically summon with this card's effect are banished when it leaves the field, so if you use World Legacy Clash , the monster will not return during your End Phase, thus it is considered that it has left the field due to the effect of Thunder Dragons' Hunred Thunders.
Non-archetype cards (Core cards)
At first glance, reading through TD's effects, you will see that there are very few of them because by their nature, they all contain two effects. However, to activate those effects, you need cards other than this TD line to support and increase the continuity of the deck.
Gold Sarcophagus (1-2x)
Spell
NormalGold Sarcophagus
Banish 1 card from your Deck, face-up. During your second Standby Phase after this card's activation, add that card to the hand.
A great card, it's one of the best starters a deck can have, 1 card has no normal summon cost and can give you an advantage if you keep that card banished export.
Strength:
- This is the most consistent card among the three " Limited 2 " cards.
- It is very flexible, as it offers different options to adapt to the other cards in your hand.
Weakness:
- This is the " Limited 2 " card with the lowest level of access (Because it costs money to get it)
- It's not typically used as a great mid-late game play.
Charge of the Light Brigade (0-2x)
Spell
NormalCharge of the Light Brigade
Send the top 3 cards of your Deck to the Graveyard; add 1 Level 4 or lower "Lightsworn" monster from your Deck to your hand.
Sending 3 cards from your deck to your GY as a cost is important because it cannot be negated.
Strength:
- It has the potential to give you a huge advantage that can help you win the game the right way or make it difficult for your opponents to keep up.
Weakness:
- This is the least consistent card among the three " Limited 2 " cards.
- It requires a Lightsworn monster in the deck to be activated, so you need to combine with some monsters of that line
- It doesn't start your engine on its own, so you still need to grind and make good combinations of cards to get your engine going.
Aloof Lupine (0-2x)
DARK
4Aloof Lupine
ATK:
1700
DEF:
300
When this card is Normal Summoned: You can banish 1 monster from your hand; banish 1 monster from your Deck with the same Type as that monster. If this card is destroyed by battle, or if this card in its owner's possession is destroyed by an opponent's card effect: You can target 1 of your banished monsters; add it to your hand. You can only use each effect of "Aloof Lupine" once per turn.
It has an effect when Normal Summoned and banishes 1 card from the hand as its cost, meaning it's really good when you play to cause disruption.
Destroyed by your opponent's card (battle or effect) can recycle the banished monster.
Strength:
- This card is the middle of the three "Limited 2" cards, adding both consistency and approachability.
- It can give you +1 or 1 Rank 5-6 without any setup.
Weakness:
- No, this gray wolf is the best (in fact, his only downside is that you can brick your hand with him if you play too many non-Thunder-type monsters).
Batteryman Solar (2-3x)
LIGHT
4Batteryman Solar
ATK:
1500
DEF:
1500
If this card is Normal or Special Summoned: You can send 1 Thunder monster from your Deck to the GY. If a Thunder monster(s) is Normal or Special Summoned while this monster is on the field: Special Summon 1 "Batteryman Token" (Thunder/LIGHT/Level 1/ATK 0/DEF 0). You can target 1 "Batteryman" Effect Monster you control or in your GY; this card's name becomes that monster's until the End Phase. You can only use each effect of "Batteryman Solar" once per turn.
This is a very important card to help ensure consistency.
Strength:
- Its effect activates upon summon so it's not a normal summon that's weak against decks with a lot of disruption
- Sell can start your engines through cards like Artifact Lancea and Chaos Hunter
- It can help fill the field quickly to use cards like Destiny HERO - Plasma and you can use Trishula, Dragon of Icy Imprisonment to help exploit them.
Weakness:
- Similar to Charge of the Light Brigade , requires other cards to start your engine, but it has no RNG (random) element
- Tokens can clog your yard
- Tokens are very vulnerable to damage by your opponents if you don't have a way to prevent them.
Note:
- Since the effect of spawning Tokens is mandatory, you can play around by summoning Thunder monsters while there is only 1 area available, this will still trigger Solar 's effect but without the area To summon another Token, you won't have a Token for the rest of the turn because that effect is once per turn.
- Remember that Solar will also spawn tokens if your opponent also summons a Thunder monster.
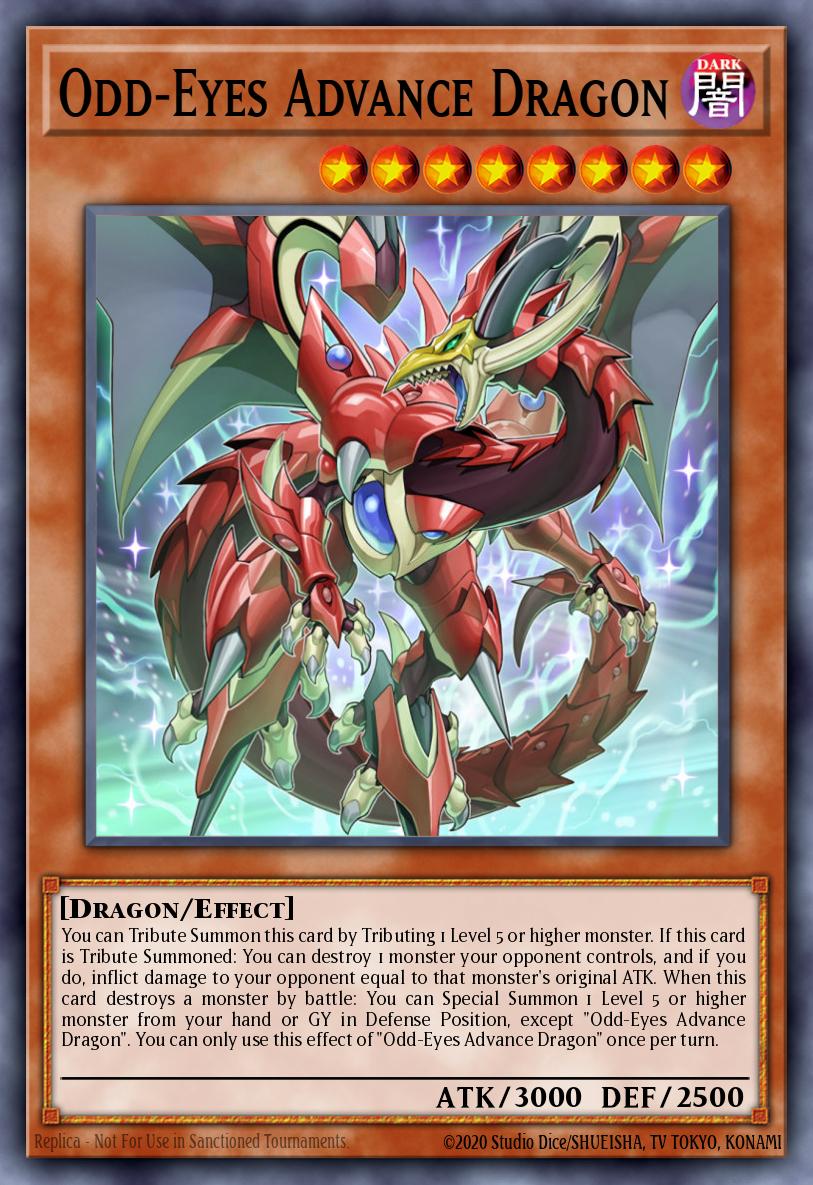
Odd-Eyes Advance Dragon and The Melody of Awakening Dragon (Sự kết hợp giữa những lá Dragon cấp 8 mạnh mẽ)
 DARK
8
DARK
8Odd-Eyes Advance Dragon
ATK:
3000
DEF:
2500
You can Tribute Summon this card by Tributing 1 Level 5 or higher monster. If this card is Tribute Summoned: You can destroy 1 monster your opponent controls, and if you do, inflict damage to your opponent equal to that monster's original ATK. When this card destroys a monster by battle: You can Special Summon 1 Level 5 or higher monster from your hand or GY in Defense Position, except "Odd-Eyes Advance Dragon". You can only use this effect of "Odd-Eyes Advance Dragon" once per turn.
 Spell
Normal
Spell
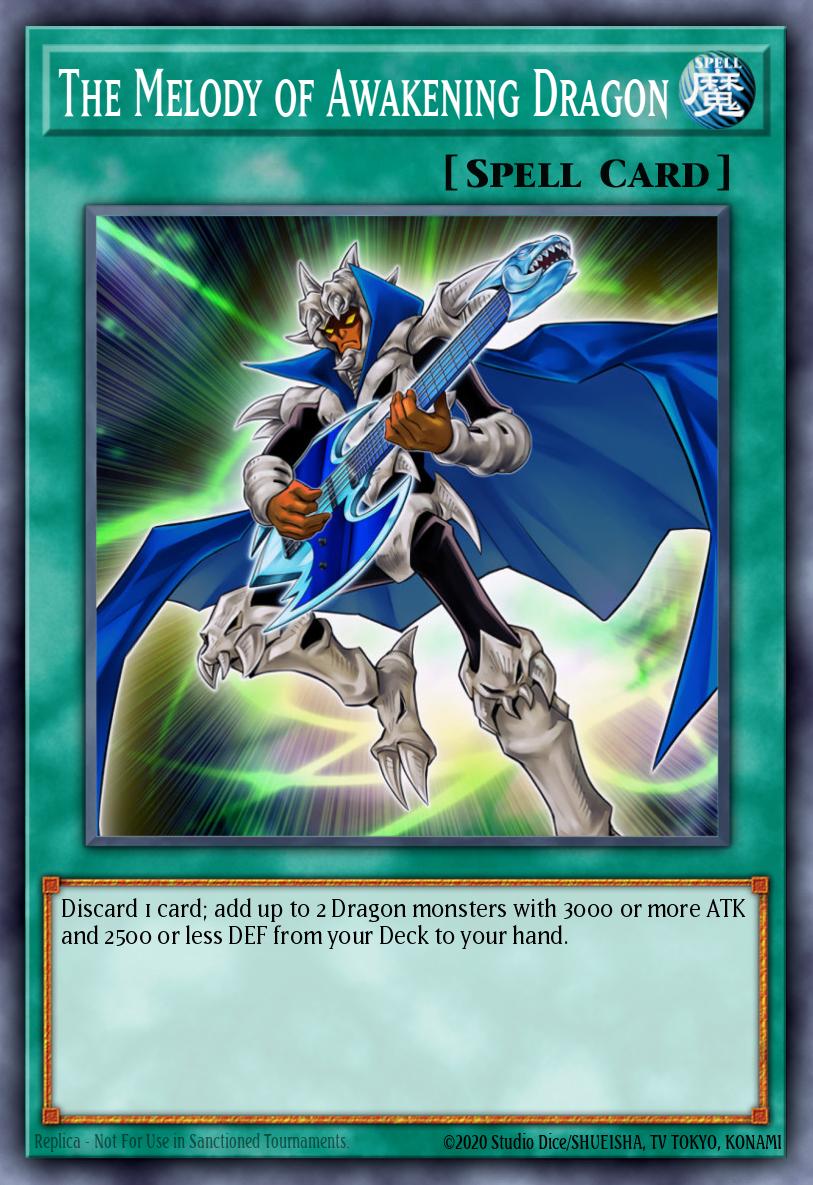
NormalThe Melody of Awakening Dragon
Discard 1 card; add up to 2 Dragon monsters with 3000 or more ATK and 2500 or less DEF from your Deck to your hand.
- Melody
- It is possible to add up to 2 Levianeer and/or Odd-Eyes Advance Dragon by leaving a beast in hand, which can also help jump-start your engines and provide additional options.
- Odd-Eyes
- It's a good card to add if you're playing Melody , and isn't a brick like Levianeer .
- Untargetable monster removal and burn damage can help deal lethality.
- As a double sacrifice can help expand the field with Batteryman Solar and its Token. And being able to sacrifice just 1 level 5 monster can help free you from Thunder Dragons' Hundred Thunders .
Chaos monsters
It would be appropriate to put together a deck around running combos through LIGHT and DARK monsters, and monsters that take advantage of those combos like Chaos monsters. Let's also see what effects those monsters have.
Chaos Dragon Levianeer (2-3x)
DARK
8Chaos Dragon Levianeer
ATK:
3000
DEF:
0
Cannot be Normal Summoned/Set. Must first be Special Summoned (from your hand) by banishing 3 LIGHT and/or DARK monsters from your GY. When Summoned this way: You can activate this effect; apply the following effect, based on the Attribute(s) of the monsters banished for the Special Summon, also this card cannot attack for the rest of this turn. ● Only LIGHT: Special Summon 1 monster from your GY in Defense Position. ● Only DARK: Shuffle 1 random card from your opponent's hand into the Deck. ● Both LIGHT and DARK: Destroy up to 2 cards on the field. You can only use this effect of "Chaos Dragon Levianeer" once per turn.
The card is great. By banishing 3 LIGHT and/or DARK monsters from your GY, you can special summon it from your hand. You will mainly use its effect to banish LIGHT and DARK monsters to activate "Destroy up to 2 cards on the field", this effect is NOT targetted, meaning they don't know you will spend kill any leaves. This effect will severely punish if your opponent tries to exceed it (both costly to prevent, and does not prevent the destructive effect).
The remaining 2 effects will appear less often, banishing 3 DARK to get "Shuffle 1 random card from your opponent's hand into the deck" can be really devastating when you go first, but it will be common thing. It is actually the strongest effect of all 3.
The final effect doesn't offer much for this deck and is the hardest to pull off and probably worthless in most situations.
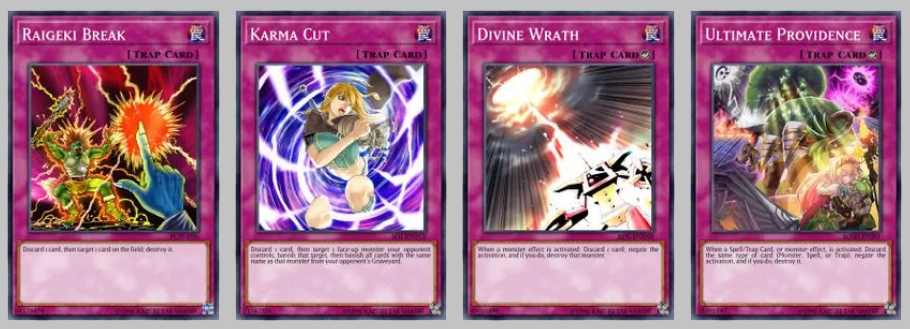
Special summoning conditions can trigger Thunder Dragon effects and they will also create Chain Block Levianeer effects, which is really important because your opponent won't be able to activate cards that need to be Chained directly with effects such as those of Divine Wrath or Head Judging .
The banish effect of LIGHT and DARK monsters to destroy cards on the field can be used to destroy itself in case your opponent turns the Levianeer face down, so your field will also not be clogged to make room for other plays (in case you don't want to use it as a Synchro/XYZ material or to summon Tribute).
It can be searched by The Melody of Awakening Dragon .
- Strength
- Excellent removal effect.
- Can activate Thunder Dragons' effects when summoned
- Has 3000 attack points.
- Weakness:
- Cannot attack during the turn you activate its effects
- Could be bricks
- It requires more GY setup than other Chaos monsters.
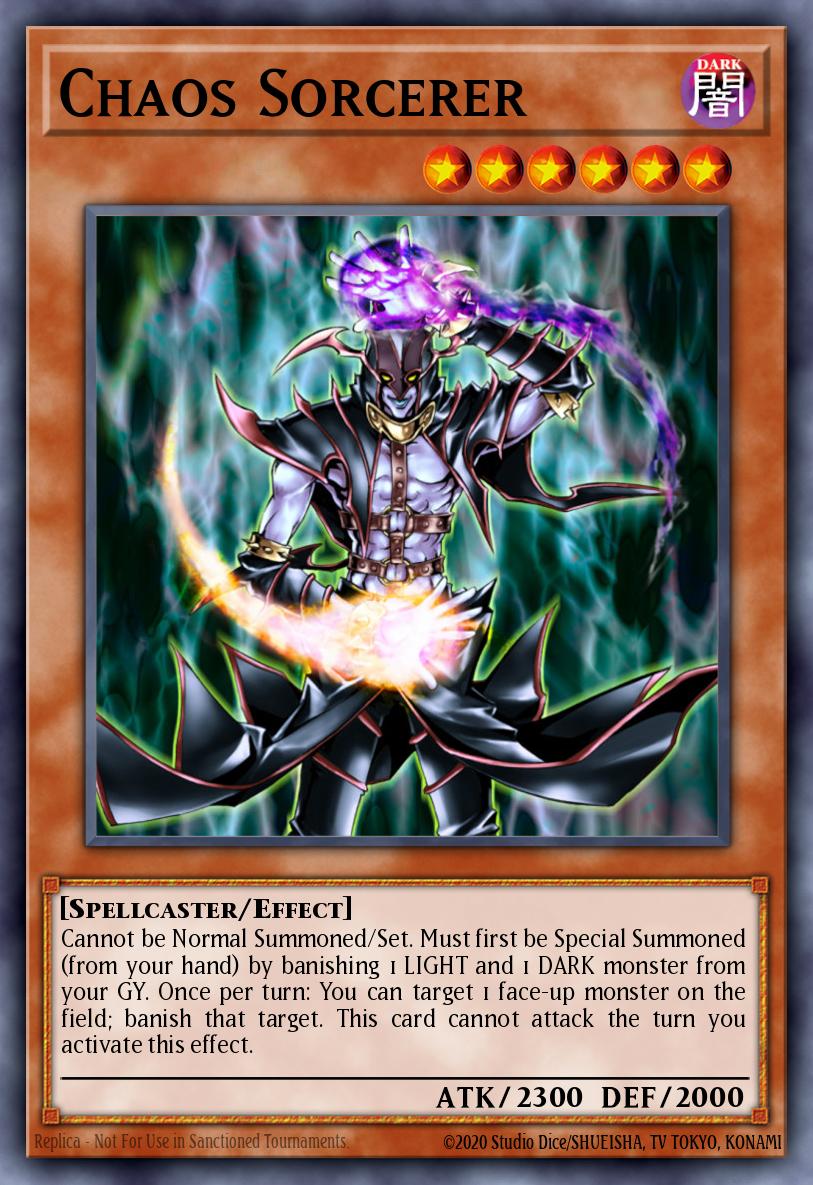
Chaos Sorcerer (1-2x)
 DARK
6
DARK
6Chaos Sorcerer
ATK:
2300
DEF:
2000
Cannot be Normal Summoned/Set. Must first be Special Summoned (from your hand) by banishing 1 LIGHT and 1 DARK monster from your GY. Once per turn: You can target 1 face-up monster on the field; banish that target. This card cannot attack the turn you activate this effect.
Can be used with Skill Supreme King's Followers
- Strength:
- Easy to summon
- Remove good monsters
- Can activate Thunder Dragons' effects when summoned.
- Weakness:
- It cannot be summoned normally
- Cannot attack during your turn to activate its effects
- Weak index
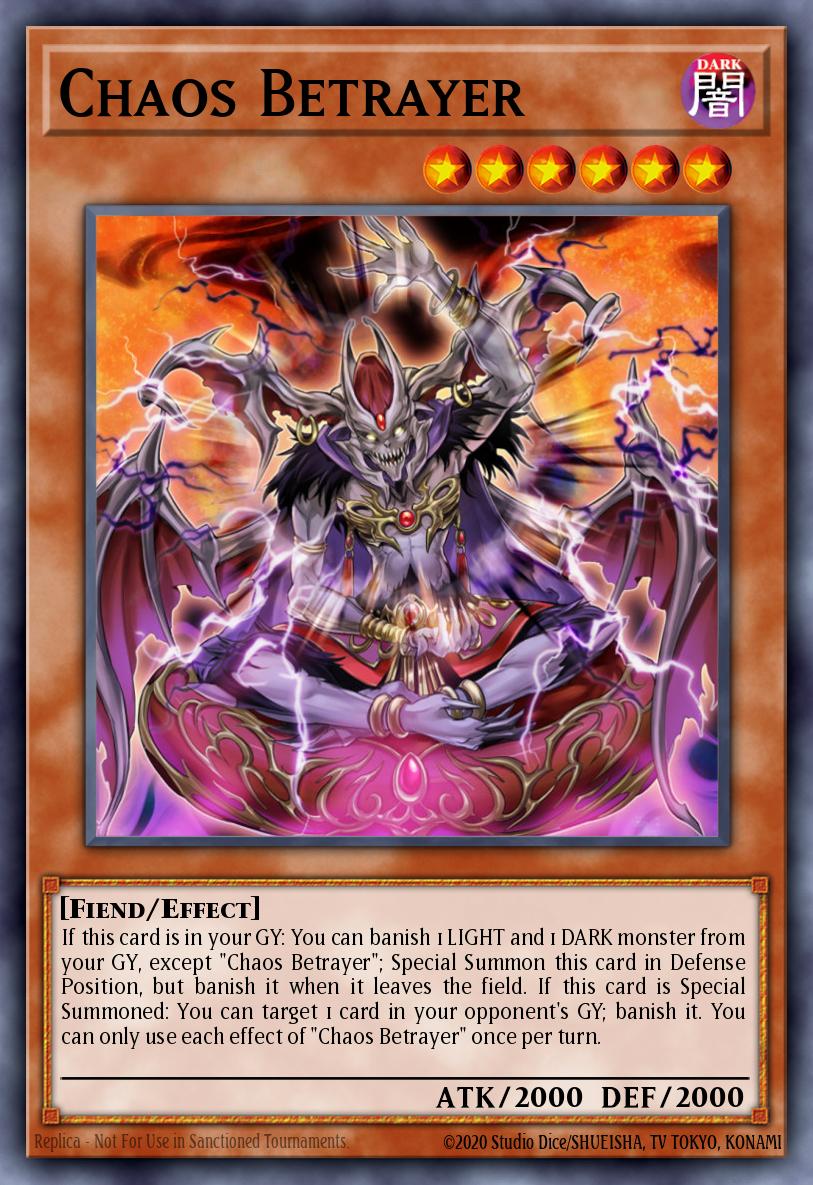
Chaos Betrayer (1x)
 DARK
6
DARK
6Chaos Betrayer
ATK:
2000
DEF:
2000
If this card is in your GY: You can banish 1 LIGHT and 1 DARK monster from your GY, except "Chaos Betrayer"; Special Summon this card in Defense Position, but banish it when it leaves the field. If this card is Special Summoned: You can target 1 card in your opponent's GY; banish it. You can only use each effect of "Chaos Betrayer" once per turn.
It can only be special summoned from GY and there are not many ways to send it directly to GY, the best way is with Fiend Farewell .
Whenever you withdraw it, it will make up for its name.
- Strength:
- Somewhat easy to summon.
- Can activate Thunder Dragons ' effects when summoned.
- Allows Rank 6 summons pretty much every turn.
- Weakness:
- Has a good effect but is very specific
- It will be banished when it leaves the field so a destruction effect will remove it for the rest of the match.
- It's difficult to send to GY
- Quite competitive with all the other cards mentioned previously.
- Fiend Farewell prevents you from using other Fiend Type monsters.
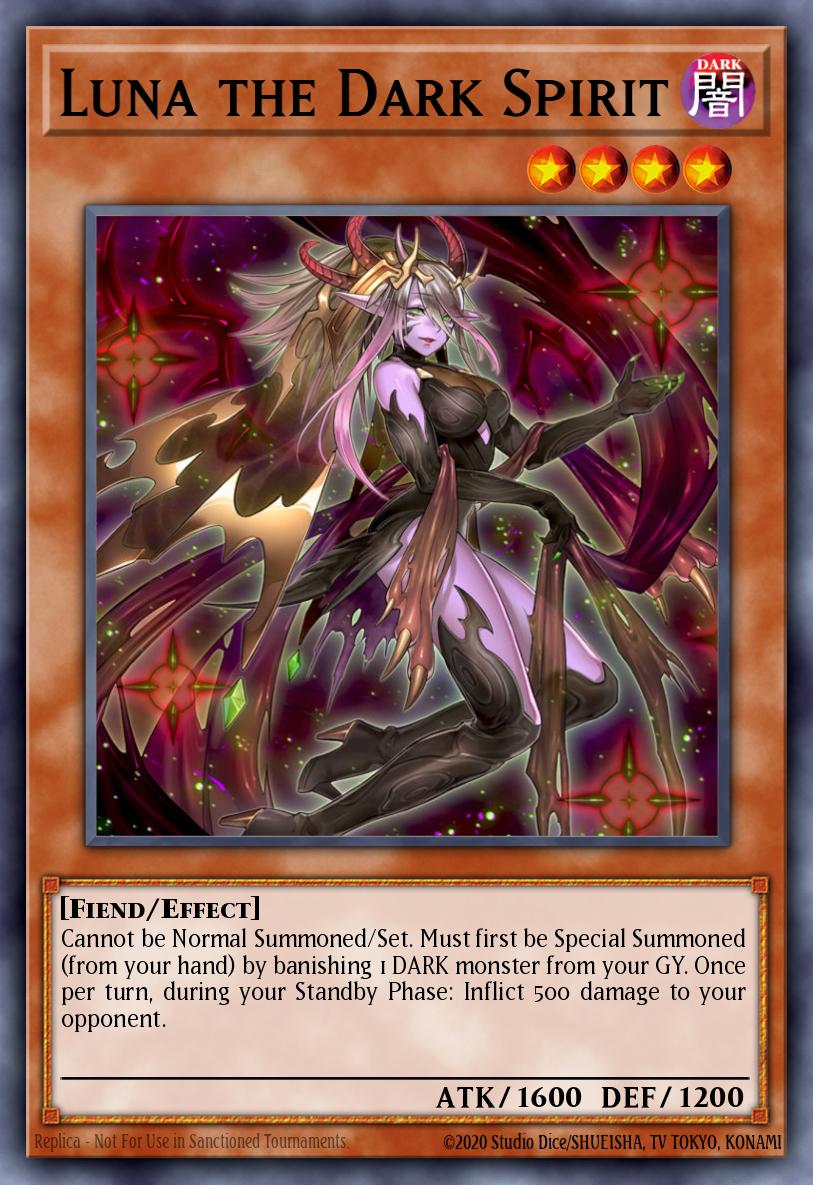
Luna the Dark Spirit (1x)
 DARK
4
DARK
4Luna the Dark Spirit
ATK:
1600
DEF:
1200
Cannot be Normal Summoned/Set. Must first be Special Summoned (from your hand) by banishing 1 DARK monster from your GY. Once per turn, during your Standby Phase: Inflict 500 damage to your opponent.
This card is great for a rank4 engine alongside Batteryman Solar or even with Raiden, Hand of the Lightsworn . It competes with other Chaos beasts as well as with Thunder Dragonhawk . If you don't have a DARK monster in your GY, you won't enjoy having Luna in your hand.
This card is better suited in a non-aggressive build without blowout cards and more control oriented cards.
Tuners
Tuner provides access to different Synchro monsters, giving your deck different options. They are expansions or continuations after you start your turn so they will conflict with other expansions, meaning the more expansions you have, the stronger your deck will be. inconsistent.
So you can play a lot of Tuners instead of Chaos beasts, or you can play less, more accessible Tuners.
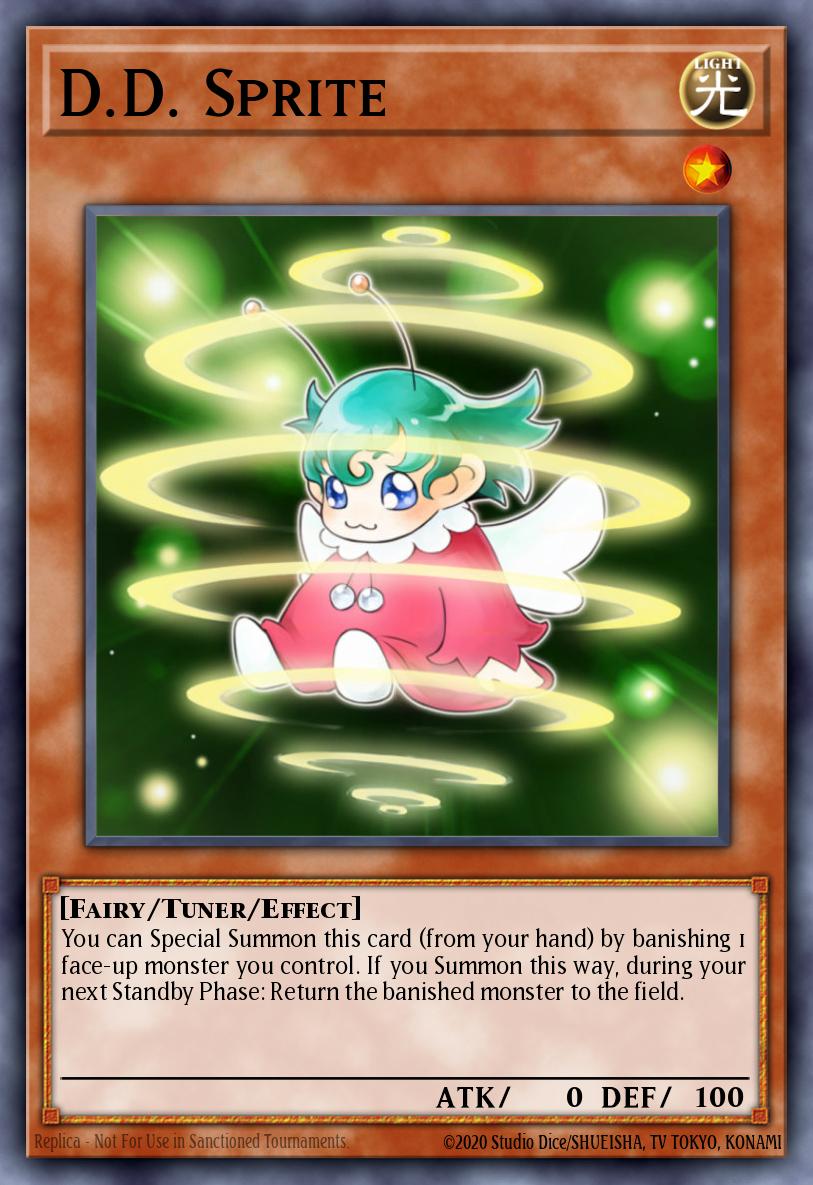
D.D. Sprite (1x)
 LIGHT
1
LIGHT
1D.D. Sprite
ATK:
0
DEF:
100
You can Special Summon this card (from your hand) by banishing 1 face-up monster you control. If you Summon this way, during your next Standby Phase: Return the banished monster to the field.
- Strength:
- Has synergy with Thunder Dragon
- This is an extended leaf (extended selection).
- Weakness:
- The monster must face up on the field to be eliminated from play
- It doesn't help the start of the game.
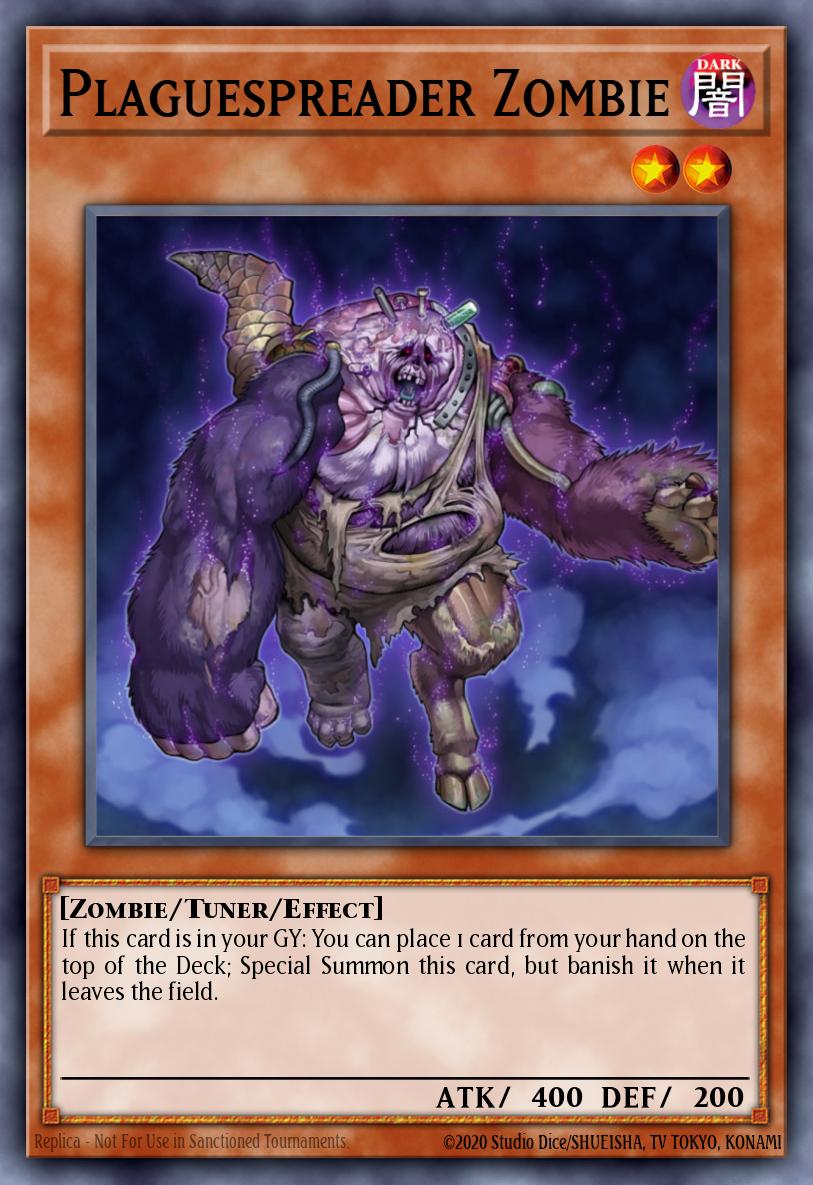
Plaguespreader Zombie (1x)
 DARK
2
DARK
2Plaguespreader Zombie
ATK:
400
DEF:
200
If this card is in your GY: You can place 1 card from your hand on the top of the Deck; Special Summon this card, but banish it when it leaves the field.
- Strength:
- A card can be used twice (second time by returning 1 card from hand to deck to be special summoned from the graveyard)
- DARK monsters have synergy with Thunder Dragonduo and other "Chaos" monsters
- After being banished by its own effect, you can top your deck with Thunder Dragonduo 's effect
- Can be used with Zombie Draw if you are not playing other zombie monsters
- There is GY synergy.
- Weakness:
- Return a card from your hand to the deck to use again, sometimes it can help to get back a card you want in your deck but still have 1 card less in your hand.
- If GY's special summon is interrupted, you will have no monsters left.
Glow-Up Bulb (1x)
 EARTH
1
EARTH
1Glow-Up Bulb
ATK:
100
DEF:
100
If this card is in your GY: You can send the top card of your Deck to the GY, and if you do, Special Summon this card. You can only use this effect of "Glow-Up Bulb" once per Duel.


- Strength:
- A card can be used twice (second time by sending 1 card to the grave from the top of your deck)
- There is GY synergy.
- Weakness:
- It is effective when special summoned by GY once per game
Jet Synchron (1-2x)
 FIRE
1
FIRE
1Jet Synchron
ATK:
500
DEF:
0
If this card is sent to the GY as Synchro Material: You can add 1 "Junk" monster from your Deck to your hand. If this card is in your GY: You can send 1 card from your hand to the GY; Special Summon this card, but banish it when it leaves the field. You can only use 1 "Jet Synchron" effect per turn, and only once that turn.
- Strength:
- It can be searched with Skill Tuning, so you can include other Synchrons for more options
- A "Junk" monster can be added if used as a sync material, preferably: Junk Anchor and Junk Giant will set up for the next turn
- 1 Card can be used twice in the same turn to summon Synchro (second time by removing 1 card from your hand, only if you do not use the first effect)
- There is GY synergy.
- Weakness:
- If GY's special summon is interrupted, your field will be empty.
- You cannot use both effects at the same turn.
Raiden Hand of the Lightsworn (2-3x)
 LIGHT
4
LIGHT
4Raiden, Hand of the Lightsworn
ATK:
1700
DEF:
1000
During your Main Phase: You can send the top 2 cards of your Deck to the GY, then if any "Lightsworn" monsters were sent to the GY by this effect, this card gains 200 ATK until the end of your opponent's turn. You can only use this effect of "Raiden, Hand of the Lightsworn" once per turn. Once per turn, during your End Phase: Send the top 2 cards of your Deck to the GY.
Raiden helps with non-starter hand work other than Thunder Dragonhawk or with "Chaos" monsters. Additionally, if running Charge, this is the best Tuner to look for in terms of its effects, as its Main Phase can give you more opportunities for the starting turn.
Wattfox (0-1x)
 LIGHT
2
LIGHT
2Wattfox
ATK:
800
DEF:
100
If this card is destroyed by your opponent's card (either by battle or by card effect), your opponent cannot Special Summon a monster, or activate Spells, Traps, Spell/Trap effects, or Monster Card effects, for the rest of this turn.
Can be sought by Thunder Dragonduo and used to banish with Aloof Lupine 's effect due to being a Thunder-type monster.
Red Resonator (0-1x)
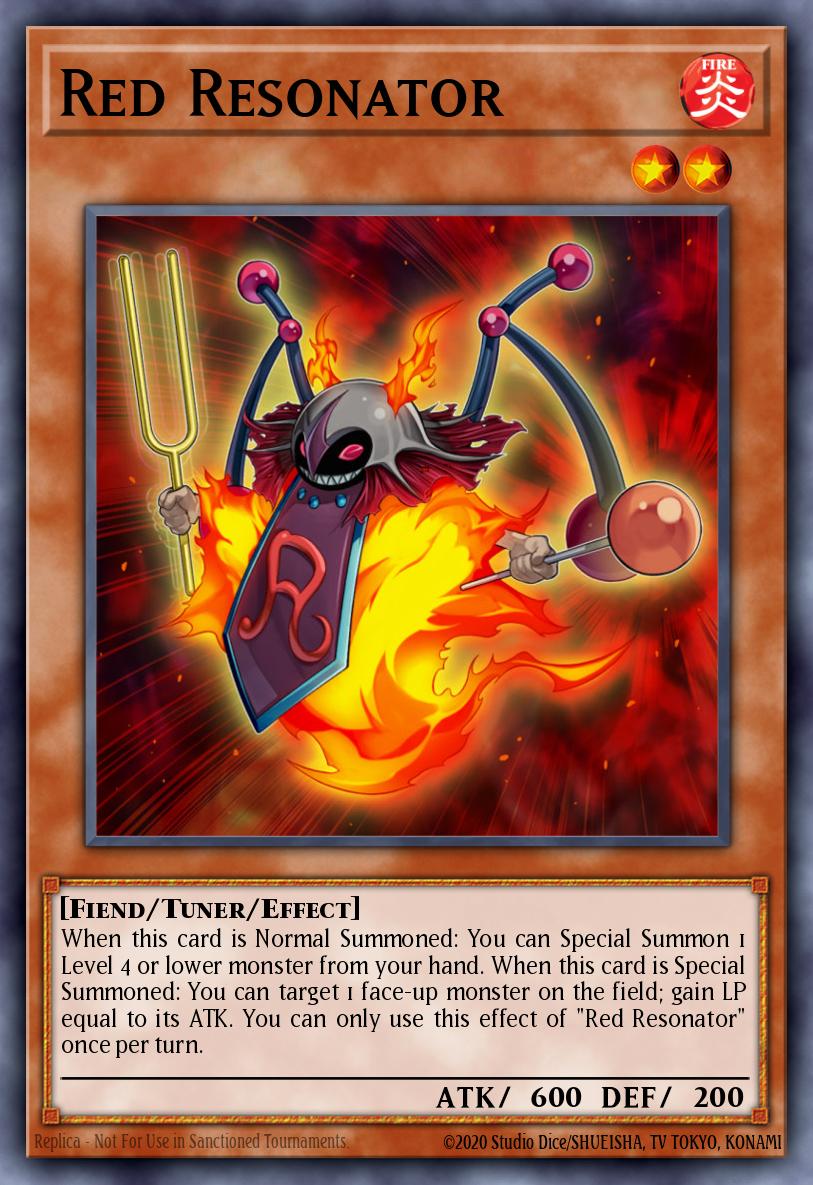 FIRE
2
FIRE
2Red Resonator
ATK:
600
DEF:
200
When this card is Normal Summoned: You can Special Summon 1 Level 4 or lower monster from your hand. When this card is Special Summoned: You can target 1 face-up monster on the field; gain LP equal to its ATK. You can only use this effect of "Red Resonator" once per turn.
There is great synergy with Batteryman Solar .
Can be searched using Resonator Call, if you really want to use it.
Crimson Resonator (0-1x)
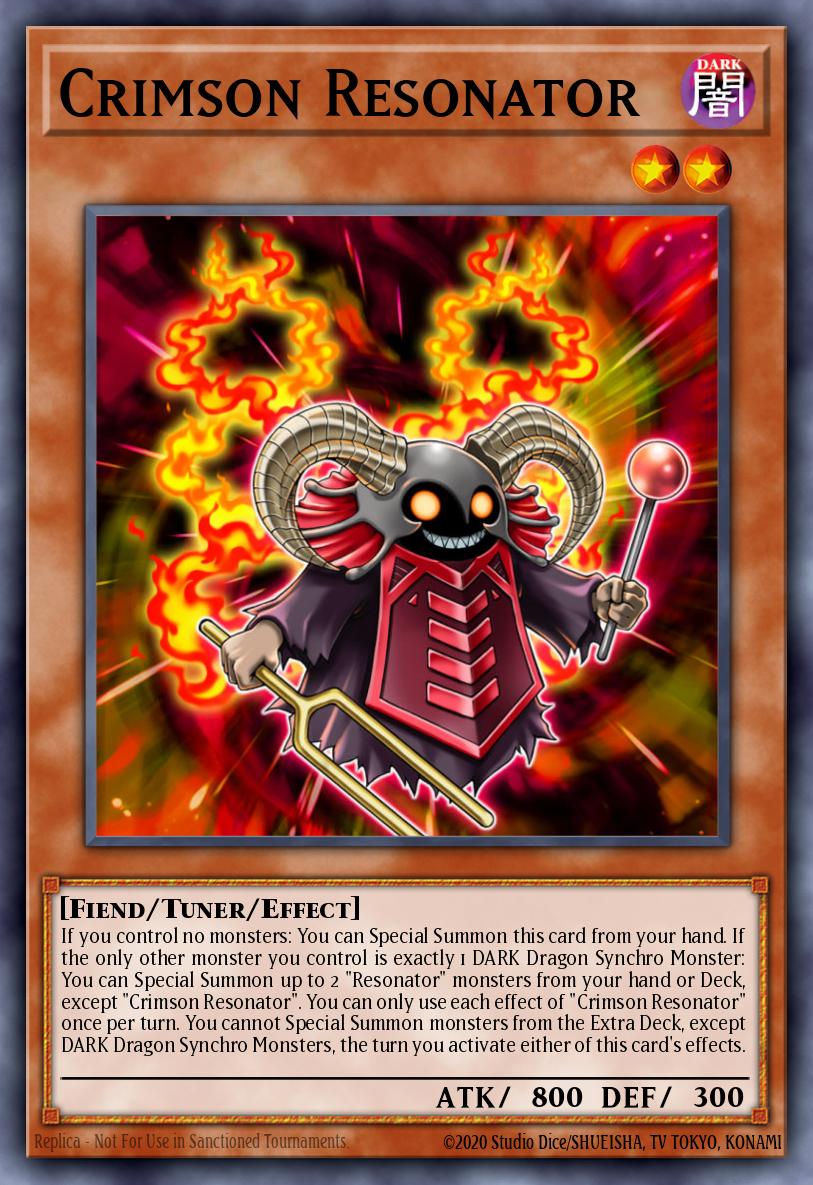 DARK
2
DARK
2Crimson Resonator
ATK:
800
DEF:
300
If you control no monsters: You can Special Summon this card from your hand. If the only other monster you control is exactly 1 DARK Dragon Synchro Monster: You can Special Summon up to 2 "Resonator" monsters from your hand or Deck, except "Crimson Resonator". You can only use each effect of "Crimson Resonator" once per turn. You cannot Special Summon monsters from the Extra Deck, except DARK Dragon Synchro Monsters, the turn you activate either of this card's effects.
Can be special summoned when you control no monsters, allowing you to Tribute it.
Can be searched with Resonator Call , if you really want to use it.
Extra Deck
Of course, with pure strength in the main deck, TD will never reach the Top Tier. Therefore, the Extra Deck is very necessary for the deck. And I have to say, they're pretty packed with options.
Synchro

Tuners will give you access to powerful Synchro monsters while also preventing you from losing resources when summoning Synchro using Dark or Roar . They also give you different scenarios and help advance the game. Additionally, there are some good Synchros that are not generic (i.e. they require a specific Type or Attribute), for some it will be necessary to use specific Tuners. I will list the best generic Synchros.
When the core cards continue, you will only play level 9 Synchro ( Giganticastle or Vermillion Dragon Mech ) to Synchro with Raiden and add 1 other card depending on the Meta, usually Assault Blackwing - Onimaru the Divine Thunder to Synchro with Raiden and Duo or Levianeer . If you play more Synchro focused, you will play more Synchro, but those will depend on the Meta and on the Tuner level.
Xyz
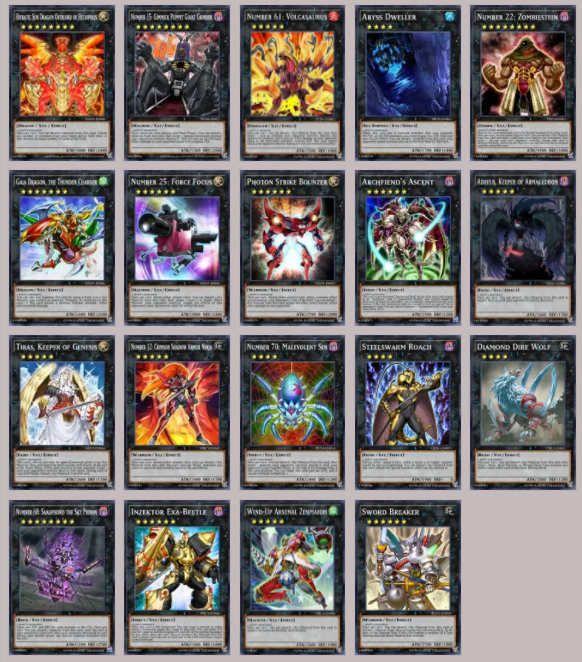
Xyz can be easier to summon since they don't require a Tuner and you can use pretty much any monster in your main deck to summon them. But compared to Synchros, they won't trigger Thunder Dragon 's effect on the summon causing you to lose resources instead, so their effect(s) need to at least compensate for that summon. You can also use Xyz to move monsters to the GY while setting up to summon Chaos monsters, which will then activate Thunder Dragon 's effect.
Additionally, you should have a Rank 8, a Rank 6 and, if you play more than 5 Rank 4s and/or Rank 5s, add at least 1 Rank 4/Rank 5 accordingly.
Fusion và Chart build Extra Deck
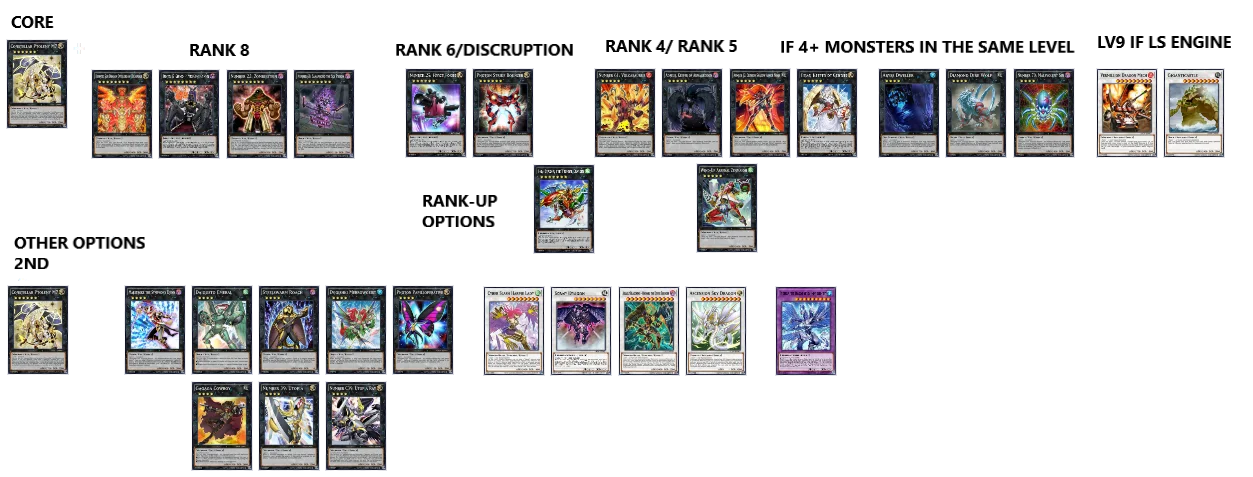
Fusions... Well, we don't have the Fusion of the TD archetype line, but we do have Trishula, the Dragon of Icy Imprisonment , spending 3 monsters to summon it is quite expensive, but as long as you using Thunder Dragon to summon it makes up for its minus, while giving options to escape a clogged field or also make more aggressive plays by activating effects Your TD.
This chart will help you better visualize how to build your Extra Deck:
Engines/Packages
To operate more smoothly, there are always some decks that need to be paired with Engines/Packages (Systems). Through the introduction of the above section, we know that the first Engines are Chaos monsters and because the game has not yet released the main monster of the Invoked series, we have to rely on other Engines to increase power as well. like the ability to get the deciding card into your hand. Below are some basic Engines
Batteryman Solar and Destiny HERO - Plasma (Package)
LIGHT
4Batteryman Solar
ATK:
1500
DEF:
1500
If this card is Normal or Special Summoned: You can send 1 Thunder monster from your Deck to the GY. If a Thunder monster(s) is Normal or Special Summoned while this monster is on the field: Special Summon 1 "Batteryman Token" (Thunder/LIGHT/Level 1/ATK 0/DEF 0). You can target 1 "Batteryman" Effect Monster you control or in your GY; this card's name becomes that monster's until the End Phase. You can only use each effect of "Batteryman Solar" once per turn.
 DARK
8
DARK
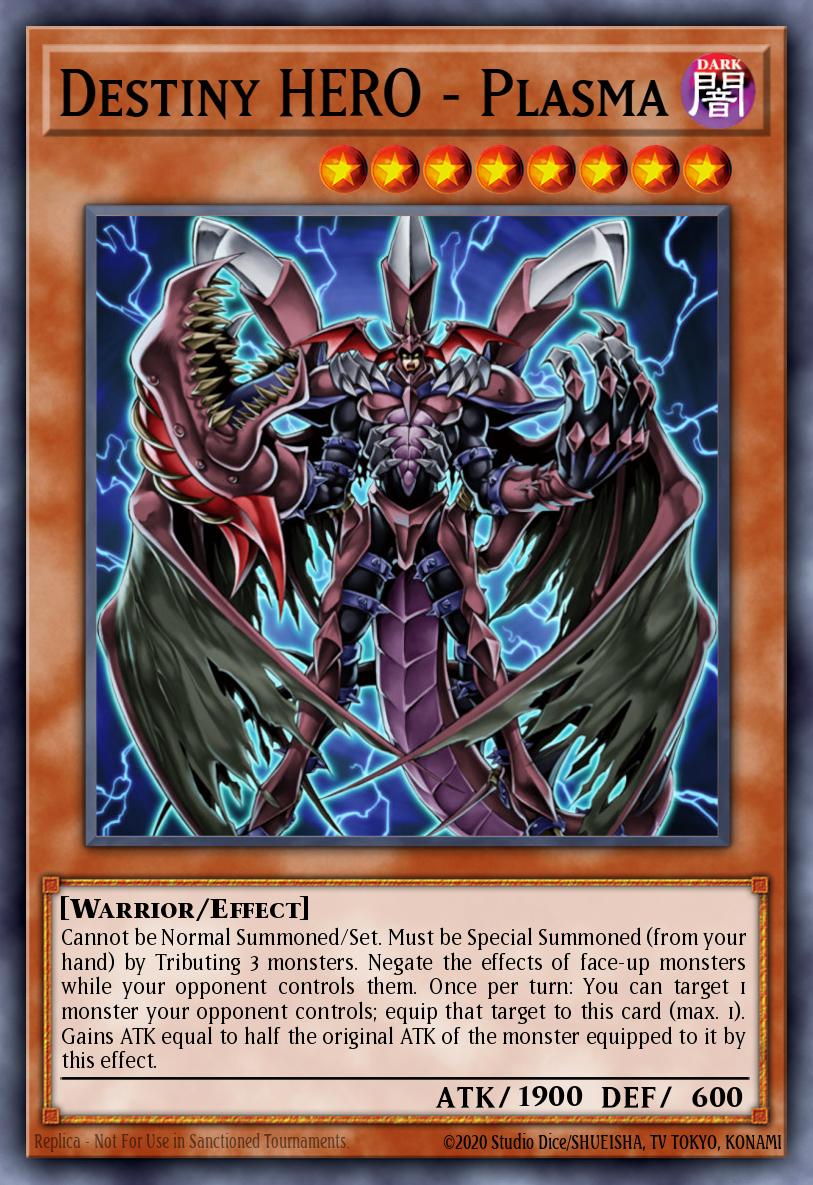
8Destiny HERO - Plasma
ATK:
1900
DEF:
600
Cannot be Normal Summoned/Set. Must be Special Summoned (from your hand) by Tributing 3 monsters. Negate the effects of face-up monsters while your opponent controls them. Once per turn: You can target 1 monster your opponent controls; equip that target to this card (max. 1). Gains ATK equal to half the original ATK of the monster equipped to it by this effect.
Plasma is a good card to turn off the effects of monsters on the field, such as negating monsters or monsters with built-in protection such as Lunalight Saber Dancer .
With the final change to the Bring it! , Plasma became more consistent, using cards like Herald of the Abyss or Cosmic Cyclone . You can shuffle a card from your hand into the deck and add Plasma to your hand in the correct way.
Batteryman Solar will help you a lot to summon Plasma because Tokens are summoned from Solar when you summon Thunder monsters.
Crystron Package
You can play with some Crystrons to search for Tuners or you can just play Tuners, if you choose to play the search monster you will have the ability to search for different Tuners but if you use the search monster you will cannot Synchro Summon a non-Machine-type Synchro monster that turn.
Crystron Citree (1-2x)
 WATER
2
WATER
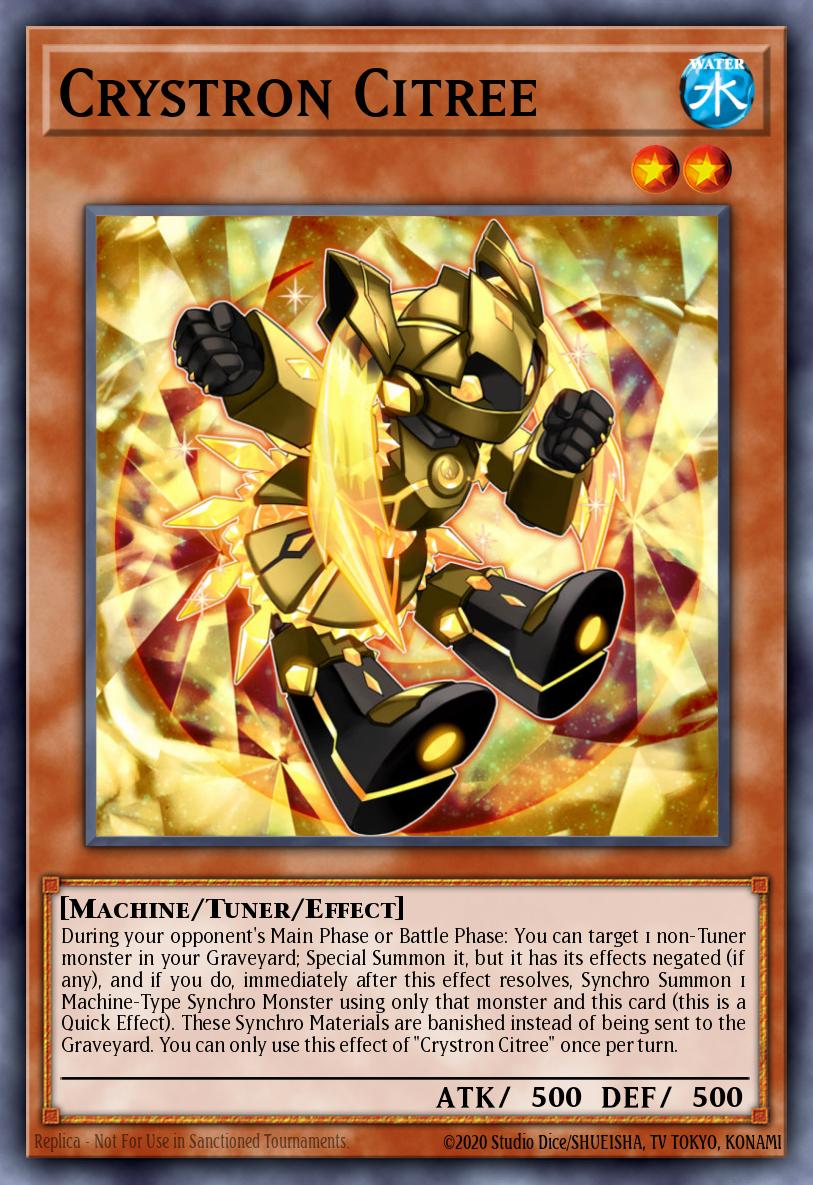
2Crystron Citree
ATK:
500
DEF:
500
During your opponent's Main Phase or Battle Phase: You can target 1 non-Tuner monster in your Graveyard; Special Summon it, but it has its effects negated (if any), and if you do, immediately after this effect resolves, Synchro Summon 1 Machine-Type Synchro Monster using only that monster and this card (this is a Quick Effect). These Synchro Materials are banished instead of being sent to the Graveyard. You can only use this effect of "Crystron Citree" once per turn.
The Synchro summon effect on the opponent's turn is really good in many matches, you can summon Synchro into Samurai Destroyer by using Thunder Dragondark in GY and Dark will receive the effect when it leaves the field for an additional card Thunder Dragon from your deck. This effect can combine well with Thunder Dragon Discharge .
Crystron Quan (1-2x)
 WATER
1
WATER
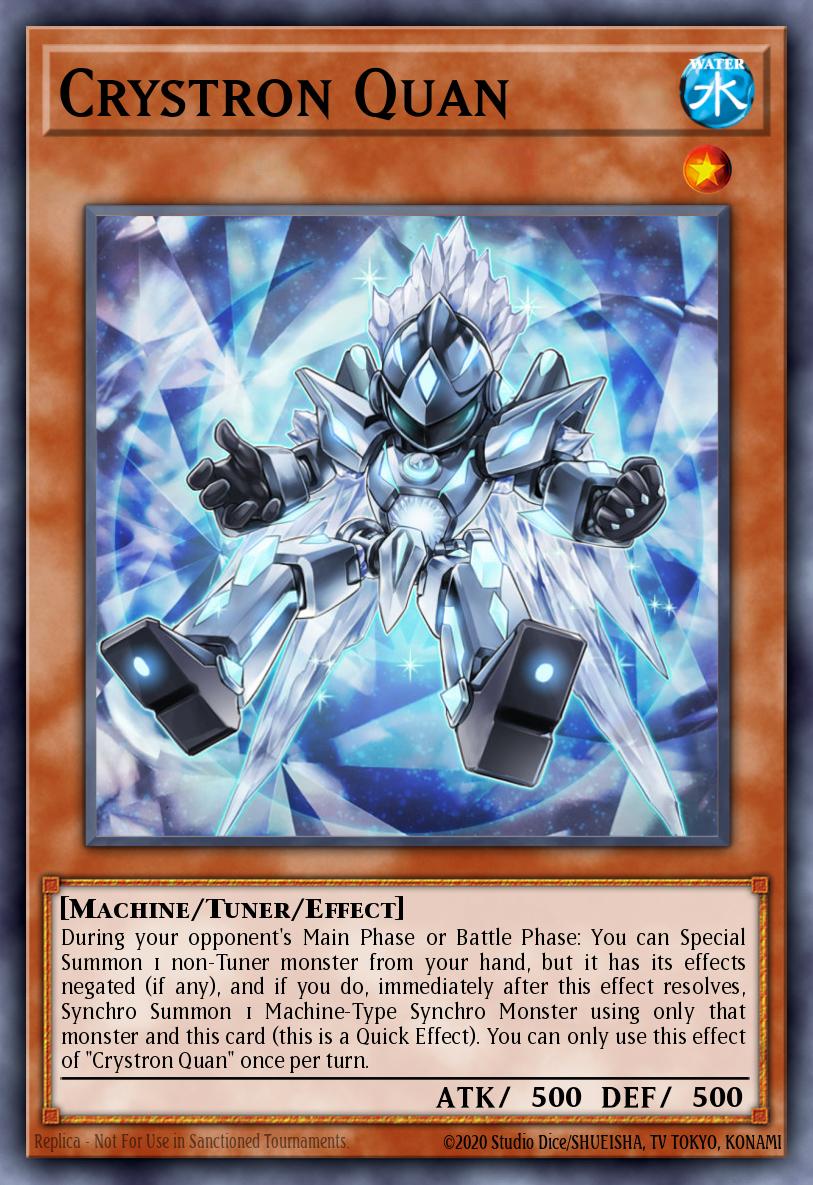
1Crystron Quan
ATK:
500
DEF:
500
During your opponent's Main Phase or Battle Phase: You can Special Summon 1 non-Tuner monster from your hand, but it has its effects negated (if any), and if you do, immediately after this effect resolves, Synchro Summon 1 Machine-Type Synchro Monster using only that monster and this card (this is a Quick Effect). You can only use this effect of "Crystron Quan" once per turn.
Quan has an advantage over Citree , if you have a hand with Citree without a monster in your graveyard or a way to send one then you won't be able to use its effect, while Quan will let you Synchro with monsters in your hand, saves you from a really bad brick hand situation, the downside is that Quan is level 1, which will be limited to level 6 and 7 synchro monsters, so no Scrap Dragon for example.
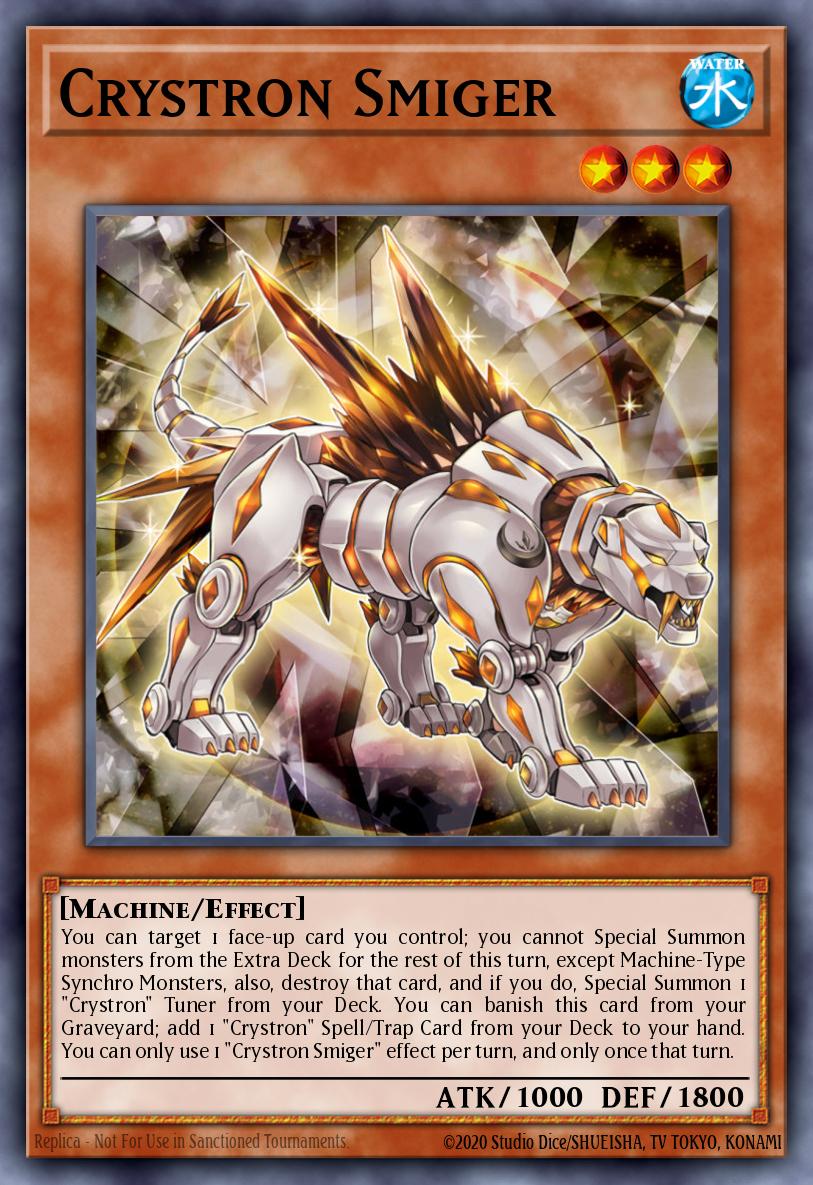
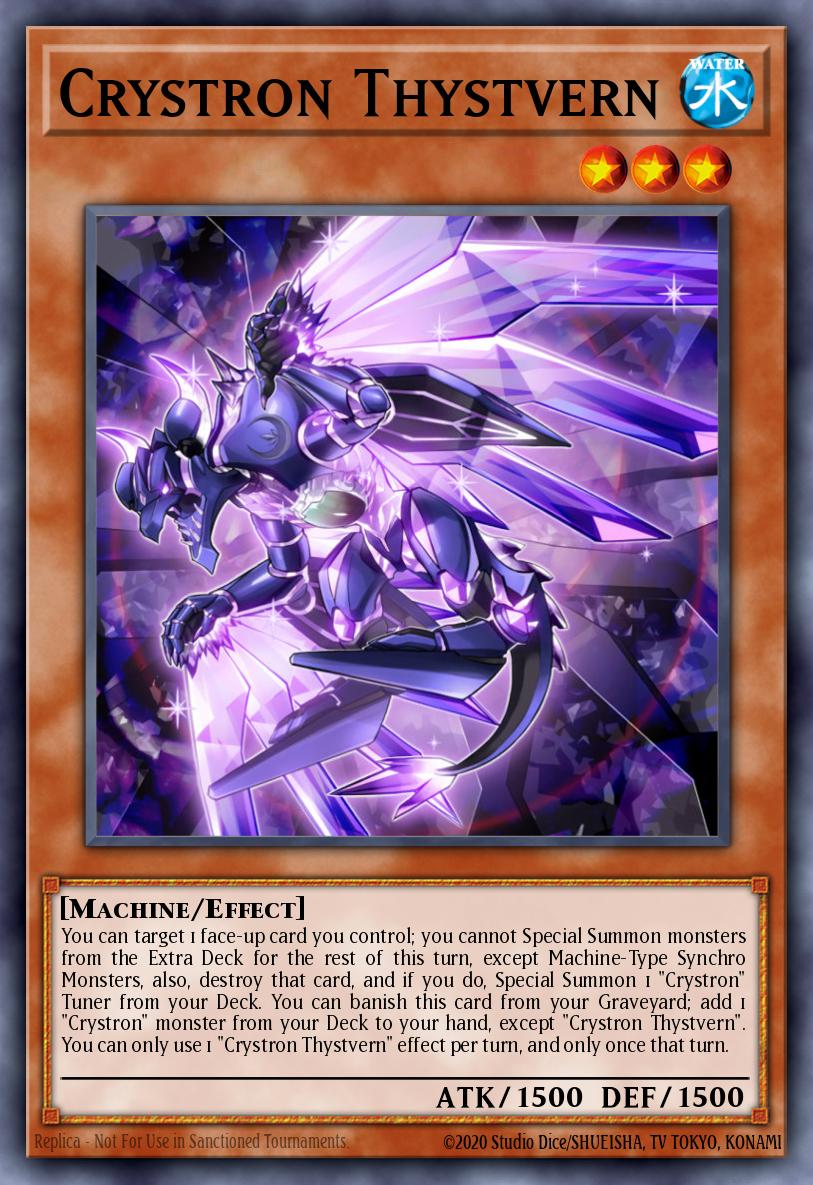
Crystron Rosenix, Crystron Smiger and Crystron Thystvern (Các searcher cho tuner)
 WATER
4
WATER
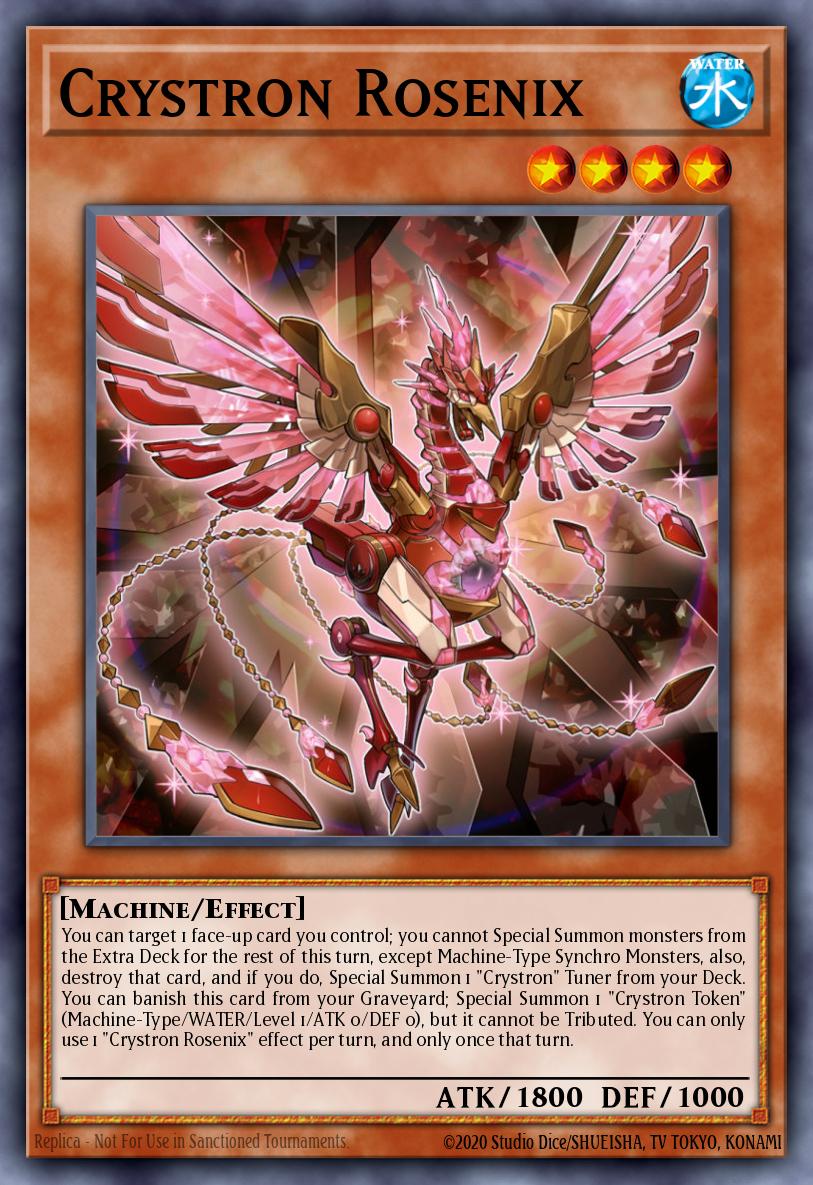
4Crystron Rosenix
ATK:
1800
DEF:
1000
You can target 1 face-up card you control; you cannot Special Summon monsters from the Extra Deck for the rest of this turn, except Machine-Type Synchro Monsters, also, destroy that card, and if you do, Special Summon 1 "Crystron" Tuner from your Deck. You can banish this card from your Graveyard; Special Summon 1 "Crystron Token" (Machine-Type/WATER/Level 1/ATK 0/DEF 0), but it cannot be Tributed. You can only use 1 "Crystron Rosenix" effect per turn, and only once that turn.
 WATER
3
WATER
3Crystron Smiger
ATK:
1000
DEF:
1800
You can target 1 face-up card you control; you cannot Special Summon monsters from the Extra Deck for the rest of this turn, except Machine-Type Synchro Monsters, also, destroy that card, and if you do, Special Summon 1 "Crystron" Tuner from your Deck. You can banish this card from your Graveyard; add 1 "Crystron" Spell/Trap Card from your Deck to your hand. You can only use 1 "Crystron Smiger" effect per turn, and only once that turn.
 WATER
3
WATER
3Crystron Thystvern
ATK:
1500
DEF:
1500
You can target 1 face-up card you control; you cannot Special Summon monsters from the Extra Deck for the rest of this turn, except Machine-Type Synchro Monsters, also, destroy that card, and if you do, Special Summon 1 "Crystron" Tuner from your Deck. You can banish this card from your Graveyard; add 1 "Crystron" monster from your Deck to your hand, except "Crystron Thystvern". You can only use 1 "Crystron Thystvern" effect per turn, and only once that turn.
The difference between them in this deck is their level and 2nd effect.
- Rosenix can be banished from the GY to special summon a Token that can be used as material or as a target for Scrap Dragon 's effect.
- Smiger can be banished from the GY to add Crystron Impact , which can protect Crystrons from being targeted.
- Thystvern can be banished from the GY to add another Tuner for the next play at a later turn. If you decide to use any of them, you should consider adding a copy of Crystron Ametrix to your Extra Deck.
Techs
Of course, we cannot help but mention the Techs to increase TD's strength. Depending on the Meta, you will use different Techs with a focus on using Techs that can handle most matches.
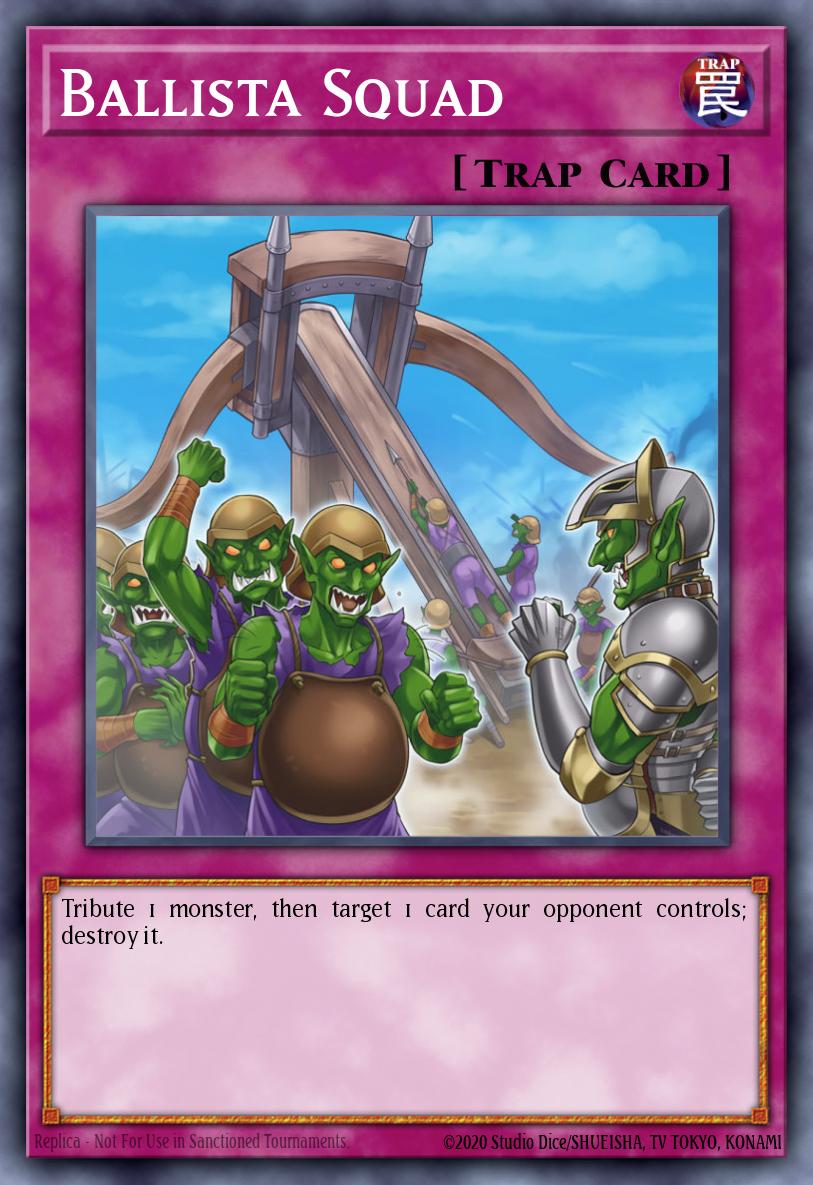
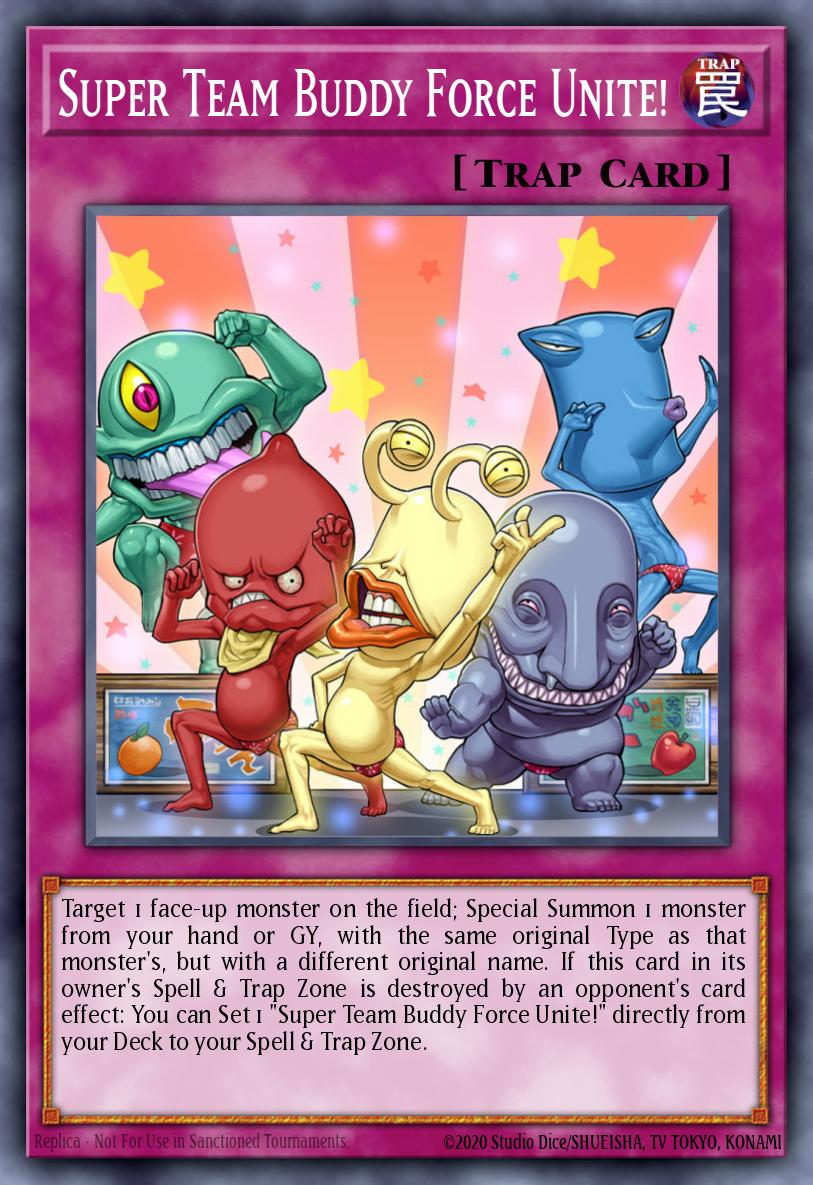
Ballista Squad and Super Team Buddy Force Unite! (Tech sử dụng Token)
 Trap
Normal
Trap
NormalBallista Squad
Tribute 1 monster, then target 1 card your opponent controls; destroy it.
 Trap
Normal
Trap
NormalSuper Team Buddy Force Unite!
Target 1 face-up monster on the field; Special Summon 1 monster from your hand or GY, with the same original Type as that monster's, but with a different original name. If this card in its owner's Spell & Trap Zone is destroyed by an opponent's card effect: You can Set 1 "Super Team Buddy Force Unite!" directly from your Deck to your Spell & Trap Zone.
These cards have additional synergy with Batteryman Solar and Thunder Dragons 'Hundred Thunders'
Handtraps
Hand Trap, not only can help fill up your GY to help summon Chaos monsters, but it also fits well into the deck, as you always have cards in your hand that can be used to block or protect
Tech Traps
These cards have disruption with a discard option that can help with bricking but is better in a control-focused deck
Tech Backrow removal
These cards will help you to remove your opponent's backrows if they play a style that is too dependent on backrows like Shiranui.
Tech against Discruptions
Some other options to help you avoid effects and disruptions coming from your opponent.
Combos
The truth is that TD's combos are very numerous. Therefore, it is difficult to know all the combos of this deck and this article cannot guide you through all the combos. However, for reference, here are some combos you need to know
Combo Turn 1 #1
- Start with summoning Aloof , using the special ability to banish Dark or Roar (depending on the card in your hand). Continue Aloof's effect, banish Roar or Dark (If you banished Roar, now banish Dark and vice versa)
- Dark's effect will bring a Thunder Dragon card into your hand (you'll want Hawk ). Roar's effect will summon a TD monster to the field from the deck but it will return to the hand during the End Phase (you will usually want a level 6 or 5 monster to Xyz).
- Use Hawk's effect to summon a TD card from the grave or banish (depending on the monster you want, if you want Xyz for Rank 5 then it's Dark, Xyz for Rank 6 then it's Hawk)
- At the end of your turn, if you do not summon Xyz, the card summoned to the field by Roar will return to your hand.
Combo Turn 1 #2
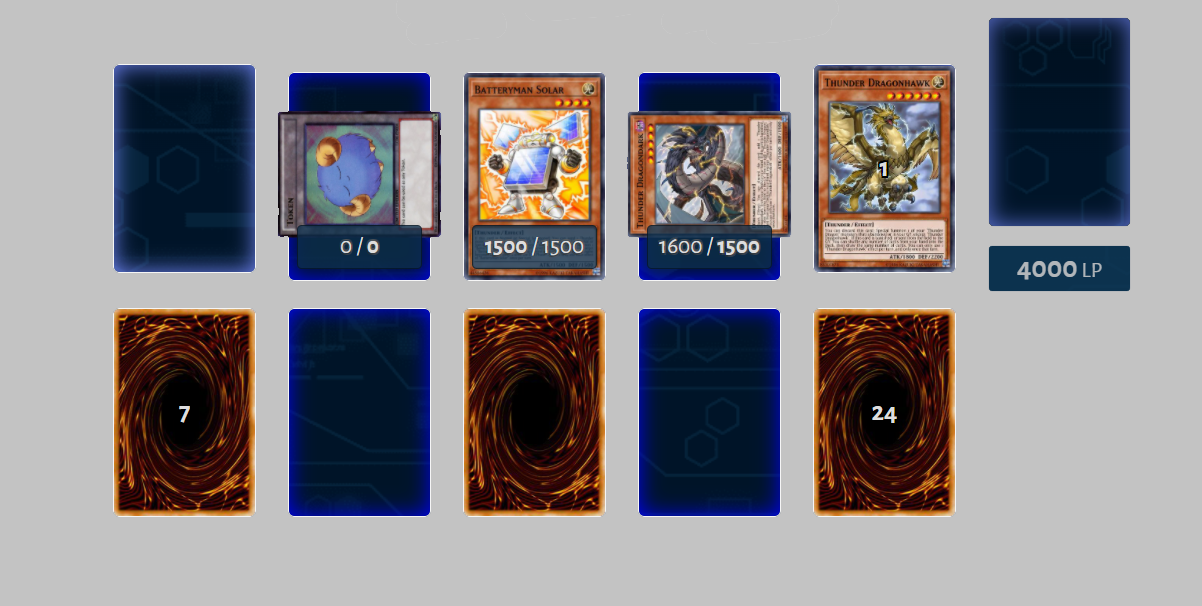
- The combo will start with your starting hand consisting of: Batteryman Solar, Hawk, Ballista Squad and possibly another TD monster with a star level equal to 5 or 6 or simply Plasma .
- Normal summon Batteryman Solar , bringing a Dark or Roar to the grave.
- Using Hawk's ability, drop it to the grave to summon the Roar/Dark you sent to the grave thanks to Solar
- Because you just summoned a Thunder monster, Solar will summon another Token
- Depending on how you setup, you may summon Plasma and thanks to the effect of Dark/Roar leaving the field, you will bring a TD card to your hand/summon a TD monster to the field and it will return to your hand at the end of the End. Phase. Or use Ballista Squad in hand, set it down and keep the field as it is, Ballista will help you make good use of your Tokens to destroy an opponent's card.
Combo Turn 1 #3

- Use Gold Sarcophagus in hand along with Roar or Dark . Banish Roar from the deck to summon Dark to the field
- Summon Roar or Dark to activate the ability of the sacrificed Dark, bringing Hawk to your hand
- Using Hawk, summon Dark back to the field. At this time, if the field remains the same, even if targeted by the opponent, the TD monsters can activate their abilities. But to be more optimal, you should summon Dark right from step 2 so that you can summon Xyz Rank 5 if you go behind your opponent to easily make things difficult for them.
Combo Turn 1 #4
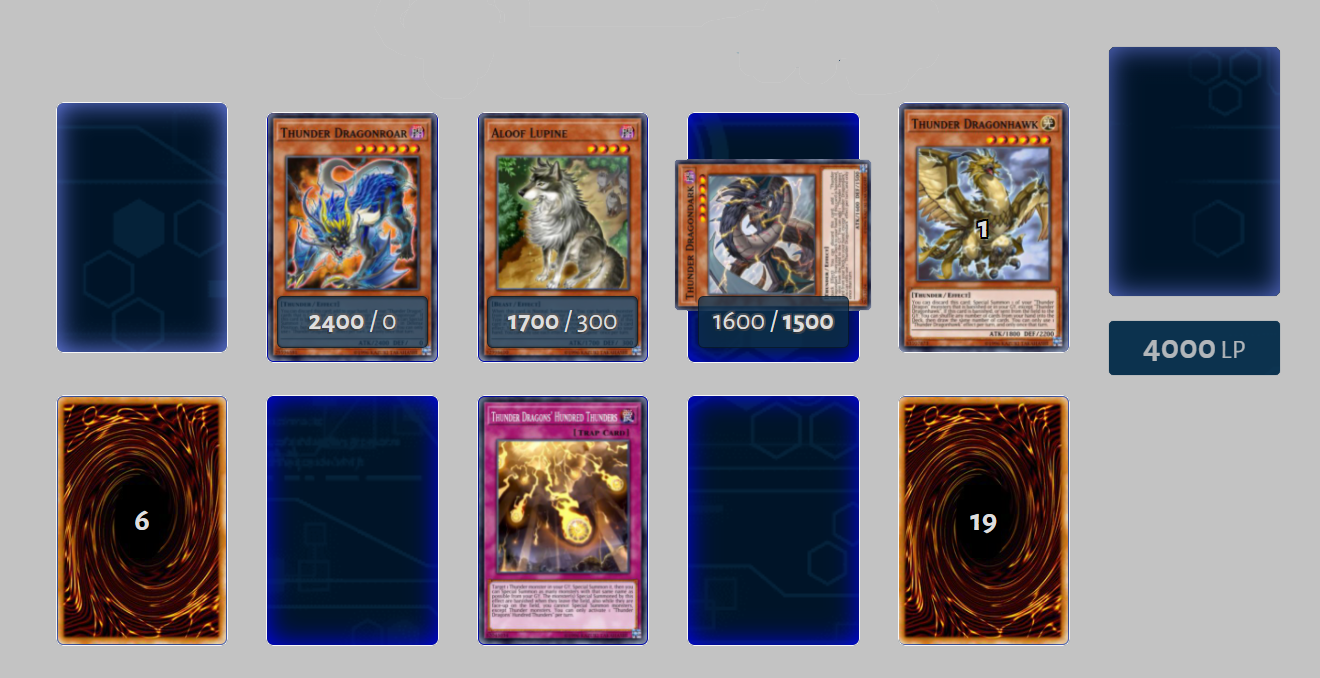
Anti Bounce Combo (Combo to prevent returning to hand)
- You will need Roar or Thunder Dragons' Hundred Thunders , another Thunder Dragon card Roar ( Hawk or Dark ) in your starting hand, and a banishable card ( Aloof for example). Use a banishable card to banish 1 Dark or Hawk. The specific case is using the gray wolf Aloof for expulsion. Dark will exert the effect of bringing another TD card into your hand (If your starting hand has Roar, bring TDHT and vice versa), while Hawk will exert the effect of putting a card from your hand into the deck and Shuffle the cards (Usually if you have extra cards you don't need, use them)
- Use Roar to bring Hawk back to your hand and use Hawk to bring Dark to the field
- Set up TDHT and bring Roar from the grave to the field during your opponent's turn. Thus, you will have a field against which the targets will be returned to your hand or expelled or destroyed. Roar will activate its effect in any case (similar to Dark but Aloof only activates when destroyed), giving you another set of fields if the current set is wiped out. Even when facing the Abyss Dweller, you won't have to fear it as its grave locking ability doesn't affect Roar.
Combo Turn 1 #5
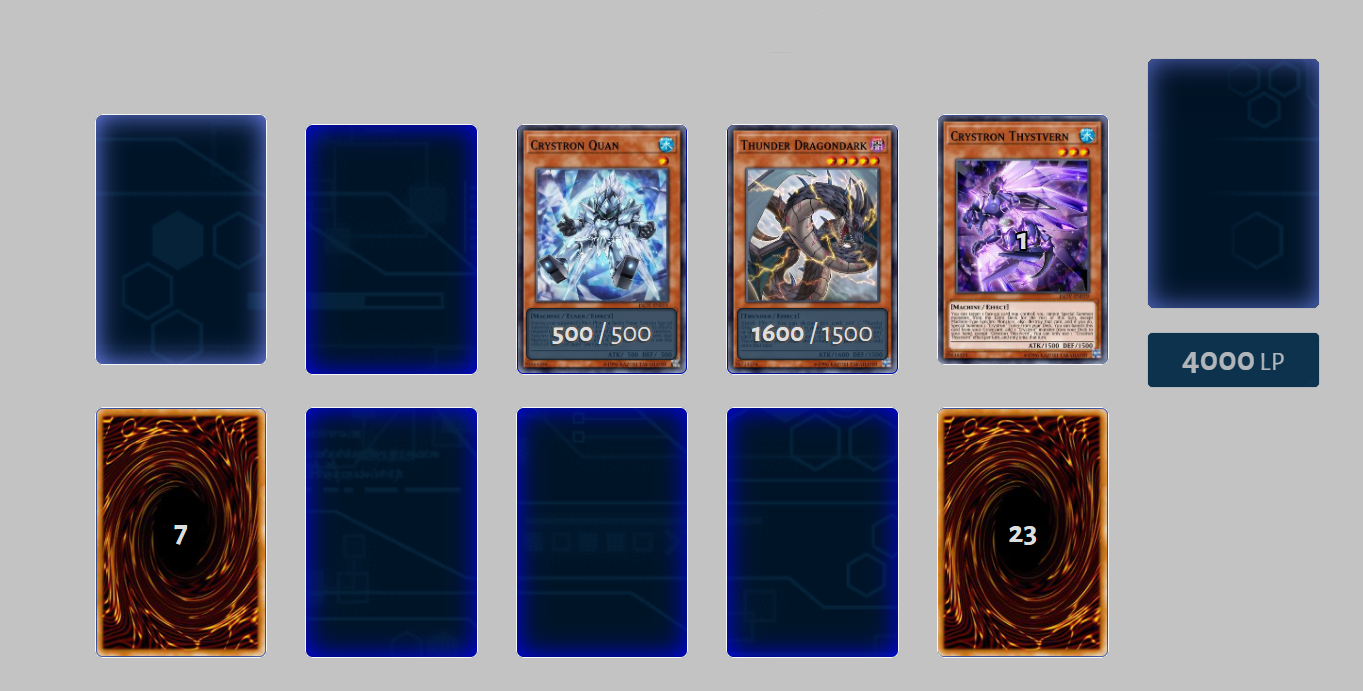
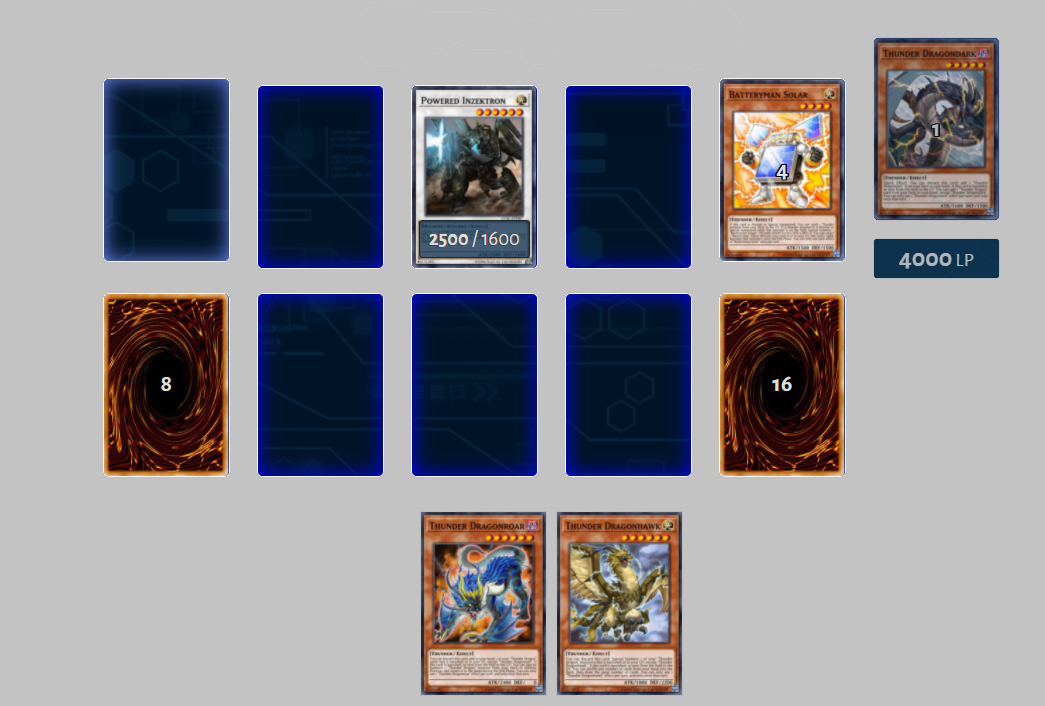
Crystons Combo
- Crystron's combo will start with Crystron Thystvern or if you're lucky, you'll have a Tuner Crystron monster ( Quan or Citree ). Use Thystvern to summon a Tuner from your deck or directly summon a Tuner from your hand (If you have one) and end your turn (If you use Thystvern, your next turn will bring an additional Tuner to your hand) .
- The Tuner's special ability will help you summon Synchro right during your opponent's turn. Therefore, depending on the Tuner monster, you will have 2 options:
- Summon a monster from the grave if it is Citree
- Summon a monster from your hand if it is Quan
- Synchro a monster from the Extra Deck using available materials thanks to Tuners (Normally the materials will be Tuner and 1 TD monster). The monster you'll want to bring in the case pictured is Powered Inzektron to protect your side of the field next turn. Note: TD monsters summoned by Tuners will have their effects disabled as long as they are on the field, but when they leave the field, they can still activate their effects, so it depends on the situation. you should bring that monster onto the field.
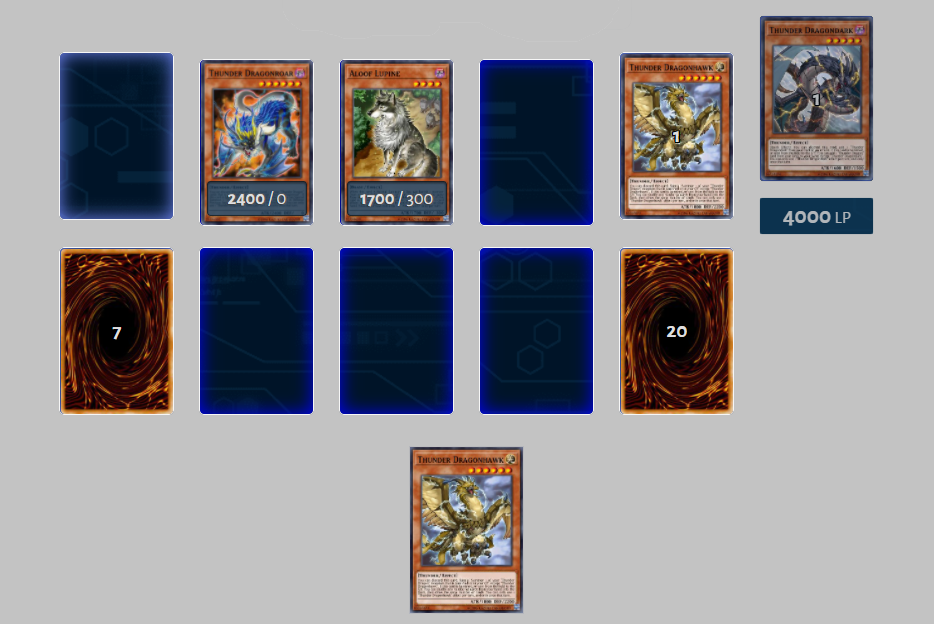
Combo Turn 1 #6
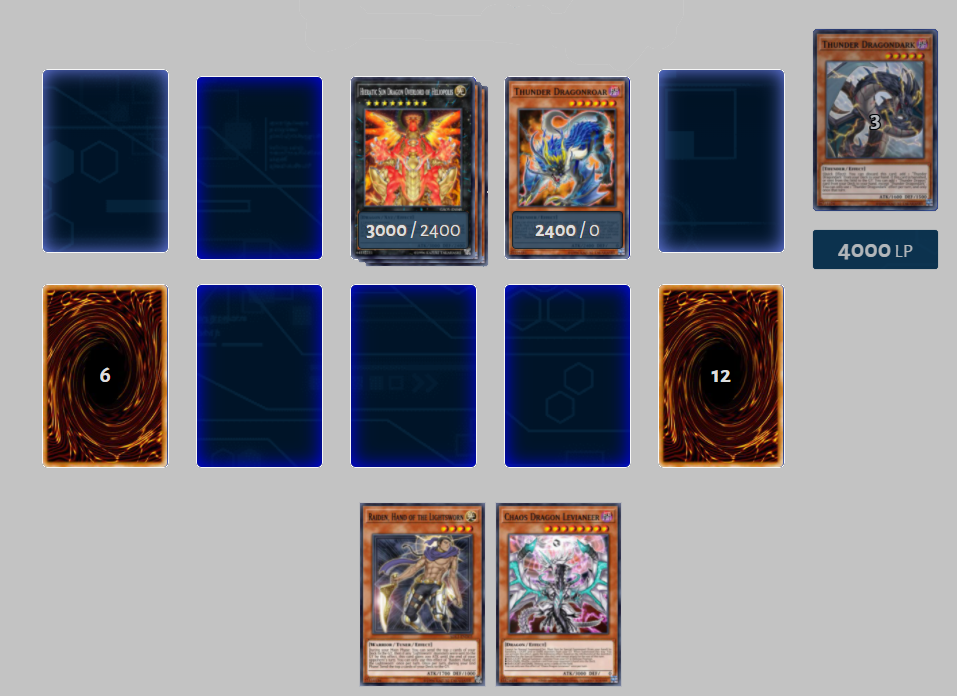
Turn 1 Levi
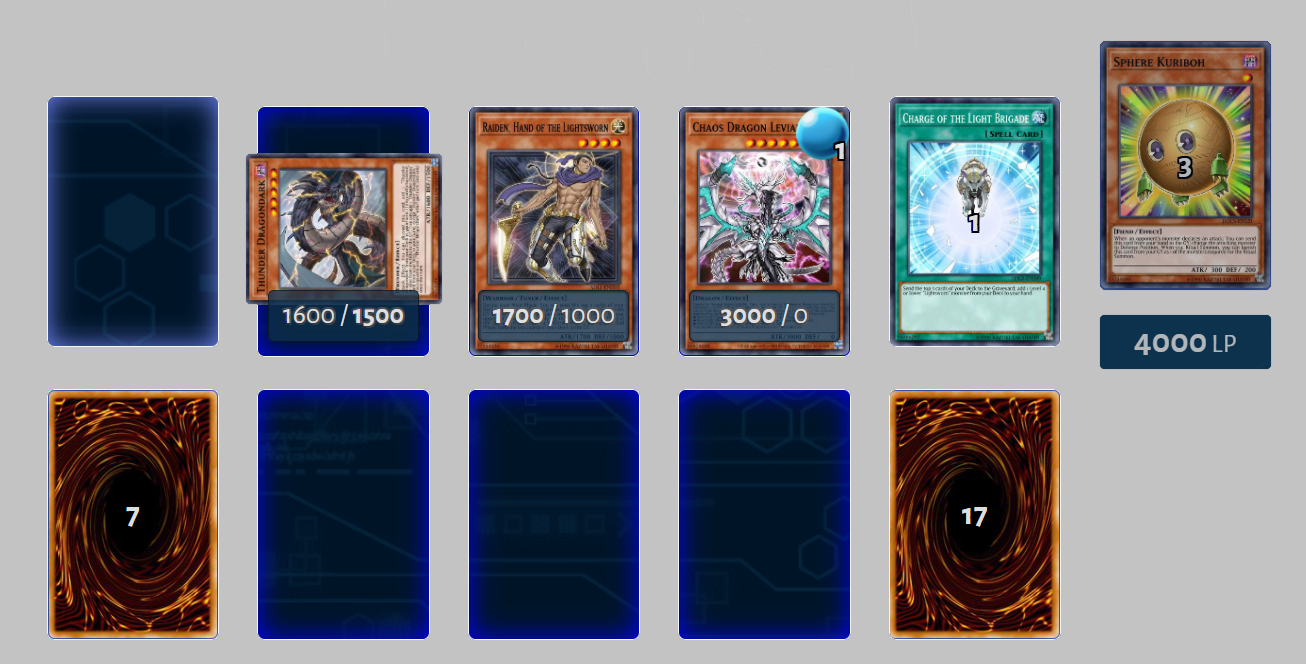
- The starting hand will always have Charge of the Light Brigade and 1 Levi . Use COTLB to bring the top 3 cards of the deck to the grave (This creates the premise to make materials for summoning Levi). Get a Raiden in your hand.
- If the 3 cards you send to the grave are not enough to summon Levi, use Raiden to bring 2 more cards to the grave.
- Use the resources in the grave to summon Levi. At this point, there will probably be at least one TD card so you can activate its ability (If you don't have one, you're pretty unlucky). As shown in the image, the effect of a Roar in the grave brought a Dark to the field. Then, depending on the material, you can use Levi's effect effectively.
- After activating the effect, Levi will not be able to attack, but it is not a problem for you because you can use it and Raiden to Synchro a new monster.
Combo Turn 1 #7
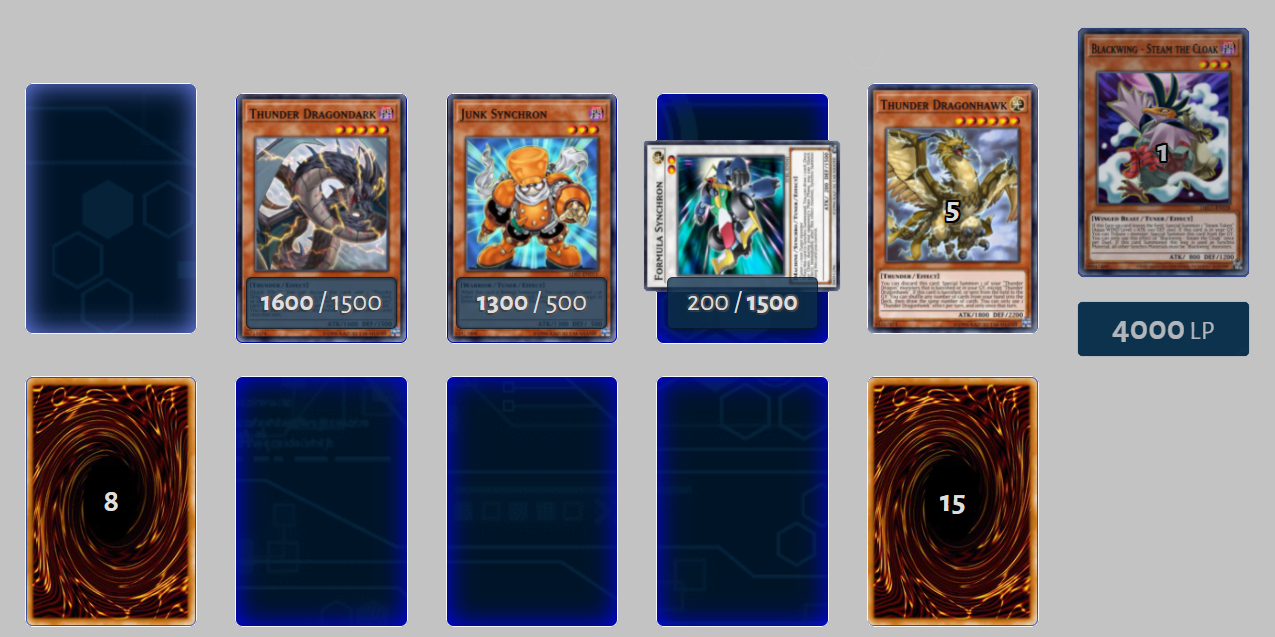
Formula Synchron to Black Rose Dragon #1
Because of the variety of ways you can use F.Syncron to bring out your main monster, I'll cover a few ways you can use it in this deck:
- Summon F.Syncron, it will allow you to draw a card. Normally you will take advantage of this ability to draw a TD card ( Hawk or Dark ) when you have another TD card (Hawk or Dark) in your hand. If you have Gold Sarcophagus in your hand, you just need to draw an additional card to add support.
- Use Gold Sarcophagus ( or Dark + Hawk combo is fine) to banish Dark, bring it to Hawk's hand, put Hawk in the grave to summon Dark. At this point, you don't want to rush Synchro, wait until your opponent's next turn and use F.Synchron's ability to Synchro right on their turn and bring Black Rose Dragon out to destroy their field. After Synchro, Dark's ability is activated again, you will want to bring a Hawk or Roar into your hand depending on the situation and the deck your opponent is using (Is it disruptive?)
- If you use Roar, you need to bring Hawk up to summon Dark again, if you use Hawk then just use it to bring Dark onto the field and thanks to Skill Mark of the Dragon - Head , you will continue Get closer to Junk Synchron , use it to bring F.Synchron onto the field. Summon Stardust Dragon to the field, continue to summon Shooting Star Dragon and thanks to Synchro, Dark once again activates his ability, you can bring a Duo to your hand and use materials in the grave to summon it. .
Combo Turn 1 #8
Formula Synchron to Black Rose Dragon #1
This combo requires Solar, DD Sprite, Dark + Roar (or Gold Sarc + Hawk ):
- Summon Solar to bring 1 Hawk to the grave, use Dark to bring up another Dark from the deck.
- Use Roar in your hand to get Hawk into your hand. Use Hawk to summon Dark in the grave. Since you summoned a Thunder-type monster, Solar will activate its effect, summoning 1 Token.
- Banish Solar and bring DD Sprite onto the field, summon F.Syncron and continue with the Black Rose Dragon combo. This time, you will have more TD monsters in your hand and unlike in the previous combo, you will play in favor of TD rather than Synchrons.
Combo Turn 1 #9
Similar to Combo Turn 1 #8 , but the monster you want to bring out will be Powered Inzektron . Therefore, you will need to keep Solar on the field to create enough stars for Synchro to Inzektron.
Combo Turn 2 #1
- Taking the next turn is a huge advantage for the TD player. For example, in the first step of this Combo, if you have Tech cards in your hand as shown in the picture, your monster can completely avoid the opponent's backrow. But this is not the main content of step 1, you will need to use Gold Sarc and a 2-star Tuner. Use Gold Sarc to banish Roar , bringing Dark onto the field.
- Summon a 2-star Tuner, Synchro it with Dark to bring Black Rose Dragon to the field. At this time, BRD's effect will chain 1, Dark chain 2 (Dark will bring 1 TD - Duo to your hand first, BRD will destroy the entire back yard). Opponents will often target BRD with counter traps but will not be able to because of the effect of the TD blockchain (blocking the chain).
- If you have a Hawk in your hand, use Hawk to bring Roar back to the field. Summon Duo to the field because you now have enough materials in your grave. If you want to Synchro again to ensure your OTK turn, make sure the Tuner monster you used in step 2 is Plaguespreader Zombie , return a card from your hand to the deck and proceed to Synchro.
Combo Turn 2 #2

This combo is similar to Combo Turn 1 #6 . When you use Charge of the Light Brigade , it will give you more options when summoning Levi . As shown in the picture, you will probably have Roar and Dark in your grave and thanks to the banish effect, they can bring you options to Xyz Rank 6 . Note, because you go to Turn 2, you will want to summon Levi first to activate its ability, then start using the TDs' abilities. Since you never know what your opponent's backrows have, it's wise to use Levi to bait them.
Combo Turn 2 #3

This combo will use the Solar system more, your hand will need Solar, DD Sprite , Roar and Hawk :
- Summon Solar, bring Dark to the grave, use Hawk to bring Dark to the field, summon 1 Token
- Summon DD Sprite, summon Coral Dragon with it and Dark. Dark activates the effect, bringing Duo to his hand.
- Take advantage of Coral's ability to destroy a card on the field (usually the backrow). Leave Roar in the grave as Coral's waste.
- Synchro uses Coral and Tokens to bring Zeta (or another level 7 Synchro monster) onto the field. And due to Coral's ability, you get to draw one card
- Banish DD Sprite and Roar to summon Duo, use Roar's effect to bring Hawk onto the field (The purpose is to thin the deck and prepare for the next turn)
Combo Turn 2 #4
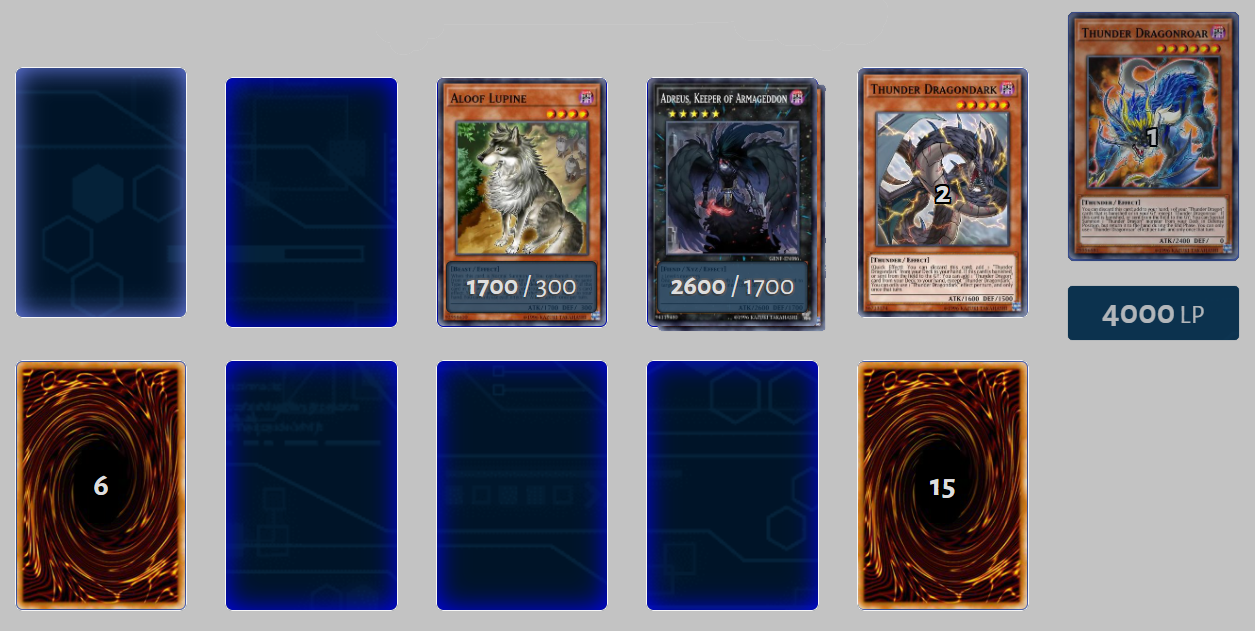
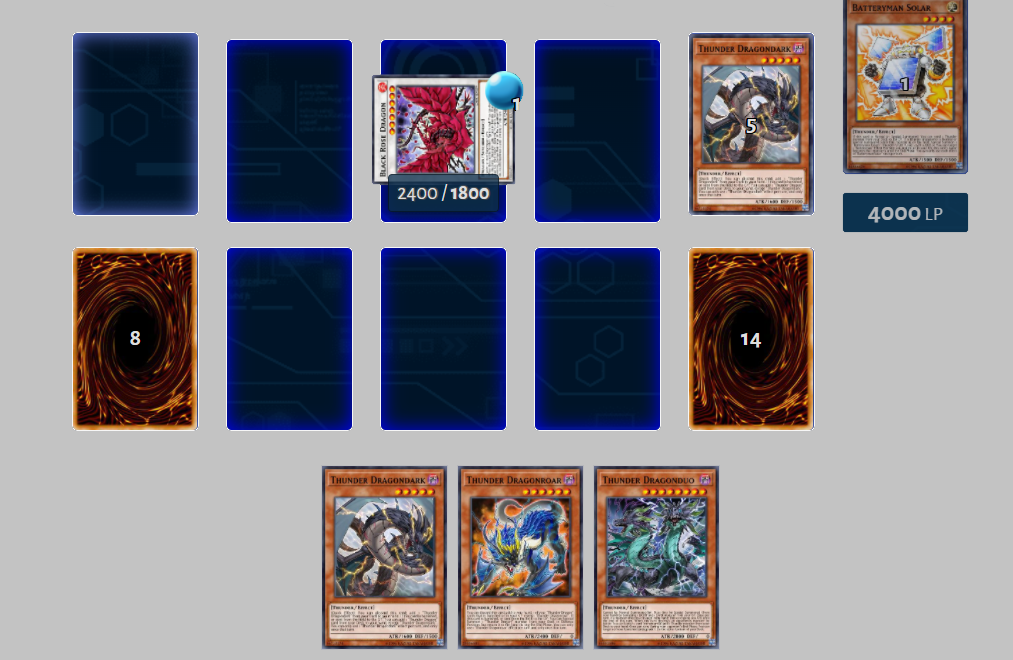
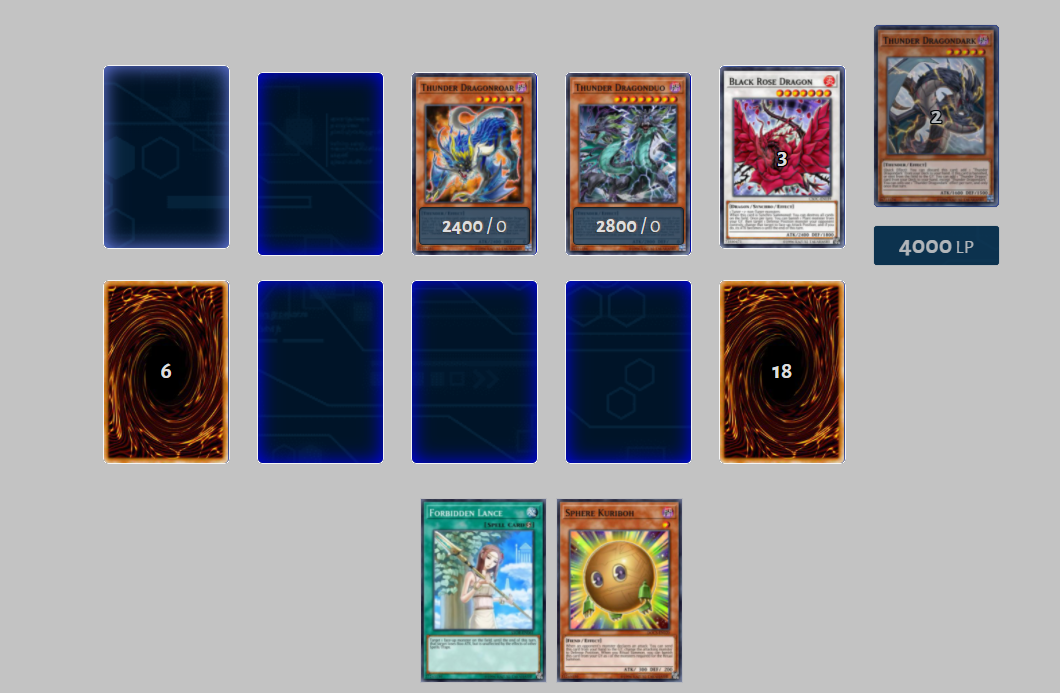
Aloof to Xyz Rank 5
Your starting hand only needs to have Aloof and Dark or Roar to be able to use this combo to destroy an annoying card from your opponent:
- Summon Aloof, banish Roar and Dark (no matter which of those two cards you have in your hand, any order is fine). Dark's ability gives you Hawk , Roar's ability brings another Dark to your field
- Use Hawk, bring the banished Dark back to the field
- Xyz Rank 5, the case in the picture is Adreus - a monster capable of destroying a face-up card on the opponent's field.
Combo Turn 2 #5
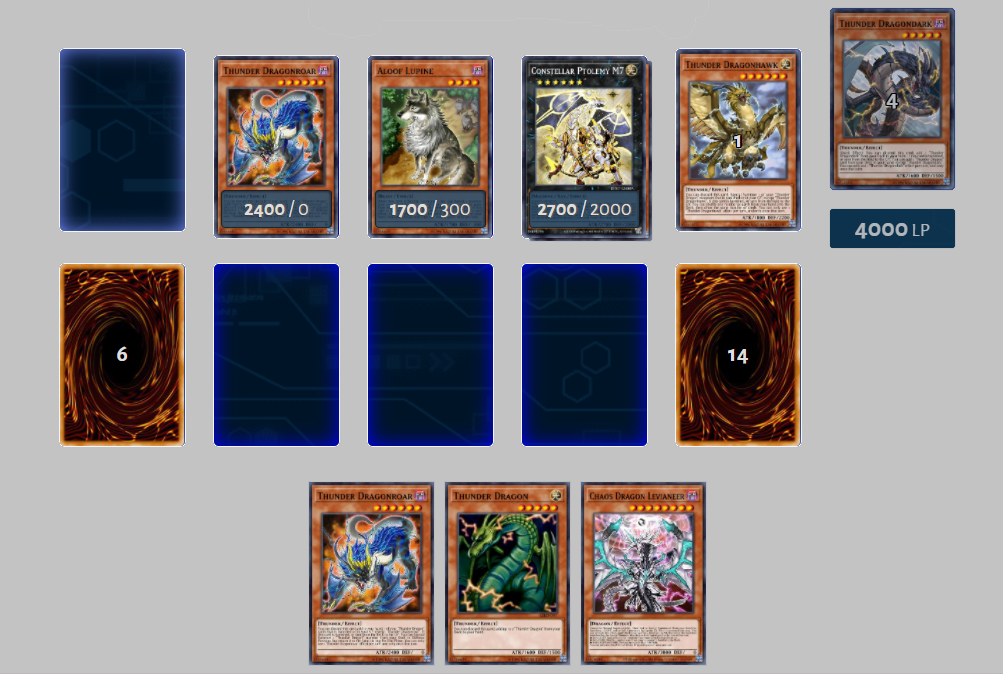
Thunder Dragon prototype
- In your hand you will need Aloof, Hawk, Dark or Roar, Levi. Because it's the next turn, if your hand has Dark, you can use its effect right on your opponent's turn to thin out the deck. Use Aloof to banish Dark and Roar (whether in hand or deck). Use their effects so that you have a prototype Thunder Dragon in your hand and a level 6 on the field.
- Use Thunder Dragon to continuously fill GY with it, as material to summon Levi (In the grave you will have 1 Dark and 2 TD). Summon Levi to destroy 2 cards on the field
- You won't be able to attack now, but you can use Skill Level Duplication to turn the (now useless) Levi into a level 6 (or other level depending on the monster on the field and your hand) to continue summon Xyz. In the picture will be M7 - has the ability to allow you and your opponent to regain 1 monster card on the field or in the graveyard. At this point you will have 2 options:
- If your opponent has no backrows and only 1 monster left, return that monster to their hand and OTK
- If the opponent has too dense a field to destroy, bring Levi back to your hand, use Hawk to bring Roar back to the field to both defend and search for cards for the next turn.
Combo Turn 2 #6
Use Roar as a Searcher
- Your starting hand will have Aloof, Roar and Dark . As I said in the previous combo, because you go last, you can use Dark to thin your deck during your opponent's turn. Next, on your turn, you will use the Aloof in your hand to banish Dark and Duo . Dark will give you Hawk , Duo has no effect but you can get it back through Roar.
- Use Hawk to summon Roar from the grave, and then you have enough materials to summon Duo. Remember, you drew a card when it was your turn so hopefully it will be a level 8 monster like Levi .
- Use Skill to turn weak Aloof into a Rank 8. Xyz into Rank 8 Heliopolis . Use its ability to sacrifice yourself to destroy your opponent's cards.
- Because of the departure of Heliopolis, your tomb now has all the ingredients to summon Levi, for example.
Combo Turn 2 #7

This combo will not necessarily be used on turn 2 but can be used after you have survived your opponent's attacks and you have no cards left in your hand. What you need is to have Chaos Betrayer in the grave, the focus of the combo will be using it a lot:
- Use Betrayer's effect in the grave, banish 2 cards (1 LIGHT, 1 DARK) to summon it. You will want to banish Roar and another LIGHT monster. When Betrayer is on the field, it banishes a card from your opponent's graveyard, and if you banished Roar, it allows you to have another level 6 monster on the field.
- Xyz is Rank 6 M7 , use its effects depending on the situation you are facing. If you want to be sure, it's better to get Levi's hand.
- Summon Levi and destroy 2 of the opponent's cards and so continue with the combos of the TDs that I have instructed. You will get a very wonderful yard.
Combo Extra Deck + TD
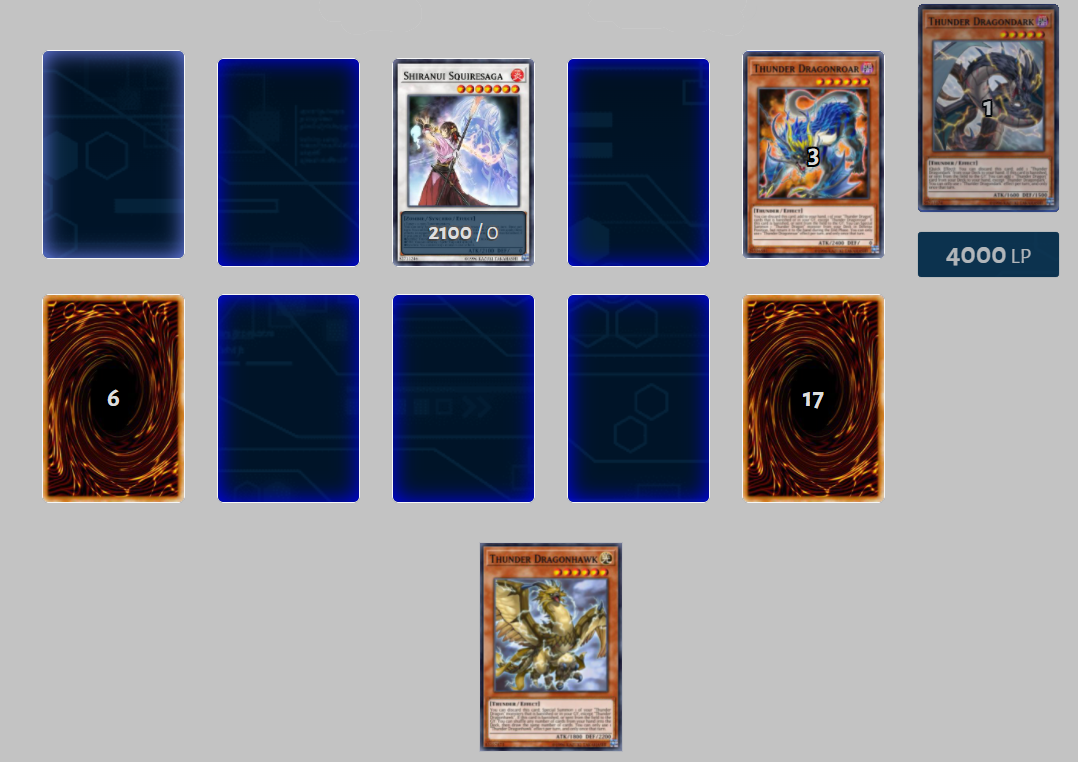
The main purpose when I introduce this combo is to show you how well the combination between the Extra Deck and the deck works. In this combo, our main character will be Shiranui Squiresaga :
- You can use any 1-star or 2-star Tuner (recommended are Plaguespreader Zombie and Glow-Up Bulb ), use them as a sacrifice with Roar or Dark - as shown in the picture, it will be Roar and Glow-Up Bulb.
- Thanks to their special abilities, Bulb and Plaguespreader will return to the field on their own. Synchro then brought Squiresaga onto the field. By leaving the field, Roar and Dark will activate their effects:
- Roar: Summon Dark from the deck to the field
- Dark: Bring Hawk to hand
- Squiresaga can banish one card from the field and from your graveyard. This is a great ability to further trigger TDs' effects. No matter the outcome, you will have a Hawk on your hands.
- Use Skill to turn Squiresaga into a level 6. Use Hawk to bring Roar to the field. Xyz them to M7 and continue your turn.
Combo Extra Deck + TD

- This combo only requires you to summon Scrap Dragon first with Roar, Roar brings 1 Dark to your field
- Use Scrap Dragon's ability and destroy 1 Dark and 1 card of your opponent. This activates Dark's effect, bringing 1 Hawk to your hand.
- Leave Hawk in the grave to bring Roar back to the field
Resource management
This deck can use a lot of resources from Hand, GY, and Banish because you have options to bounce around between them. Knowing which resources to keep in GY or Banished can be great for optimizing your play and having better options for the next turn.
This won't always be the optimal turn or you might not even get to the next turn, but getting used to these little details will improve your resource management skills, so when you play these The longer the game, the better your chances of winning:
When you summon Chaos monsters, you usually banish Dark and Roar to activate their effects, sometimes even Hawk, it's important to keep extra of those monsters in your GY for the next turn , so if possible, try to banish other L&D monsters instead of adding Thunder Dragon , for example if you used Thunder Dragonhawk to special summon Thunder Dragon then this turn keep a Hawk in your GY can give you the option to Shuffle the cards in your hand earlier on your next turn by banishing it to summon a Chaos monster.
Banishing Thunders first, then adding or summoning banished Thunders with the effects of Roar and Hawk will allow you to keep more resources in your GY.
Banishing techniques can allow you to add them with Thunder Dragonduo 's effect during your opponent's End Phase or apply pressure to deal with your Duo, possibly leaving something else on your field that you have can take advantage, for example if you have Constellar Ptolemy M7 and Thunder Dragonduo on your field, they may not have a way to deal with both.
Keeping a T hunder Dragondark in your deck can be useful instead of thinning your deck during your opponent's turn to get Dark in your GY. Because it will allow you to summon from your deck to play with it by activating Roar's effect, from banish from your deck, GY, or even sacrifice summon against it.
Use the Roar effect to add Hawk, that way you can have Roar in your GY for the next turn as an additional way to get monsters onto the field.
How to cause deadly damage
To determine lethality, try using these steps to help you:
- You should consider what you have to deal with: possible face down cards, floating monsters (when you attack, it will be summoned to the field to defend), hand traps
- What tools do you have at your disposal, including monsters from your Extra Deck, cards in your Hand or GY like Chaos Dragon Levianeer , monsters you sacrifice summon (like a monarch or Odd-Eyes Advance Dragon ), and how you can activate Dark or Roar.
- You can place as many monsters on the field to deal damage and create Xyz or Synchros to deal with your opponent's field.
- In this case, you can use the Hawk effect, Duo Summon, Levianeer, Normal (if you don't need a sacrifice summon) and the Roar effect can serve as a summon from the deck or to continue Summon Duo by having 1 LIGHT monster in GY (also if you need to search one of them).
- You should now arrange your turns in the best way to play around the game variations you don't know about, face cards and hand traps.
- This can be done as soon as you have enough options to play through all of them.
- Consider whether you should try to clear your opponent's field:
- If you can't get through the worst-case scenario but you can survive another turn, maybe just wait a turn while perhaps setting up more options for the next turn if giving them a turn won't do. harder OTK them next turn. But most importantly, try not to waste resources, like summoning Levianeer as a set and a monster you can use in battle.
- If you cannot overcome the worst case scenario nor survive the turn, you should play as if it is not the worst case scenario as this is probably your best chance of winning the game.
Setup for the next turns
As I mentioned before, you should always consider all of your possible plays and the best way to use Thunder Dragons' effects (since you can only use one of the effects). In this section, I'll list some things you should accomplish to have a good yard and move on.
- What you should leave on the field.
From the safest part of the yard to the least safe:
- Roar, will give you the option to float if expelled/sent to GY
- Hundred Thunders, superfluous monsters and to create a destruction
- Hand trap, gives an idea of possible OTK to your opponent with over attack, making it easier for you to defeat them
- Backrow, can be broken but can also make your opponent wary.
- Aloof on the field will generate a return resource if destroyed, and with Gold Sarcophagus banishing {Chaos Dragon Levianeer} will make your opponent try their best not to trigger Aloof Lupine's effect .
- Summon Number 25: Force Focus or Photon Strike Bounzer is only valuable if you know its effect will have an impact, otherwise it's just a waste of resources.
Leaving Dark on the field is a greedy turn that you can ignore if your opponent doesn't have an aggressive deck. Leave Dark's settings for the sacrificial summons to search. Also, in case you have 2 monsters (Dark and Roar / Aloof) if you normally summon a Tuner and it is flipped, you can use a card like Trishula, the Dragon of Icy Imprisonment to discard the Tuner get face down (mainly if there is a liability or if you can advance the game) while getting at least one search from Dark.
- What you should always prioritize having on hand to follow up on another turn:
- Hawk
- Roar
- Duo The reason is
Hawk is the best continuation in this case:
- Revive Roar to keep a safe field
- Summon a monster to Synchro with or use roar as a sacrifice to activate its ability during an Xyz play (Summon of the same level as the sacrificed summoned monster)
- Keep summoning Duo to keep the pressure on.
Roar:
- To add Duo, could be an option to get the banish effect from Dark, to search for Hawk or Matrix.
- To recycle Hundred Thunders
- To recycle the Hawk in case you can't turn it on first
Duo:
- Only if there are no other targets or if you want to keep those targets in the deck
- Other turn 1 options
- Summon Duo to banish a Levianeer or a tech in your GY so you pressure your opponent to deal with it, otherwise you can put it on top of your deck.
- Summon Chaos Dragon Levianeer by banishing 3 DARK monsters. The effect of shuffling a card from your opponent's hand can be very punishing against decks that use skills that modify their hand, such as Balance . This doesn't guarantee anything, and is only worth it if you can set up for the next follow-up, by using that Levianeer for Synchro or XYZ, then adding to your hand with the Constellar Ptolemy effect M7 or by expulsion using Duo's recall procedure as I mentioned before.
Building a Deck of Cards
There are polarities like the number of cards you should play in this deck, the number of starting cards, extra deck options and some techs, but most of them are really up to your preferences and will change accordingly. your gameplay, but some details are important and you may not have considered them, so here are some things to keep in mind:
- This deck relies heavily on 2-card combos to make plays, so any card you play against another needs to consider how many other cards it works with.
- For example, Roar in your hand relies on Aloof Lupine , Gold Sarcophagus or mill Hawk or Duo while also having enough fuel to summon it, where a card like Batteryman Solar is guaranteed to give you what you need . On the other hand, hawk will work if you mill Roar / Dark or if you have Dark in your starting hand, which is on the same cards that work with Roar (hawk + Aloof is worse than Roar but still playable most of the time ). For those reasons, Roar is played at 2 in most builds, while they use 3 Hawks for a total of 5 resources to summon throughout the match. And often you will see 3 Roars and 2 Hawks to compensate for not having a 3rd Hawk. And some larger lists will have 3 Hawks and 3 Roars to have the most resources because it will help your game. Friend.
- The more X-types that depend on Y-type cards to play will increase the number of cards full of X or Y types that will brick most of the time. For example. X is a card that relies on having something banished or in your GY, while Y is a mill card, if you have too many of your X and Y will increase the number of dead cards. So how do you avoid this? You need to play more X types of cards that work on their own while not playing too many Y types because they won't work on them. That will give you a more consistent deck with less reliance on RNG.
- Drawing Engines
- Draw engines are a good thing to add to your deck, but they are worthless if they are 2-card combos that don't combine with your Core cards or don't work with them. For example. Solar Recharge is not good in Thunder Dragon decks because you are adding a card that doesn't work with TD itself but the deck itself is bricked and is less consistent, as this deck relies heavily on 2-3 card combos card, that one dead card will have a lot of impact.
- Deck size
- 20 cards in the deck will give a higher chance to draw your better cards like Gold Sarcophagus, Aloof Lupin etc but on the other hand it will reduce your overall resources and increase the chance of bricking only with the Thunder Dragon monster. For builds with 20 cards, try to play 5 roar/hawk (this will change depending if you own 2 or 3 Hawks) and only 2 Dark.
- 30 cards in the deck will give you more resources, make it easier to stack decks for extra deck options, and will reduce bricking when only having Thunder Dragon cards in hand, but on the other hand , it will require more starting leaves (e.g. Aloof Lupin, Batteryman Solar, Crystron, etc).
- Side Deck
- This should be obvious, but just in case, DON'T PUT YOUR MAIN MOTOR SHEETS INTO THE SECOND DECK! Starting cards like Aloof Lupine and Thunder Dragon's main monster are essential to your strategy and should not be left out under any circumstances. The cards you should lay out should always be:
- Defensive hand: if the game is slower or if your opponent is an opponent who is likely to play more defensively than you.
- Attack cards: choose cards like Chaos Dragon Levianeer in matches where your opponent has a more fragile side of the field, where they will likely try to block your Levianner summon or will try to use cards like Necrovalley to stop your turn, some copies of attack cards should be traded for cards that will allow you to play the game instead of having cards that have the potential to become a dead weight.
- Tech: in the side deck there are generic main deck Techs that can facilitate when folding to the Side deck because you will only swap them for other Tech cards.
- You should try to cover the most popular decks with the least amount of cards, prioritizing the less popular matchups, so that you have room for the worst matchups (mainly if it's quite popular variable). Try to put cards in pairs, unless the card is searchable so you can only play 1 card instead, or if the card is really important and doesn't affect your deck, you can Can stack 3 copies of it.
Time keeping
Timing can be frustrating as sometimes you need to think about the round going, trying to figure out if you're lethal or not, etc. so here are some tips to help you:
- During your turn, if you have Thunder Dragondark in hand and there are no other cards you might want to activate like the Quick-Play spell, switch to off as none of our effects (currently) need to be activated. strung. This also helps with timing as well as not confusing choosing Thunder Dragondark with Hawk or Roar's effect with activating Dark's effect in the chain as Hawk or Roar's effect (I know you've done that before).
- You need to take advantage of your timing not decreasing, so during your opponent's turn you can count the number of Thunder Dragons in your GY and Banish piles (by holding those positions, it will shows the list of cards there), this will help know how much you have left in your deck, making it a little easier to see what you can do on your turn, as well as it will help avoid the mistake of activating the Roar effect to summon your ultimate Thunder when you'd really rather have it in your hand.
- Hold your finger close to the arrow in the bottom left corner (on mobile) or just right-click (on PC) when you have something you can use that you don't want to use at that moment ( like when you have darkness in your hand and field because you probably want the search effect instead of using fold).
Thunder Dragondark
Thunder Dragondark has some technical plays involved, so here are some things you might not know or have never considered:
- Should you always thin your deck with the effects of Darkness in their End Phase?
- Having Dark in your deck can be very important, as you can summon from the deck to activate it or use it as an XYZ material without using a more important resource like Roar or Hawk.
- There are decks that can interact with your GY and since you have discarded the card you will not be able to use it, the search effect if it is banished or if you want to discard the card so you can summon with the effect of Hawk, you may not be able to use it. if they return to your hand or deck. To reach the End Phase reduces their chance to interrupt you.
- Block the chain!
- Thunder Dragondark effect in hand, you can use this effect to block the chain! How it works? For example, if your opponent has a Paleozoic Canadia in their GY, and they try to trigger a trap only to summon that Canada to attack for the kill, you can chain Dark's effect to your trap. them, so they cannot summon Canadia. This works with any other effect when your opponent is forcing it (If you activate a trap, your opponent has priority to chain their Canadia off the GY and you cannot block it) . Effective with other cards like Maiden with Eyes of Blue, Magician of Chaos or Cyber Slash Harpie Lady need to be directly linked to that activation.
- Use Thunder Dragondark to read your opponent's cards:
- In your Stanby Phase with Dark in hand and the ON button, as it will keep asking you to activate it when you click the arrow to cancel (press ESC or right click), the Hourglass is in the top right corner will change quickly if they have something they can activate, this is very useful in situations where they only have 1 set sitting face down with no other activated abilities, as it allows you to collect narrow the value of that set. This works with any other Quick Effect, but dark is a built-in this deck has.
Roar's effect during End Phase
- Thunder Dragonroar's effect summons TDs from the deck, returning monsters in the End Phase, if you summon Thunder Dragondark, with the ON button, you can use the Dark effect after it is added to your hand, which is not possible. can do with Auto Mode.
Chain link!
In Duel Links, we do not have full control over Chain Link commands as the effects occur at the same time. But some effects we can manipulate a bit or have knowledge before activating to know what will happen when resolved.- Since all Tribute and Synchro monsters have an effect that activates when summoned (e.g. Mobius the Frost Monarch or Stardust Charge Warrior) will always be Chain Link 1 and materials will be Chain Link 2 or higher (with the sole exception Black Rose Dragon is made the highest CL). Additionally, if multiple monsters activate when summoned, they will activate from left to right respectively on your field.
- Materials used from those summons will be in the same order from Left to Right as they are on your field, for example Psychic Wheeleder, Witch of the Black Forest and of course, Thunder Dragons. You can use this to control what chains will block and what effects you can use to make your opponent's cards miss the moment.
- The effect that triggers when banishing will trigger in the order they are banished, this happens with Aloof Lupine and Chaos monsters, and Chaos Dragon Levianeer will give you more options than other cards because it does not require banishing the LIGHT monster first. This can allow you to sort out which effects are more important to experience rather than the ones you should get rid of first.
Tips against certain cards
Necrovally
Necrovalley is used in some decks where having a deck in the Meta will hurt you badly (and of course in the Gravekeepers deck), it can stop some of our plays, like Special Summoning with Hawk's effect (from the grave, but you can still special summon the banished TD), with Hundred Thunders and prevents us from using Roar's effect to add a card from the GY to the hand (still possible one more card is banished). Also prevents Crystron Citree from Synchro during your opponent's turn.
But there are plenty of rounds you can still do under Necrovalley.
Aloof Lupine doesn't really care about Necrovalley, because it can:
- Set up a Synchro turn for the next turn. Since you can summon a banished Roar and Dark with Hawk's effect, you can Synchro a monster that will defeat Necrovalley. You can still sync the same turn with DD Sprite , or if your opponent controls an additional monster from the Extra Deck, you can use Mirror Resonator.
- Form Adreus, Keeper of Armageddon , by banishing Dark or Roar from hand while banishing the other card from the deck, using Roar's effect to summon Dark from the deck and Dark's effect to add Hawk, Hawk summon the banished Dark, then summon xyz using both Darks. After separating the materials, you also have 1 LIGHT and 1 DARK in your GY (2 DARK if you discard cards in their End Phase).
Necrovalley hurts you quite a bit, but there are ways to help deal with it, here are a few: Cosmic Cyclone and Thunder Dragon Discharge are obvious ways. Crystron Quan along with Discharge can destroy Necrovalley with its effects because it special summons from the hand. Scrap Dragon , Ancient Fairy Dragon and Shiranui Squiresaga are also good choices.
Gravekeeper. Most of these options will not work if they have Gravekeeper's Supernaturalist , which prevents the Necrovalley from being destroyed, in which case you should try to use Samurai Destroyer, which can attack and destroy the Supernaturalist even while the Necrovalley is works, as it negates the effect of Supernaturalist which will reduce it to 2500 ATK.
Chaos Hunter
It can be frustrating because there isn't much to play around it since this particular deck summons a lot of monsters and it's always mostly CL1 except for Roar's effect from Levianeer's summon or from the effect of Aloof Lupin, that's something you don't have good control over. Luckily after 1 Special Summon, you likely have access to Constellar Ptolemy M7 or Adreus, Keeper of Armageddon .
General words
TD is very strong in strength as well as the constant reincarnation of cards that do not belong to its prototype line also makes its position on the Top Tier table unshakable over time. However, currently the game has not yet included all the Thunder Dragons card lines. This makes looking forward to them even more worthwhile. Therefore, until TD's supports are introduced into the game and there are sudden changes to them, I will always fully update you on how to play them.
Companion unit:
duel-links
17
5
DARK
8Odd-Eyes Advance Dragon
ATK:
3000
DEF:
2500
You can Tribute Summon this card by Tributing 1 Level 5 or higher monster. If this card is Tribute Summoned: You can destroy 1 monster your opponent controls, and if you do, inflict damage to your opponent equal to that monster's original ATK. When this card destroys a monster by battle: You can Special Summon 1 Level 5 or higher monster from your hand or GY in Defense Position, except "Odd-Eyes Advance Dragon". You can only use this effect of "Odd-Eyes Advance Dragon" once per turn.
DARK
8Chaos Dragon Levianeer
ATK:
3000
DEF:
0
Cannot be Normal Summoned/Set. Must first be Special Summoned (from your hand) by banishing 3 LIGHT and/or DARK monsters from your GY. When Summoned this way: You can activate this effect; apply the following effect, based on the Attribute(s) of the monsters banished for the Special Summon, also this card cannot attack for the rest of this turn. ● Only LIGHT: Special Summon 1 monster from your GY in Defense Position. ● Only DARK: Shuffle 1 random card from your opponent's hand into the Deck. ● Both LIGHT and DARK: Destroy up to 2 cards on the field. You can only use this effect of "Chaos Dragon Levianeer" once per turn.
Tuning (Skill Card)
ATK:
0
DEF:
0
Can be used when your Life Points decrease by 1000. Instead of conducting your normal draw, draw 1 'Synchron' Tuner Monster of your choice from your Deck. Then, send the top card of your Deck to the Graveyard. If you began the Duel with 3 or more 'Junk' Effect Monsters in your Deck, add 'Speed Warrior' from outside of your Deck to your Graveyard. This Skill can only be used once per Duel.
Level Duplication (Skill Card)
ATK:
0
DEF:
0
Can be used when your Life Points are 3000 or lower, by revealing 1 monster card in your hand and selecting 1 monster on your field. The selected monster's Level will become equal to the Level of the monster you revealed until the end of the turn. This Skill can only be used once per Duel.
LIGHT
4Batteryman Solar
ATK:
1500
DEF:
1500
If this card is Normal or Special Summoned: You can send 1 Thunder monster from your Deck to the GY. If a Thunder monster(s) is Normal or Special Summoned while this monster is on the field: Special Summon 1 "Batteryman Token" (Thunder/LIGHT/Level 1/ATK 0/DEF 0). You can target 1 "Batteryman" Effect Monster you control or in your GY; this card's name becomes that monster's until the End Phase. You can only use each effect of "Batteryman Solar" once per turn.
DARK
6Chaos Sorcerer
ATK:
2300
DEF:
2000
Cannot be Normal Summoned/Set. Must first be Special Summoned (from your hand) by banishing 1 LIGHT and 1 DARK monster from your GY. Once per turn: You can target 1 face-up monster on the field; banish that target. This card cannot attack the turn you activate this effect.
Trap
NormalBallista Squad
Tribute 1 monster, then target 1 card your opponent controls; destroy it.
Spell
NormalCharge of the Light Brigade
Send the top 3 cards of your Deck to the Graveyard; add 1 Level 4 or lower "Lightsworn" monster from your Deck to your hand.
DARK
2Crimson Resonator
ATK:
800
DEF:
300
If you control no monsters: You can Special Summon this card from your hand. If the only other monster you control is exactly 1 DARK Dragon Synchro Monster: You can Special Summon up to 2 "Resonator" monsters from your hand or Deck, except "Crimson Resonator". You can only use each effect of "Crimson Resonator" once per turn. You cannot Special Summon monsters from the Extra Deck, except DARK Dragon Synchro Monsters, the turn you activate either of this card's effects.
WATER
4Crystron Rosenix
ATK:
1800
DEF:
1000
You can target 1 face-up card you control; you cannot Special Summon monsters from the Extra Deck for the rest of this turn, except Machine-Type Synchro Monsters, also, destroy that card, and if you do, Special Summon 1 "Crystron" Tuner from your Deck. You can banish this card from your Graveyard; Special Summon 1 "Crystron Token" (Machine-Type/WATER/Level 1/ATK 0/DEF 0), but it cannot be Tributed. You can only use 1 "Crystron Rosenix" effect per turn, and only once that turn.
LIGHT
6Thunder Dragonhawk
ATK:
1800
DEF:
2200
You can discard this card; Special Summon 1 of your "Thunder Dragon" monsters that is banished or in your GY, except "Thunder Dragonhawk". If this card is banished, or sent from the field to the GY: You can shuffle any number of cards from your hand into the Deck, then draw the same number of cards. You can only use 1 "Thunder Dragonhawk" effect per turn, and only once that turn.
Trap
NormalThunder Dragons' Hundred Thunders
Target 1 Thunder monster in your GY; Special Summon it, then you can Special Summon as many monsters with that same name as possible from your GY. The monster(s) Special Summoned by this effect are banished when they leave the field, also while they are face-up on the field, you cannot Special Summon monsters, except Thunder monsters. You can only activate 1 "Thunder Dragons' Hundred Thunders" per turn.
DARK
8Destiny HERO - Plasma
ATK:
1900
DEF:
600
Cannot be Normal Summoned/Set. Must be Special Summoned (from your hand) by Tributing 3 monsters. Negate the effects of face-up monsters while your opponent controls them. Once per turn: You can target 1 monster your opponent controls; equip that target to this card (max. 1). Gains ATK equal to half the original ATK of the monster equipped to it by this effect.
Trap
NormalSuper Team Buddy Force Unite!
Target 1 face-up monster on the field; Special Summon 1 monster from your hand or GY, with the same original Type as that monster's, but with a different original name. If this card in its owner's Spell & Trap Zone is destroyed by an opponent's card effect: You can Set 1 "Super Team Buddy Force Unite!" directly from your Deck to your Spell & Trap Zone.
DARK
8Thunder Dragonduo
ATK:
2800
DEF:
0
Cannot be Normal Summoned/Set. Must first be Special Summoned (from your hand) by banishing 1 LIGHT and 1 DARK monster from your GY. Once per turn, if a monster effect is activated in the hand: This card gains 300 ATK until the end of this turn. When this card destroys an opponent's monster by battle: You can banish 1 card from your GY; add 1 Thunder monster from your Deck to your hand. Once per turn, during your opponent's End Phase: You can target 1 of your banished cards; place it on the top or bottom of your Deck.
DARK
5Thunder Dragondark
ATK:
1600
DEF:
1500
(Quick Effect): You can discard this card; add 1 "Thunder Dragondark" from your Deck to your hand. If this card is banished, or sent from the field to the GY: You can add 1 "Thunder Dragon" card from your Deck to your hand, except "Thunder Dragondark". You can only use 1 "Thunder Dragondark" effect per turn, and only once that turn.
Trap
ContinuousThunder Dragon Discharge
The activation of your Thunder monsters' effects cannot be negated. Once per turn, if a "Thunder Dragon" monster(s) is Normal or Special Summoned to your field: You can target 1 Spell/Trap on the field; banish 1 Thunder monster from your Deck, and if you do, destroy that target.
LIGHTHieratic Sun Dragon Overlord of Heliopolis
ATK:
3000
DEF:
2400
2 Level 8 monsters Once per turn: You can detach 1 Xyz Material from this card; Tribute any number of monsters from your hand and/or your side of the field (minimum 1), then destroy an equal number of cards on the field.
LIGHT
1Thunder Dragonmatrix
ATK:
0
DEF:
2000
(Quick Effect): You can discard this card, then target 1 Thunder monster you control; it gains 500 ATK. If this card is banished, or sent from the field to the GY: You can add 1 "Thunder Dragonmatrix" from your Deck to your hand. You can only use 1 "Thunder Dragonmatrix" effect per turn, and only once that turn.
WATER
3Crystron Smiger
ATK:
1000
DEF:
1800
You can target 1 face-up card you control; you cannot Special Summon monsters from the Extra Deck for the rest of this turn, except Machine-Type Synchro Monsters, also, destroy that card, and if you do, Special Summon 1 "Crystron" Tuner from your Deck. You can banish this card from your Graveyard; add 1 "Crystron" Spell/Trap Card from your Deck to your hand. You can only use 1 "Crystron Smiger" effect per turn, and only once that turn.
Destiny Draw (Skill Card)
ATK:
0
DEF:
0
[If you lose 2000 or more LP, you can activate this Skill during your next Draw Phase.] During your Draw Phase, you may search your Deck for any card, reveal it to your opponent, and add it to your hand instead of drawing. If you do that, flip this card over.
DARK
4Luna the Dark Spirit
ATK:
1600
DEF:
1200
Cannot be Normal Summoned/Set. Must first be Special Summoned (from your hand) by banishing 1 DARK monster from your GY. Once per turn, during your Standby Phase: Inflict 500 damage to your opponent.
WATER
3Crystron Thystvern
ATK:
1500
DEF:
1500
You can target 1 face-up card you control; you cannot Special Summon monsters from the Extra Deck for the rest of this turn, except Machine-Type Synchro Monsters, also, destroy that card, and if you do, Special Summon 1 "Crystron" Tuner from your Deck. You can banish this card from your Graveyard; add 1 "Crystron" monster from your Deck to your hand, except "Crystron Thystvern". You can only use 1 "Crystron Thystvern" effect per turn, and only once that turn.
EARTH
1Glow-Up Bulb
ATK:
100
DEF:
100
If this card is in your GY: You can send the top card of your Deck to the GY, and if you do, Special Summon this card. You can only use this effect of "Glow-Up Bulb" once per Duel.
FIRE
2Red Resonator
ATK:
600
DEF:
200
When this card is Normal Summoned: You can Special Summon 1 Level 4 or lower monster from your hand. When this card is Special Summoned: You can target 1 face-up monster on the field; gain LP equal to its ATK. You can only use this effect of "Red Resonator" once per turn.
LIGHT
2Wattfox
ATK:
800
DEF:
100
If this card is destroyed by your opponent's card (either by battle or by card effect), your opponent cannot Special Summon a monster, or activate Spells, Traps, Spell/Trap effects, or Monster Card effects, for the rest of this turn.
DARK
1Sphere Kuriboh
ATK:
300
DEF:
200
When an opponent's monster declares an attack: You can send this card from your hand to the GY; change the attacking monster to Defense Position. When you Ritual Summon, you can banish this card from your GY as 1 of the monsters required for the Ritual Summon.
DARK
6Thunder Dragonroar
ATK:
2400
DEF:
0
You can discard this card; add to your hand, 1 of your "Thunder Dragon" cards that is banished or in your GY, except "Thunder Dragonroar". If this card is banished, or sent from the field to the GY: You can Special Summon 1 "Thunder Dragon" monster from your Deck in Defense Position, but return it to the hand during the End Phase. You can only use 1 "Thunder Dragonroar" effect per turn, and only once that turn.
Light and Dark
ATK:
0
DEF:
0
This Skill can be used when your Life Points decrease by 1000. Choose 1 of the following: ● Return 1 DARK monster from your hand to your Deck. Then, add from your Deck to your hand, 1 LIGHT monster with the same Level and Type as that monster from your Deck to your hand. ● Return 1 LIGHT monster from your hand to your Deck. Then, add 1 DARK monster with the same Level and Type as that monster from your Deck to your hand. This Skill can only be used once per turn, and twice per Duel.
WATER
1Crystron Quan
ATK:
500
DEF:
500
During your opponent's Main Phase or Battle Phase: You can Special Summon 1 non-Tuner monster from your hand, but it has its effects negated (if any), and if you do, immediately after this effect resolves, Synchro Summon 1 Machine-Type Synchro Monster using only that monster and this card (this is a Quick Effect). You can only use this effect of "Crystron Quan" once per turn.
Spell
NormalGold Sarcophagus
Banish 1 card from your Deck, face-up. During your second Standby Phase after this card's activation, add that card to the hand.
Spell
NormalThe Melody of Awakening Dragon
Discard 1 card; add up to 2 Dragon monsters with 3000 or more ATK and 2500 or less DEF from your Deck to your hand.
LIGHT
1D.D. Sprite
ATK:
0
DEF:
100
You can Special Summon this card (from your hand) by banishing 1 face-up monster you control. If you Summon this way, during your next Standby Phase: Return the banished monster to the field.
LIGHTConstellar Ptolemy M7
ATK:
2700
DEF:
2000
2 Level 6 monsters You can also Xyz Summon this card by using a "Constellar" Xyz Monster you control as the Xyz Material, other than "Constellar Ptolemy M7". (Xyz Materials attached to that monster also become Xyz Materials on this card.) If Summoned this way, the following effect cannot be activated this turn. Once per turn: You can detach 1 Xyz Material from this card, then target 1 monster on the field or in either player's Graveyard; return that target to the hand.
LIGHT
4Raiden, Hand of the Lightsworn
ATK:
1700
DEF:
1000
During your Main Phase: You can send the top 2 cards of your Deck to the GY, then if any "Lightsworn" monsters were sent to the GY by this effect, this card gains 200 ATK until the end of your opponent's turn. You can only use this effect of "Raiden, Hand of the Lightsworn" once per turn. Once per turn, during your End Phase: Send the top 2 cards of your Deck to the GY.
Allured by Darkness (Skill Card)
ATK:
0
DEF:
0
Can be used each time your Life Points decrease by 1800. Instead of doing a normal draw, "Allure of Darkness" is added to your hand from outside of your Deck.
DARK
2Plaguespreader Zombie
ATK:
400
DEF:
200
If this card is in your GY: You can place 1 card from your hand on the top of the Deck; Special Summon this card, but banish it when it leaves the field.
DARK
6Chaos Betrayer
ATK:
2000
DEF:
2000
If this card is in your GY: You can banish 1 LIGHT and 1 DARK monster from your GY, except "Chaos Betrayer"; Special Summon this card in Defense Position, but banish it when it leaves the field. If this card is Special Summoned: You can target 1 card in your opponent's GY; banish it. You can only use each effect of "Chaos Betrayer" once per turn.
FIRE
1Jet Synchron
ATK:
500
DEF:
0
If this card is sent to the GY as Synchro Material: You can add 1 "Junk" monster from your Deck to your hand. If this card is in your GY: You can send 1 card from your hand to the GY; Special Summon this card, but banish it when it leaves the field. You can only use 1 "Jet Synchron" effect per turn, and only once that turn.
Fiend Farewell (Skill Card)
ATK:
0
DEF:
0
Can be used when one of your monsters is destroyed in battle. 1 random Fiend-Type monster from your Deck is sent to the Graveyard.
LIGHT
5Thunder Dragon
ATK:
1600
DEF:
1500
You can discard this card; add up to 2 "Thunder Dragon" from your Deck to your hand.
WATER
2Crystron Citree
ATK:
500
DEF:
500
During your opponent's Main Phase or Battle Phase: You can target 1 non-Tuner monster in your Graveyard; Special Summon it, but it has its effects negated (if any), and if you do, immediately after this effect resolves, Synchro Summon 1 Machine-Type Synchro Monster using only that monster and this card (this is a Quick Effect). These Synchro Materials are banished instead of being sent to the Graveyard. You can only use this effect of "Crystron Citree" once per turn.
Draw Sense: Spell/Trap
ATK:
0
DEF:
0
Can be used each time your Life Points decrease by 1000. In the Draw Phase, instead of confucting your normal draw, draw a random Spell/Trap Card. This Skill will only activate if you begin the Duel with a Deck that has 3 or more Spell/Trap Cards with different names.
Zombie Draw (Skill Card)
ATK:
0
DEF:
0
Can be used each time your Life Points decrease by 1000. During your Draw Phase, instead of doing a normal draw, randomly draw a Zombie-Type monster.
DARK
4Aloof Lupine
ATK:
1700
DEF:
300
When this card is Normal Summoned: You can banish 1 monster from your hand; banish 1 monster from your Deck with the same Type as that monster. If this card is destroyed by battle, or if this card in its owner's possession is destroyed by an opponent's card effect: You can target 1 of your banished monsters; add it to your hand. You can only use each effect of "Aloof Lupine" once per turn.
The Tie that Binds
ATK:
0
DEF:
0
Until the end of your turn, the ATK of all face-up monsters on your field increases by the number of monsters on your field times 100. This Skill can only be used once per turn.
Menu
https://metaduelist.com/